> ## Documentation Index
> Fetch the complete documentation index at: https://ona.com/docs/llms.txt
> Use this file to discover all available pages before exploring further.
# Complete DNS Setup
# Post-Deployment DNS Configuration
This section is relevant only if you are using your own domain name to
setup a Gitpod cell. That is, a non `gitpod.cloud` domain name is being
used.
Once your CF stack creation has successfully completed, you have to make sure than the domain names you are going to use to access the Gitpod setup is pointing to the right loadbalancer Domain names. We create two Network loadbalancers as part of our setup, that points to different EKS clusters. You will find the DNS names of both these loadbalancers in the output of your CF stack as shown below:
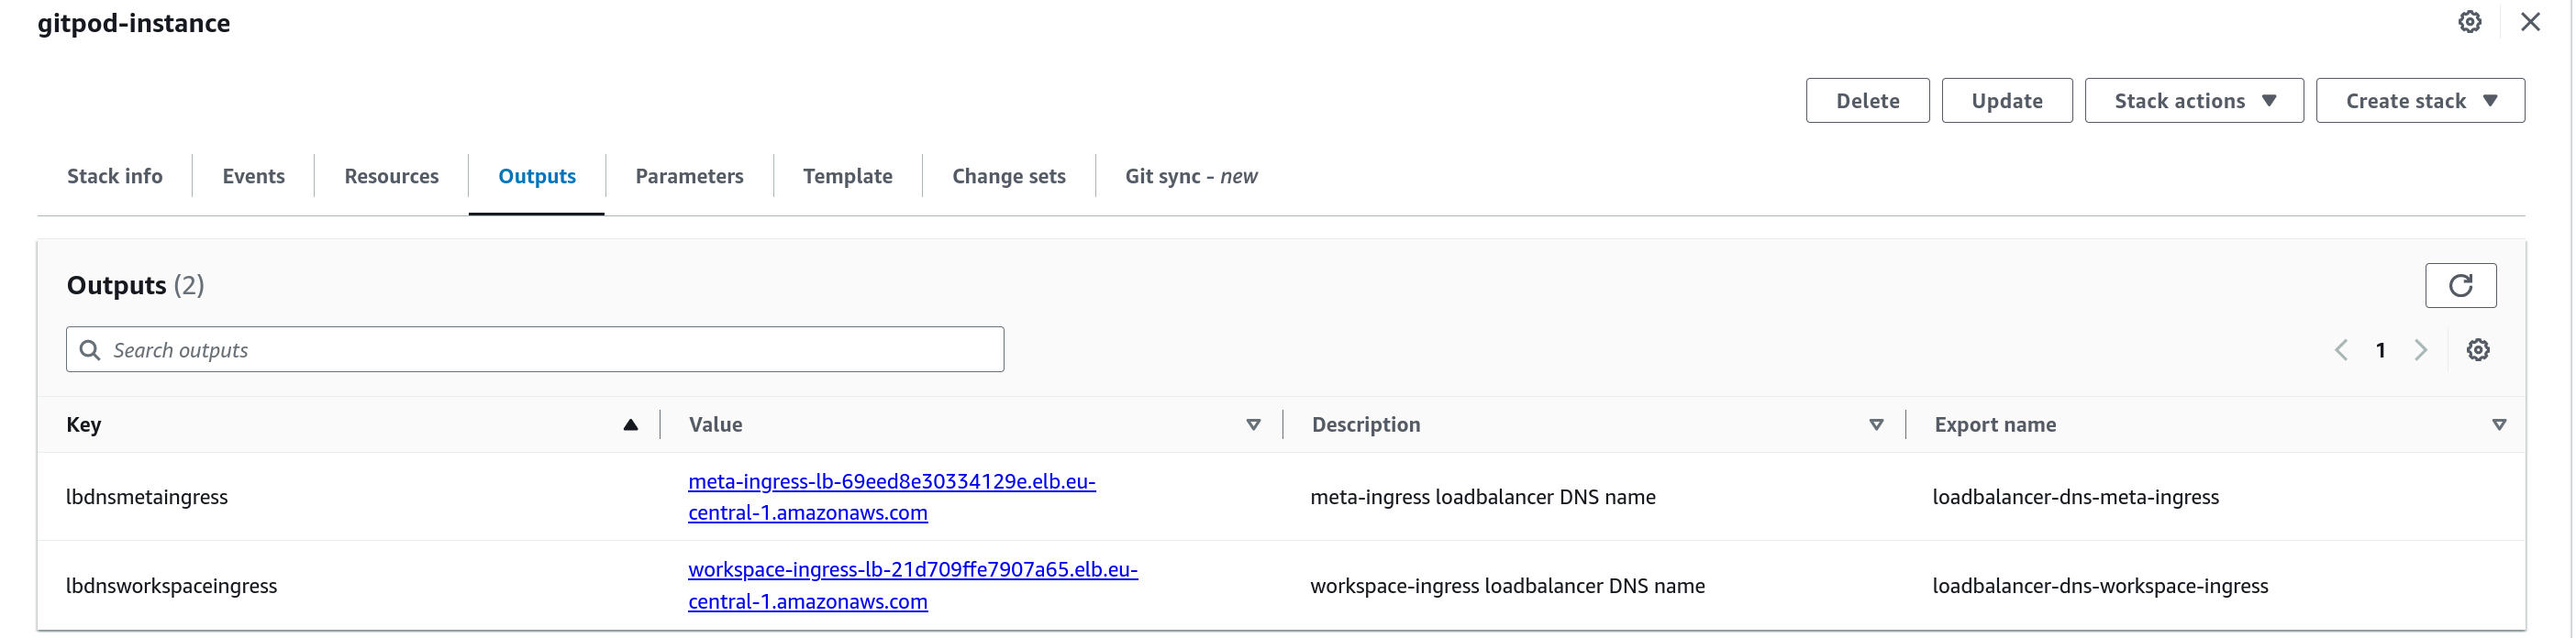 You can now go ahead and complete the DNS configuration as follows:
* Navigate to the DNS zone that controls your domain.
* Add a record the following CNAME records:
* From `yourcustomdomain.com` to Meta Loadbalancer DNS name
* From `*.yourcustomdomain.com` to Meta Loadbalancer DNS name
* From `*.ws.yourcustomdomain.com` to Workspace Loadbalancer DNS name
## Exposing public API
If you chose `Yes` to `Expose Gitpod webhooks and IDP services publicly?` Option in your CF template parameters, then you will have a public API Gateway Created with a static DNS name, to which you will have to point a certain subdomain to. You will find the static domain in the output of your template as follows:
You can now go ahead and complete the DNS configuration as follows:
* Navigate to the DNS zone that controls your domain.
* Add a record the following CNAME records:
* From `yourcustomdomain.com` to Meta Loadbalancer DNS name
* From `*.yourcustomdomain.com` to Meta Loadbalancer DNS name
* From `*.ws.yourcustomdomain.com` to Workspace Loadbalancer DNS name
## Exposing public API
If you chose `Yes` to `Expose Gitpod webhooks and IDP services publicly?` Option in your CF template parameters, then you will have a public API Gateway Created with a static DNS name, to which you will have to point a certain subdomain to. You will find the static domain in the output of your template as follows:
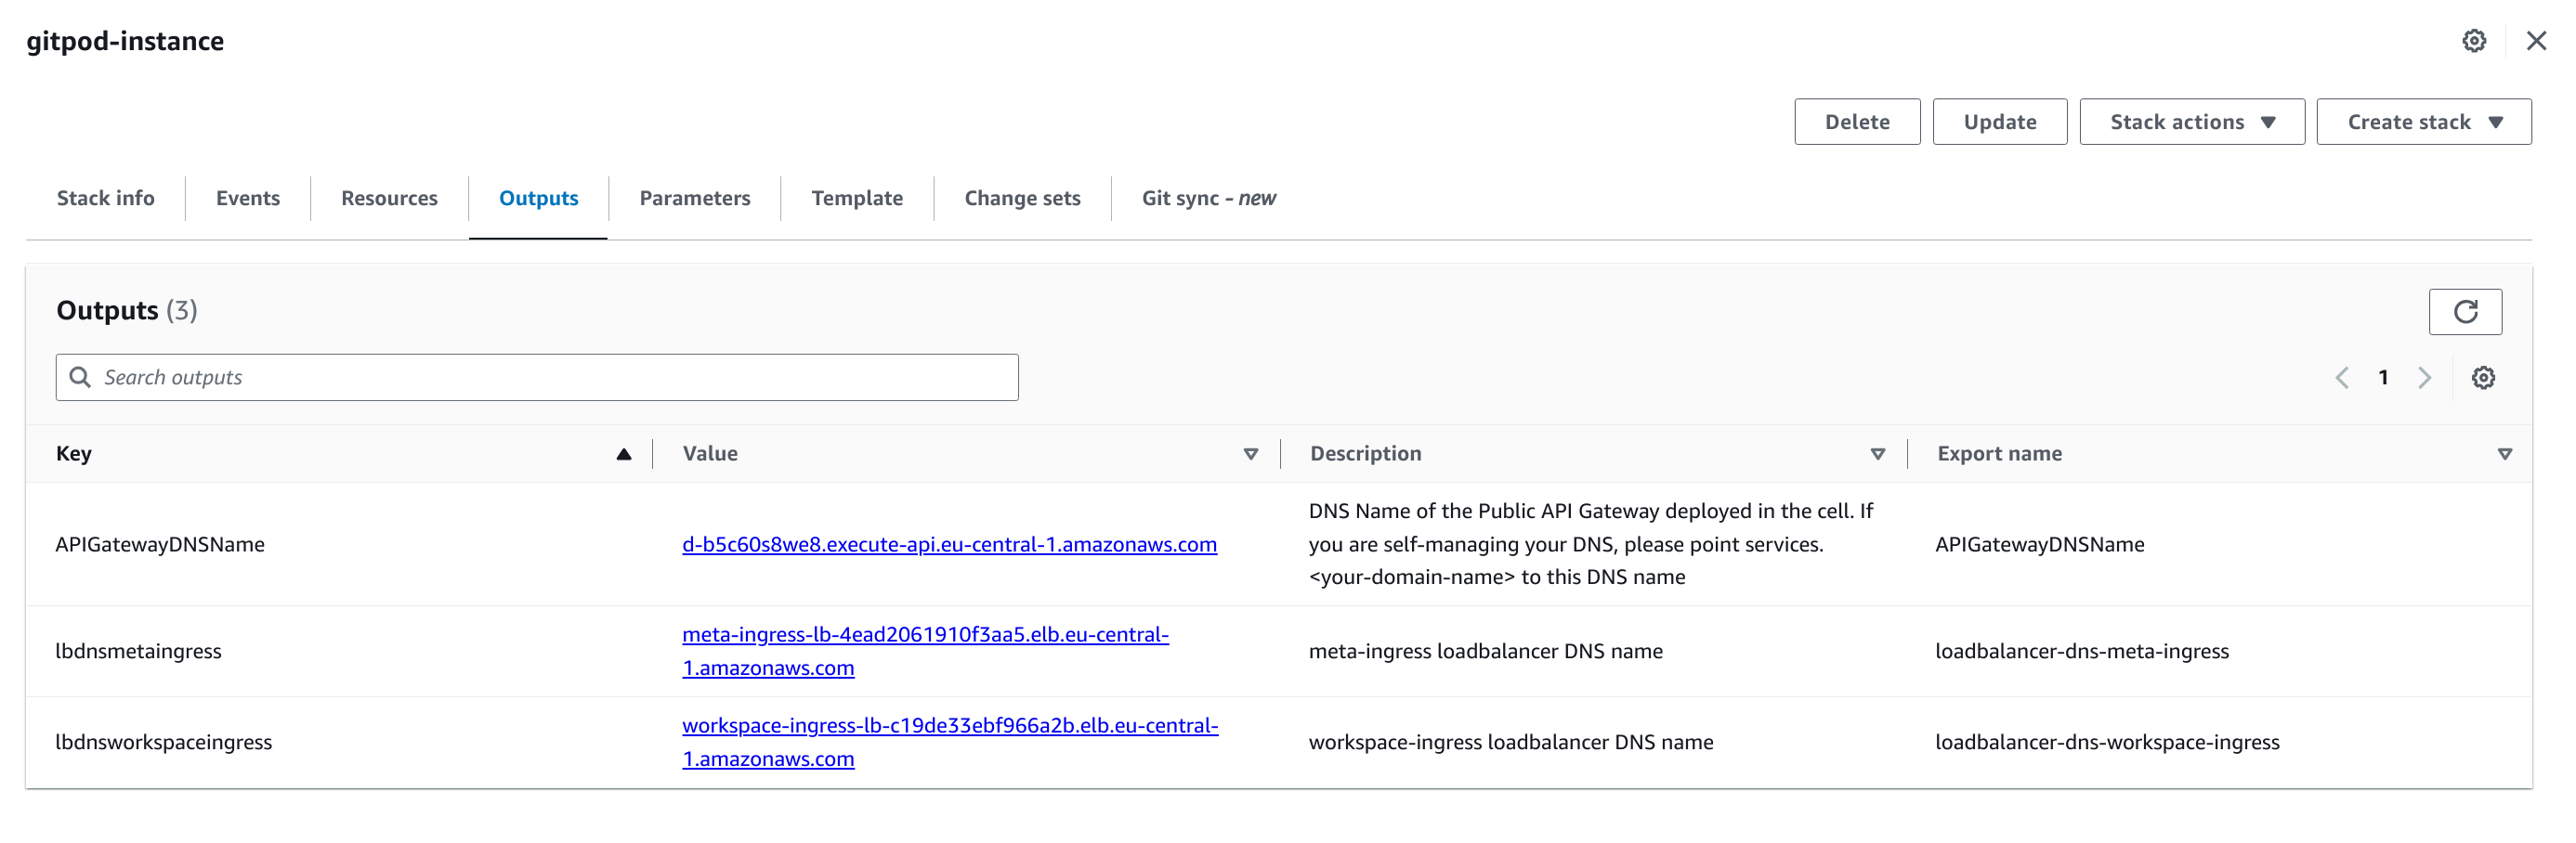 You can now go ahead and complete the DNS configuration for API Gateway as follows:
* Navigate to the DNS zone that controls your domain.
* Add a record the following CNAME records:
* From `services.yourcustomdomain.com` to API Gateway DNS name
* From `yourcustomdomain.com` to Meta Loadbalancer DNS name
* From `*.yourcustomdomain.com` to Meta Loadbalancer DNS name
* From `*.ws.yourcustomdomain.com` to Workspace Loadbalancer DNS name
That should be it!
You can now go ahead and complete the DNS configuration for API Gateway as follows:
* Navigate to the DNS zone that controls your domain.
* Add a record the following CNAME records:
* From `services.yourcustomdomain.com` to API Gateway DNS name
* From `yourcustomdomain.com` to Meta Loadbalancer DNS name
* From `*.yourcustomdomain.com` to Meta Loadbalancer DNS name
* From `*.ws.yourcustomdomain.com` to Workspace Loadbalancer DNS name
That should be it!