> ## Documentation Index
> Fetch the complete documentation index at: https://ona.com/docs/llms.txt
> Use this file to discover all available pages before exploring further.
# Bitbucket Server
Gitpod works well with public, private, or internal repositories from your own instance of [Bitbucket Server](https://bitbucket.org/product/guides/getting-started/overview#bitbucket-software-hosting-options) v7.20 or later.
## Registering a Bitbucket Server Integration
As an organization owner, you can configure Gitpod with your Bitbucket Server instance via the following steps:
On Gitpod's Dashboard:
1. Navigate to the Organization settings using the organization dropdown in the top left corner.
2. Select `Git Providers` and click `New Git Provider`.
3. Choose `Bitbucket Server` as the provider type and enter your Bitbucket Server hostname.
4. Copy the redirect URL from the form and follow the instructions below to create a corresponding OAuth app on Bitbucket Server.
On Bitbucket Server:
1. Open your Bitbucket Server Administration settings.
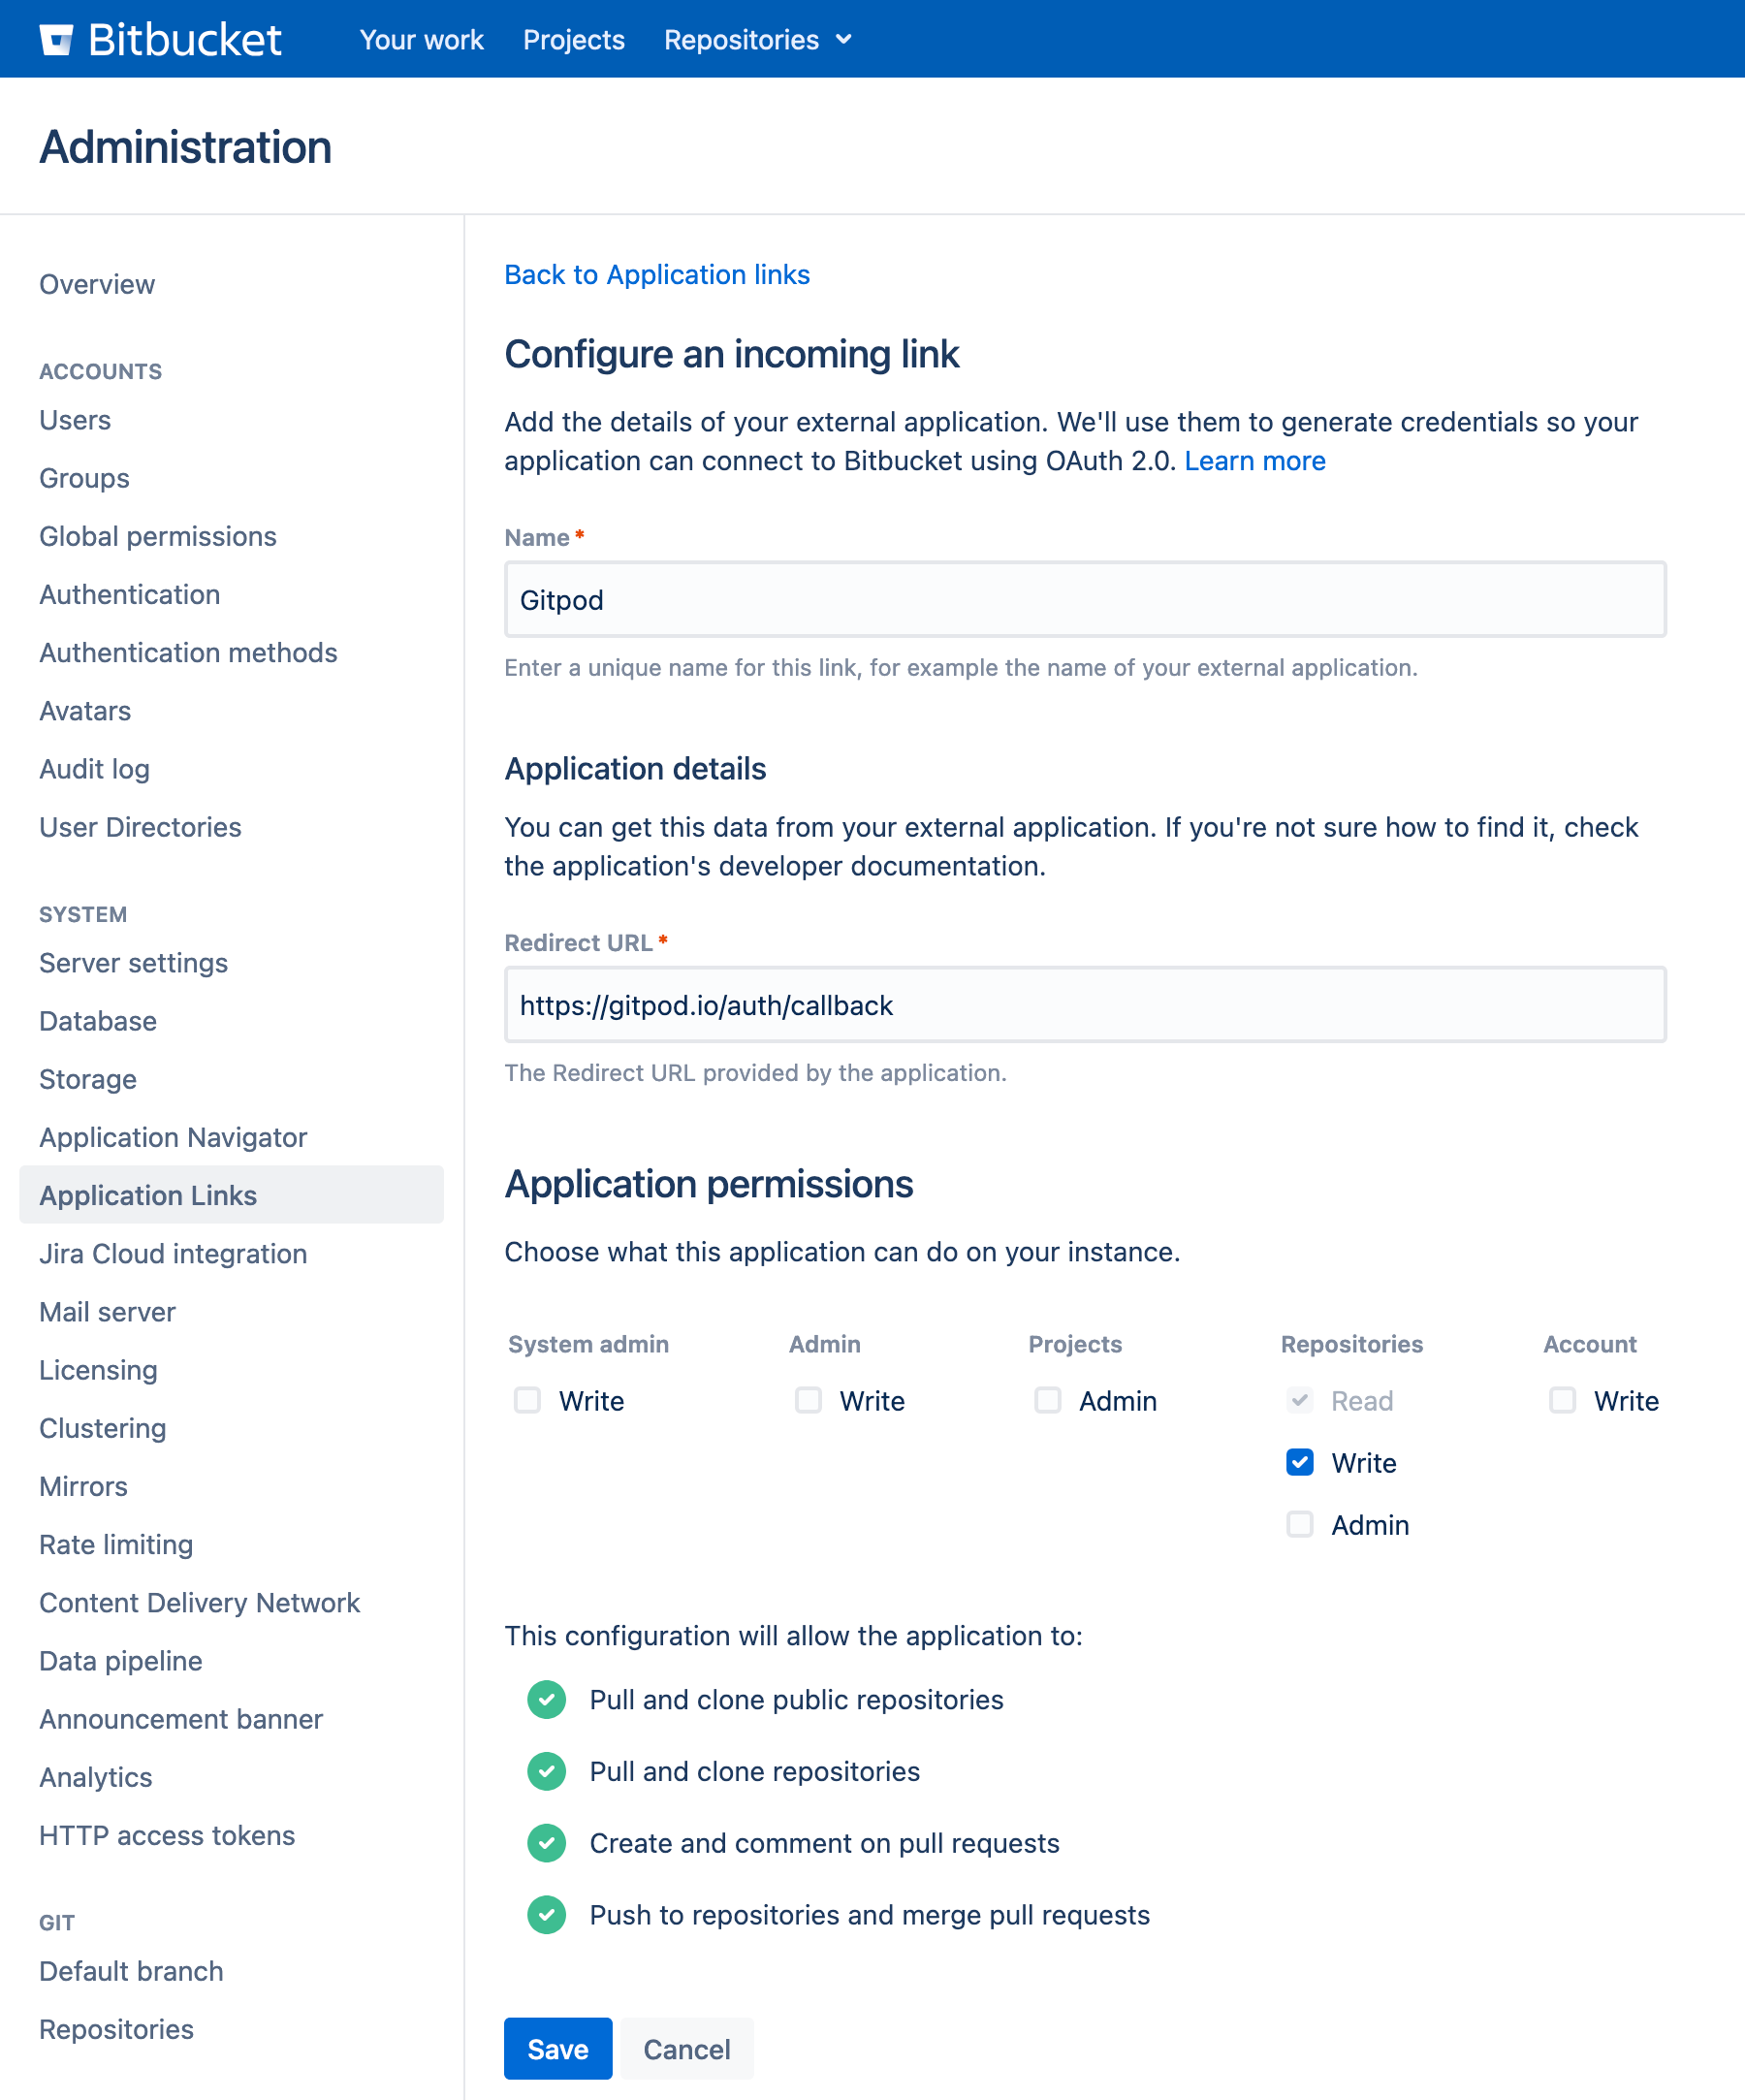
2. Go to `Application Links` and create a new incoming link for an external application.
3. Configure the link with the following details:
* **Name**: `Gitpod` (or any other name you prefer)
* **Redirect URL**: the redirect URL copied from Gitpod
* **Application Permissions**: Choose "Projects Admin"
4. Click `Save` to create the application link.
 After saving, you will receive a `Client ID` and a `Client Secret`. Copy these values into the corresponding fields in Gitpod and hit `Activate` to test the connection.
## Connecting Your Bitbucket Server Account
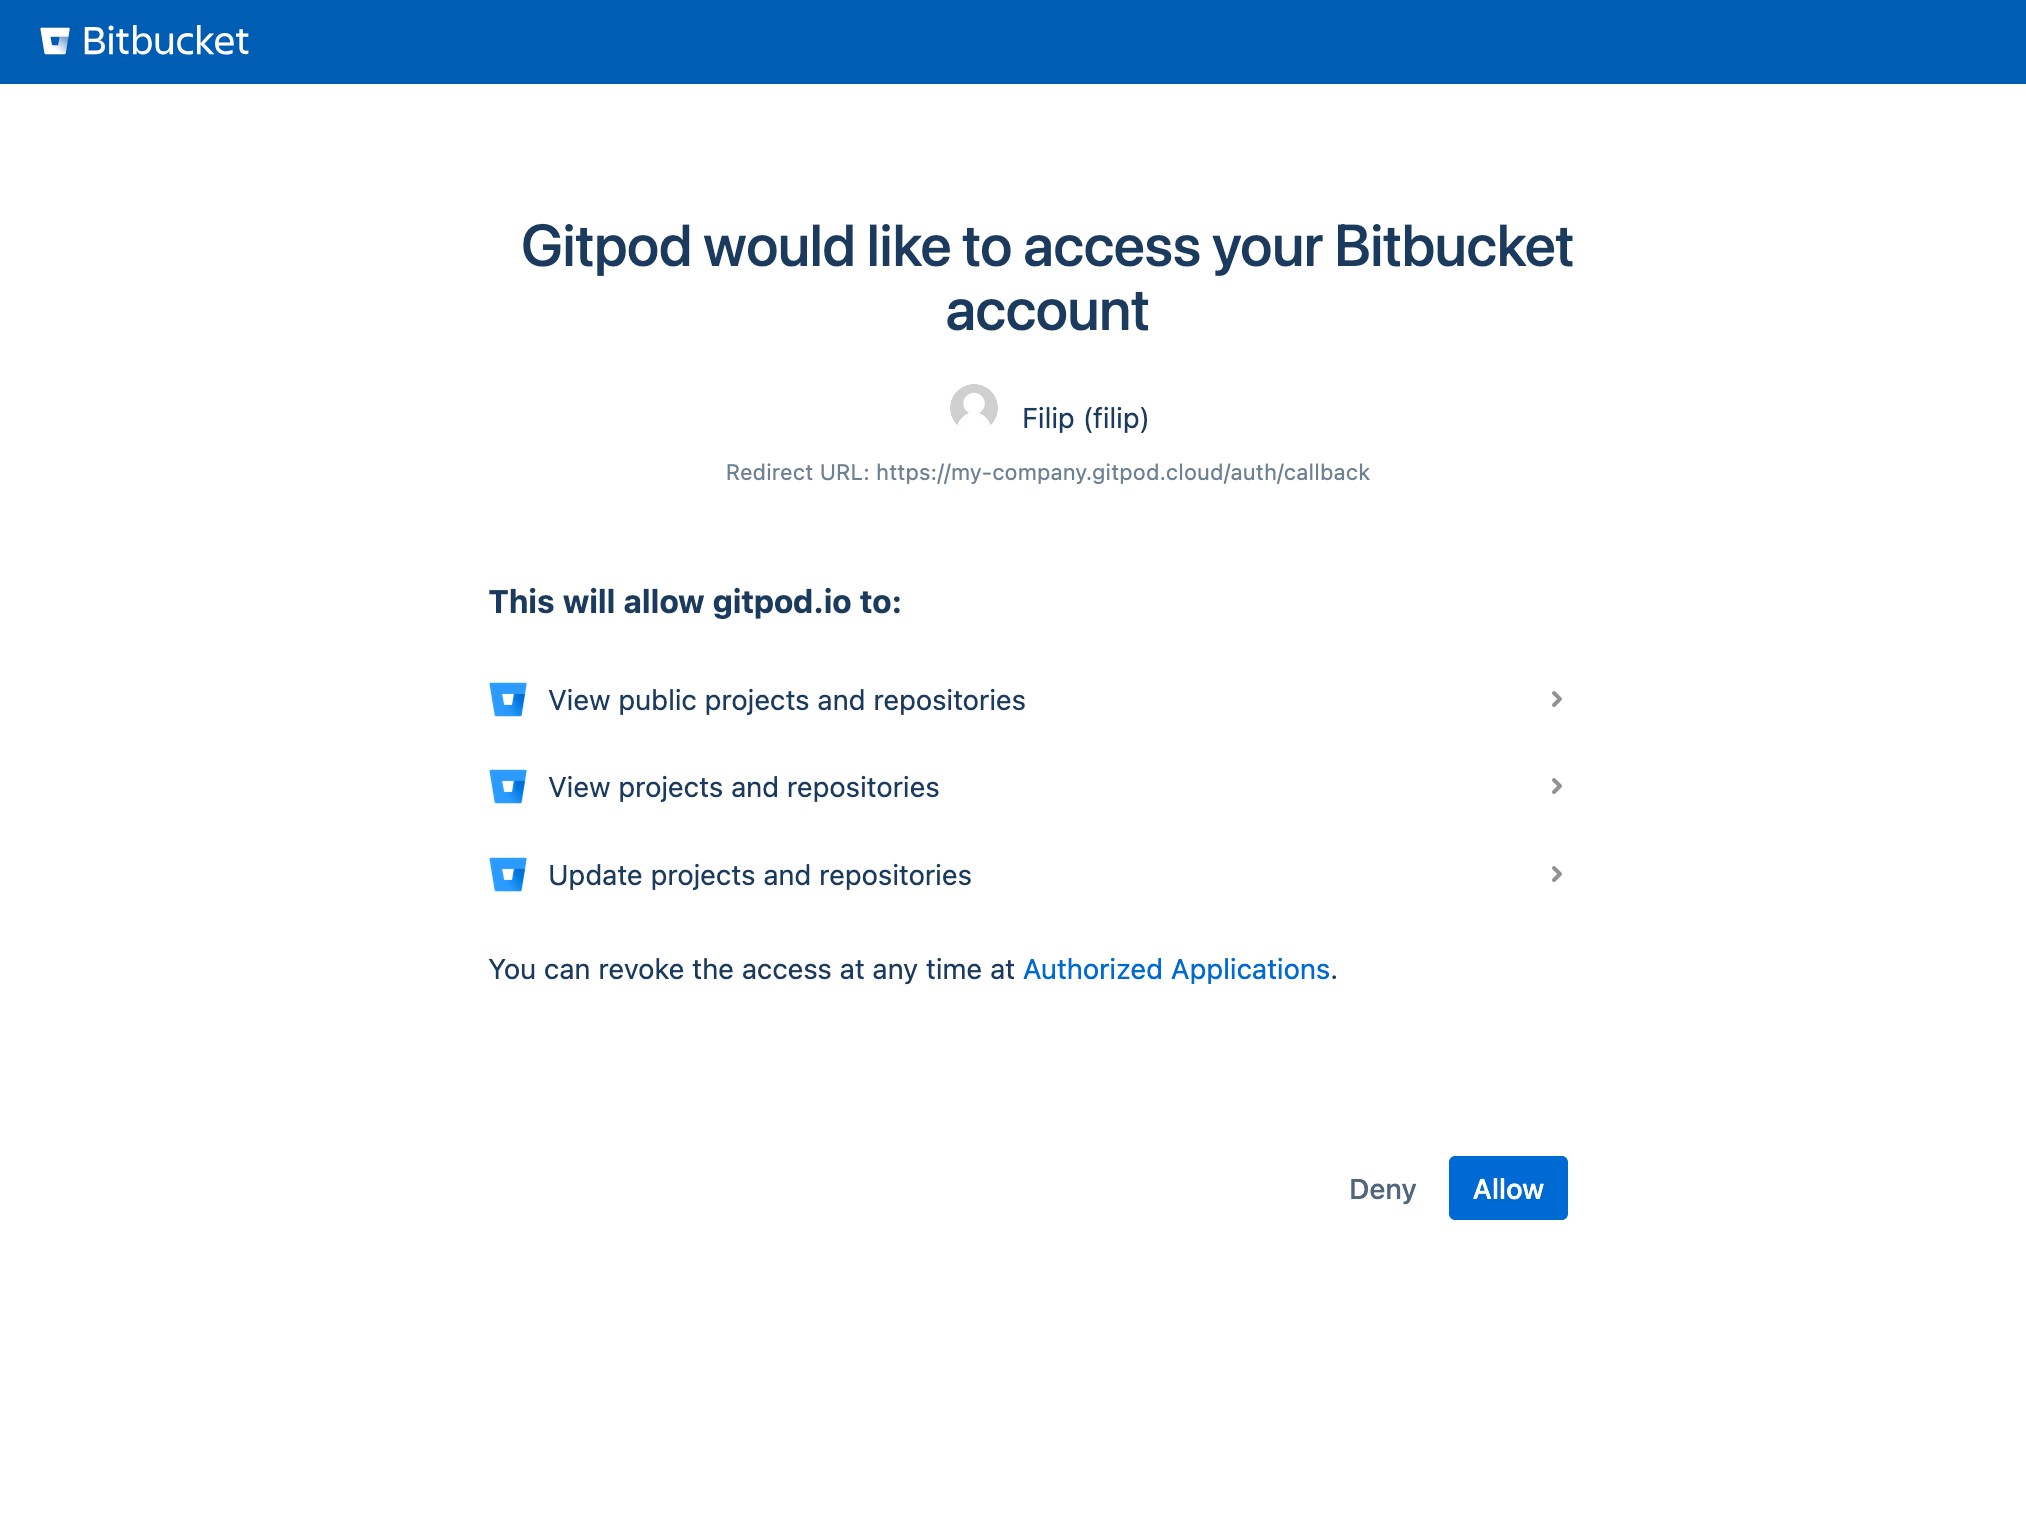
The first time every member of your organization starts a workspace from Bitbucket Server, they will be prompted to connect their Bitbucket Server account to their Gitpod account, via an authorization prompt. Once the connection is confirmed, it will be saved, and the workspace will open. Subsequent workspaces with repositories from the same Bitbucket Server instance will open without requiring reconnection.
After saving, you will receive a `Client ID` and a `Client Secret`. Copy these values into the corresponding fields in Gitpod and hit `Activate` to test the connection.
## Connecting Your Bitbucket Server Account
The first time every member of your organization starts a workspace from Bitbucket Server, they will be prompted to connect their Bitbucket Server account to their Gitpod account, via an authorization prompt. Once the connection is confirmed, it will be saved, and the workspace will open. Subsequent workspaces with repositories from the same Bitbucket Server instance will open without requiring reconnection.
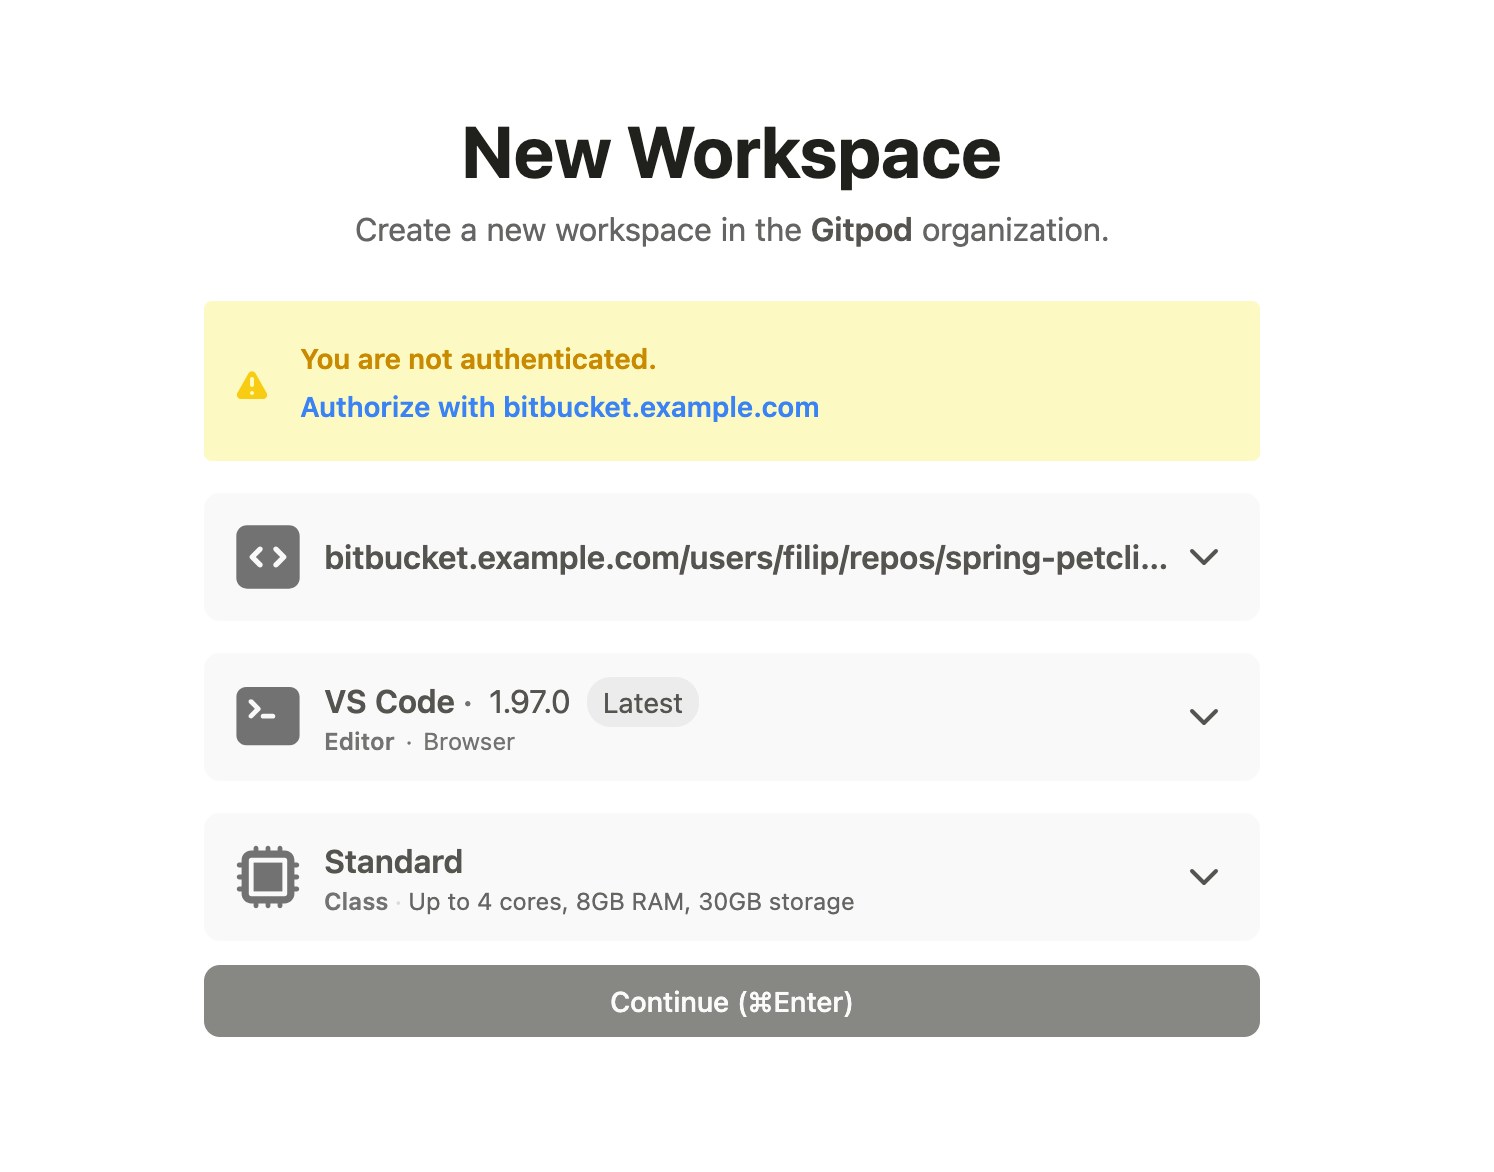 The Bitbucket Server OAuth window will prompt for confirmation to access projects and repositories.
 ## Starting Workspaces
To start a new workspace after logging into Gitpod, use `Ctrl/Cmd + O` or click on the **New Workspace** button in your Gitpod Dashboard. This will prompt for a repository URL, and suggest relevant repositories.
## Verifying the Integration
After setting up the integration, you can verify it in two ways:
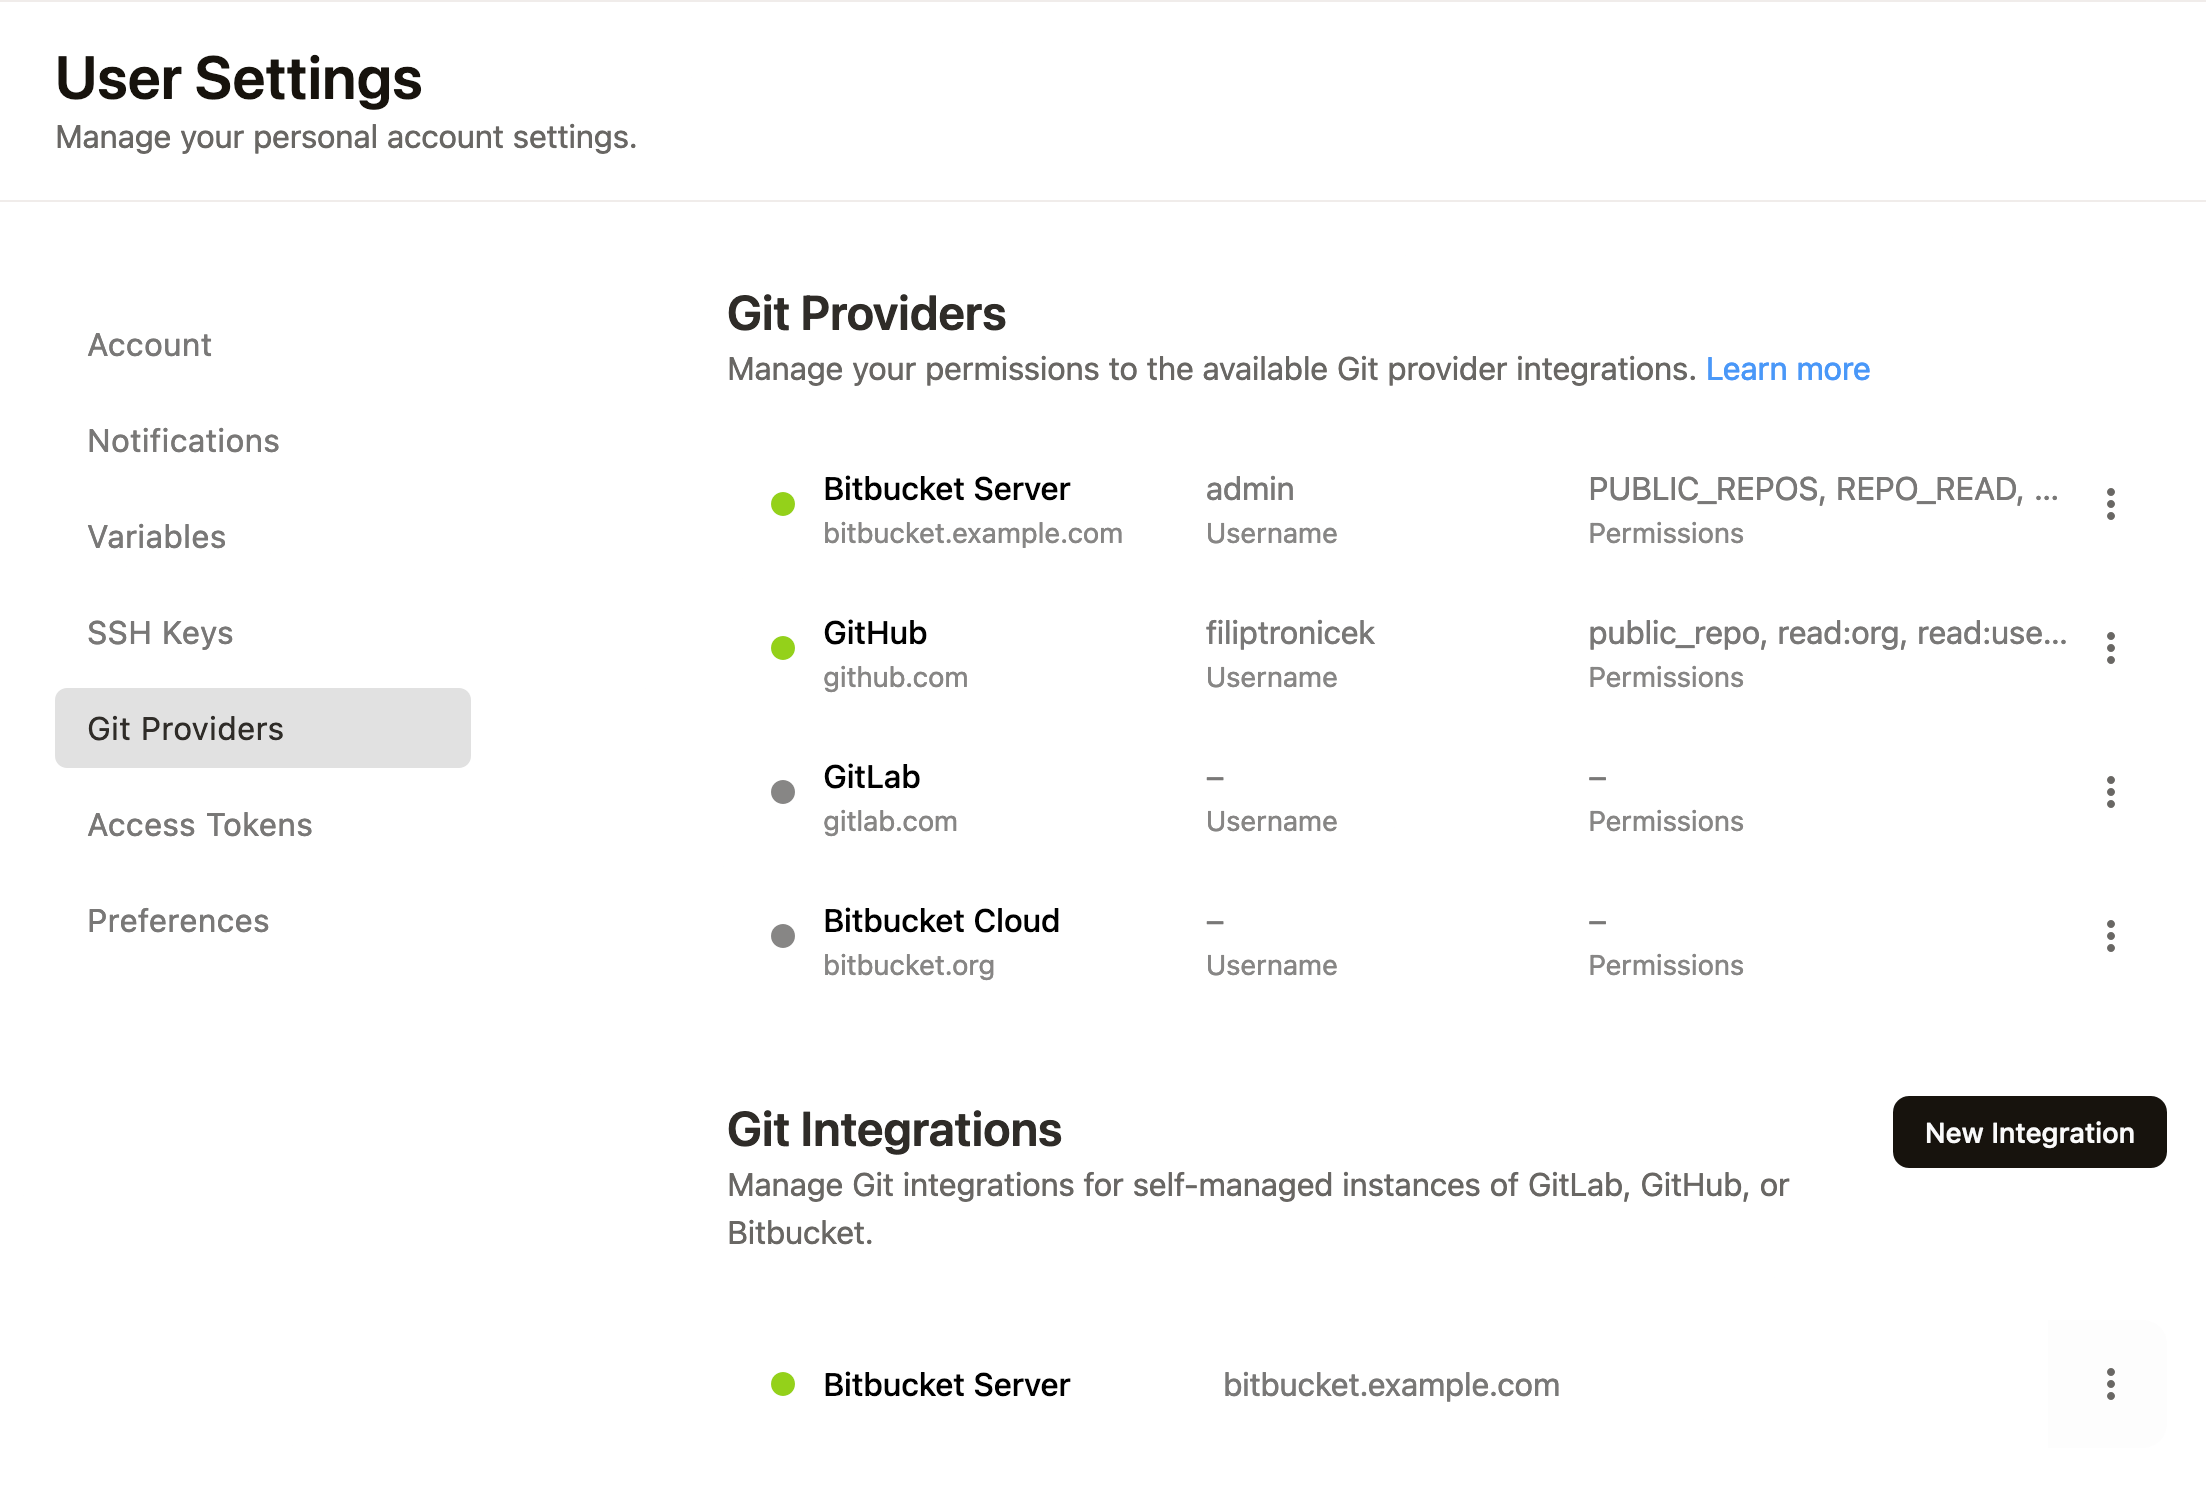
1. Refreshing the integration settings page should show your Bitbucket Server instance as a new Git provider connection.
2. The Git Integration section should display the registration status.
## Starting Workspaces
To start a new workspace after logging into Gitpod, use `Ctrl/Cmd + O` or click on the **New Workspace** button in your Gitpod Dashboard. This will prompt for a repository URL, and suggest relevant repositories.
## Verifying the Integration
After setting up the integration, you can verify it in two ways:
1. Refreshing the integration settings page should show your Bitbucket Server instance as a new Git provider connection.
2. The Git Integration section should display the registration status.