> ## Documentation Index
> Fetch the complete documentation index at: https://ona.com/docs/llms.txt
> Use this file to discover all available pages before exploring further.
# Configure .gitpod.yml
In [the last step](/classic/user/introduction/gitpod-tutorial/1-start-your-workspace), we opened a workspace. Opening workspaces clones our repo, sets up git, and then gives us an isolated workspace. However, the power of Gitpod comes when you automate your development environment by configuring a `.gitpod.yml`.
## Understanding tasks - command
The simplest first task to automate is the installation of packages. We do that by adding them as a `command` in a [task definition](/classic/user/configure/workspaces/tasks). Add a `.gitpod.yml` at the root of your repository, add the following code, commit and re-open the workspace.
```yml .gitpod.yml theme={null}
tasks:
- command: npm start
```
## Understanding tasks - multiple commands
Now let's take that example, and add some more steps to install our packages, and start both our frontend and backend applications. Go ahead and update your `.gitpod.yml` stop your workspace and then start a new one.
```yml .gitpod.yml theme={null}
tasks:
- name: run back-end
openMode: split-left
command: |
npm install pg dotenv
npm install
npm start
- name: run front-end
openMode: split-right
command: |
cd client
npm install
echo "REACT_APP_API_URL=$(gp url 3001)" > .env
npm start
```
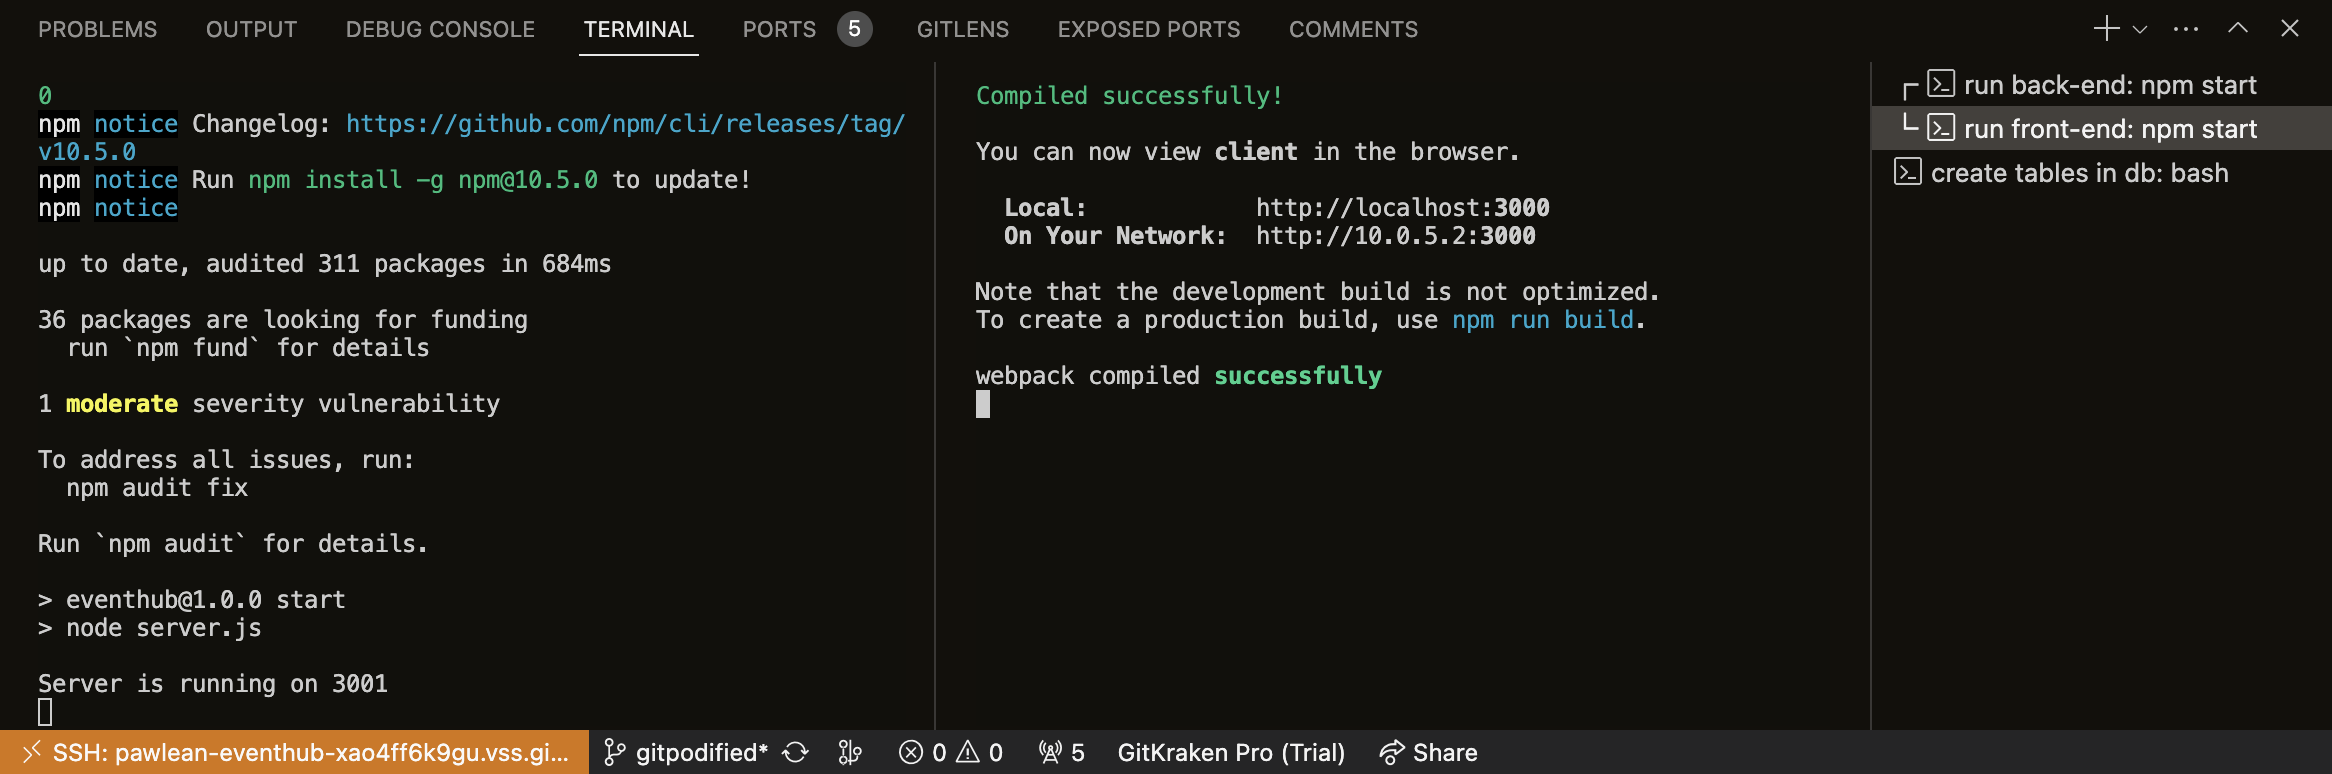
Each task block is a new terminal in your development environment. You can see all running tasks by running `gp tasks` in a workspace. You’ll notice that we also use `openMode` in each task to specify how these terminals open in the workspace.
Here's how it should look:
**Caption:** VS Code split terminals
## Optimizing your .gitpod.yml
The above `.gitpod.yml` will run all of your tasks in the "foreground", e.g. once the workspace has started. This is a great way to get started, however you might want to optimize your workspaces to open faster, which you can do by using [Prebuilds](/classic/user/configure/repositories/prebuilds).
To use Prebuilds you need to:
1. Modify your `.gitpod.yml` to specify which steps can be ran in advance.
2. Enable Prebuilds in your [Repository Settings](https://gitpod.io/repositories).
Here's a modified version of the above `.gitpod.yml` however, we're going to run our `npm install` command in a prebuild.
```yml .gitpod.yml theme={null}
image: gitpod/workspace-postgres
tasks:
- name: run back-end
openMode: split-left
init: npm install
command: npm start
- name: run front-end
init: cd client && npm install
command: |
echo "REACT_APP_API_URL=$(gp url 3001)" > .env
npm start
openMode: split-right
```
## Next Steps
[Configure ports →](/classic/user/introduction/gitpod-tutorial/3-configure-application-ports)
 **Caption:** VS Code split terminals
## Optimizing your .gitpod.yml
The above `.gitpod.yml` will run all of your tasks in the "foreground", e.g. once the workspace has started. This is a great way to get started, however you might want to optimize your workspaces to open faster, which you can do by using [Prebuilds](/classic/user/configure/repositories/prebuilds).
To use Prebuilds you need to:
1. Modify your `.gitpod.yml` to specify which steps can be ran in advance.
2. Enable Prebuilds in your [Repository Settings](https://gitpod.io/repositories).
Here's a modified version of the above `.gitpod.yml` however, we're going to run our `npm install` command in a prebuild.
```yml .gitpod.yml theme={null}
image: gitpod/workspace-postgres
tasks:
- name: run back-end
openMode: split-left
init: npm install
command: npm start
- name: run front-end
init: cd client && npm install
command: |
echo "REACT_APP_API_URL=$(gp url 3001)" > .env
npm start
openMode: split-right
```
## Next Steps
[Configure ports →](/classic/user/introduction/gitpod-tutorial/3-configure-application-ports)
**Caption:** VS Code split terminals
## Optimizing your .gitpod.yml
The above `.gitpod.yml` will run all of your tasks in the "foreground", e.g. once the workspace has started. This is a great way to get started, however you might want to optimize your workspaces to open faster, which you can do by using [Prebuilds](/classic/user/configure/repositories/prebuilds).
To use Prebuilds you need to:
1. Modify your `.gitpod.yml` to specify which steps can be ran in advance.
2. Enable Prebuilds in your [Repository Settings](https://gitpod.io/repositories).
Here's a modified version of the above `.gitpod.yml` however, we're going to run our `npm install` command in a prebuild.
```yml .gitpod.yml theme={null}
image: gitpod/workspace-postgres
tasks:
- name: run back-end
openMode: split-left
init: npm install
command: npm start
- name: run front-end
init: cd client && npm install
command: |
echo "REACT_APP_API_URL=$(gp url 3001)" > .env
npm start
openMode: split-right
```
## Next Steps
[Configure ports →](/classic/user/introduction/gitpod-tutorial/3-configure-application-ports)