

Step 1: Role Creation
To start, click on the first deep link URL to launch the role creation template. This action opens the AWS CloudFormation console to the welcome screen for setting up the template.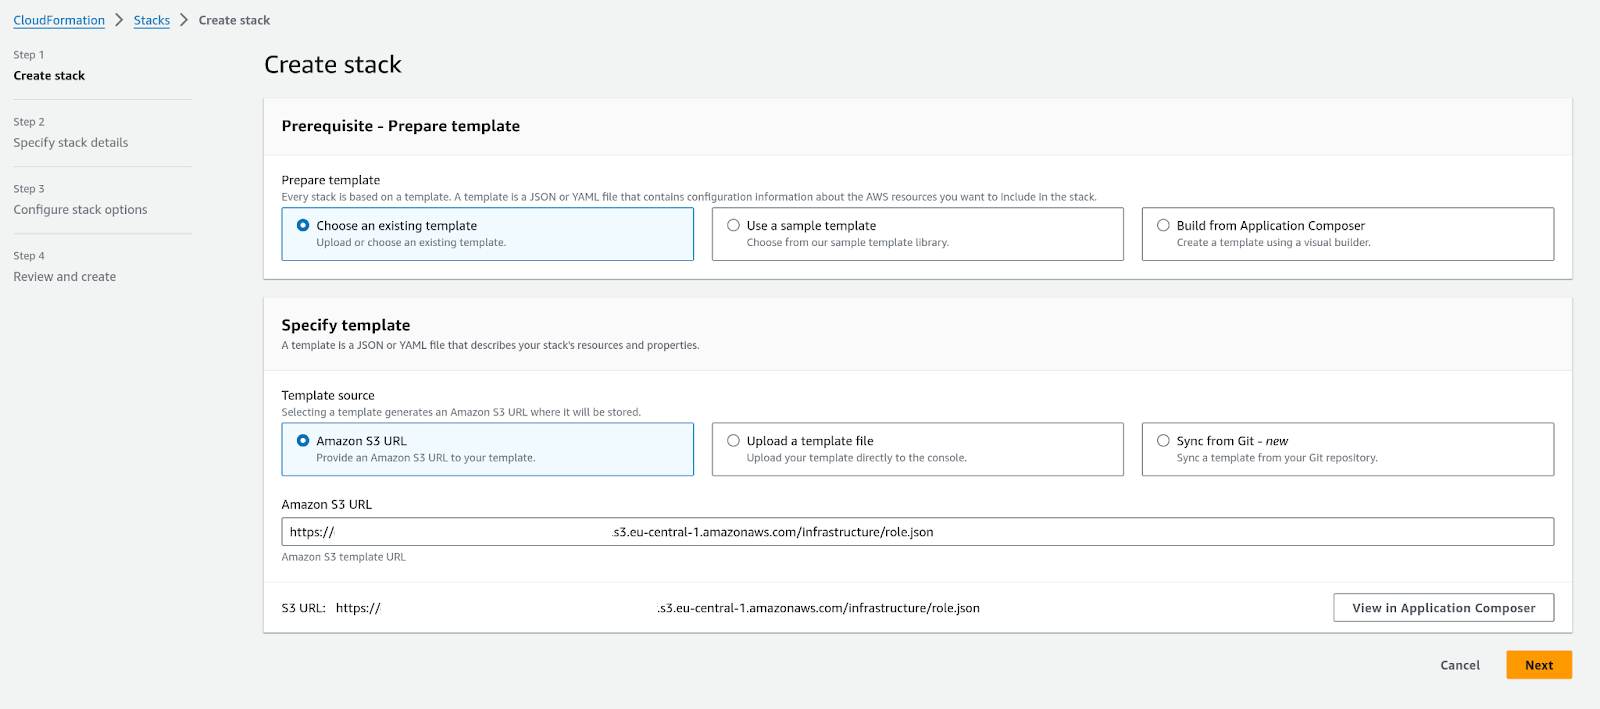
Role template landing page
Parameters in the Role Creation Template
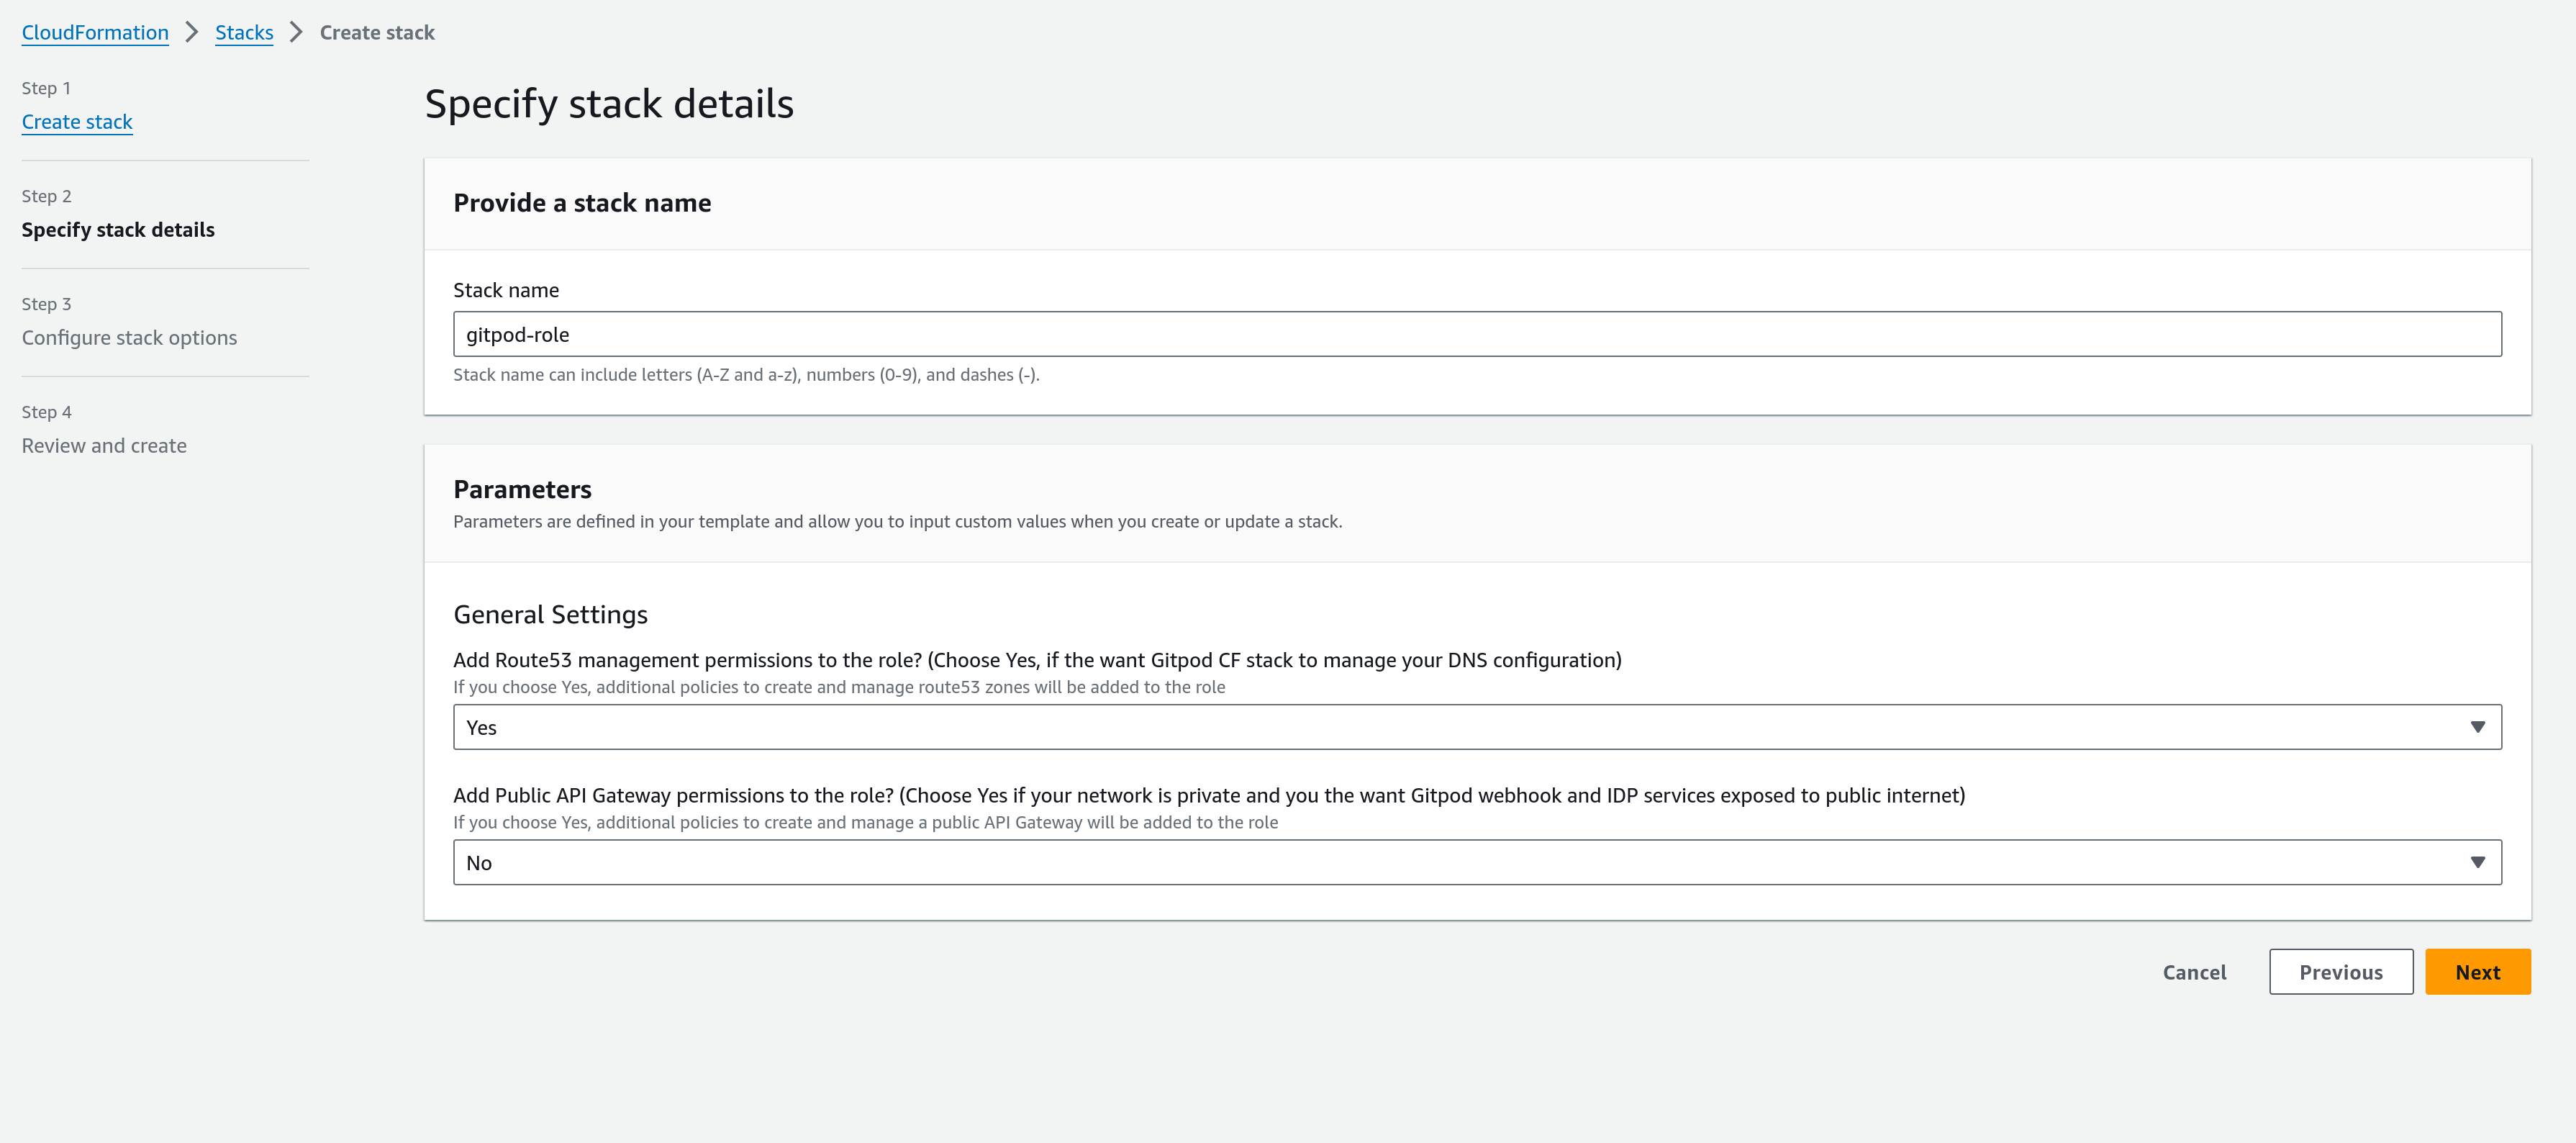
Role template parameters
- Add Route 53 management permissions to the role: If you plan to manage your DNS settings manually, you can opt to disable this option and not add Route53 specific permissions to the role.
- Enable Public API Gateway Permissions: This option should be considered based on how you intend to use Gitpod. If Gitpod is to be set up without public internet access, but you require GitHub webhooks and Identity Provider (IDP) features to be publicly accessible (e.g., for integration with a public SCM), then you will need to enable this feature in the main Gitpod CF template. Selecting “Yes” here ensures the necessary permissions are established.
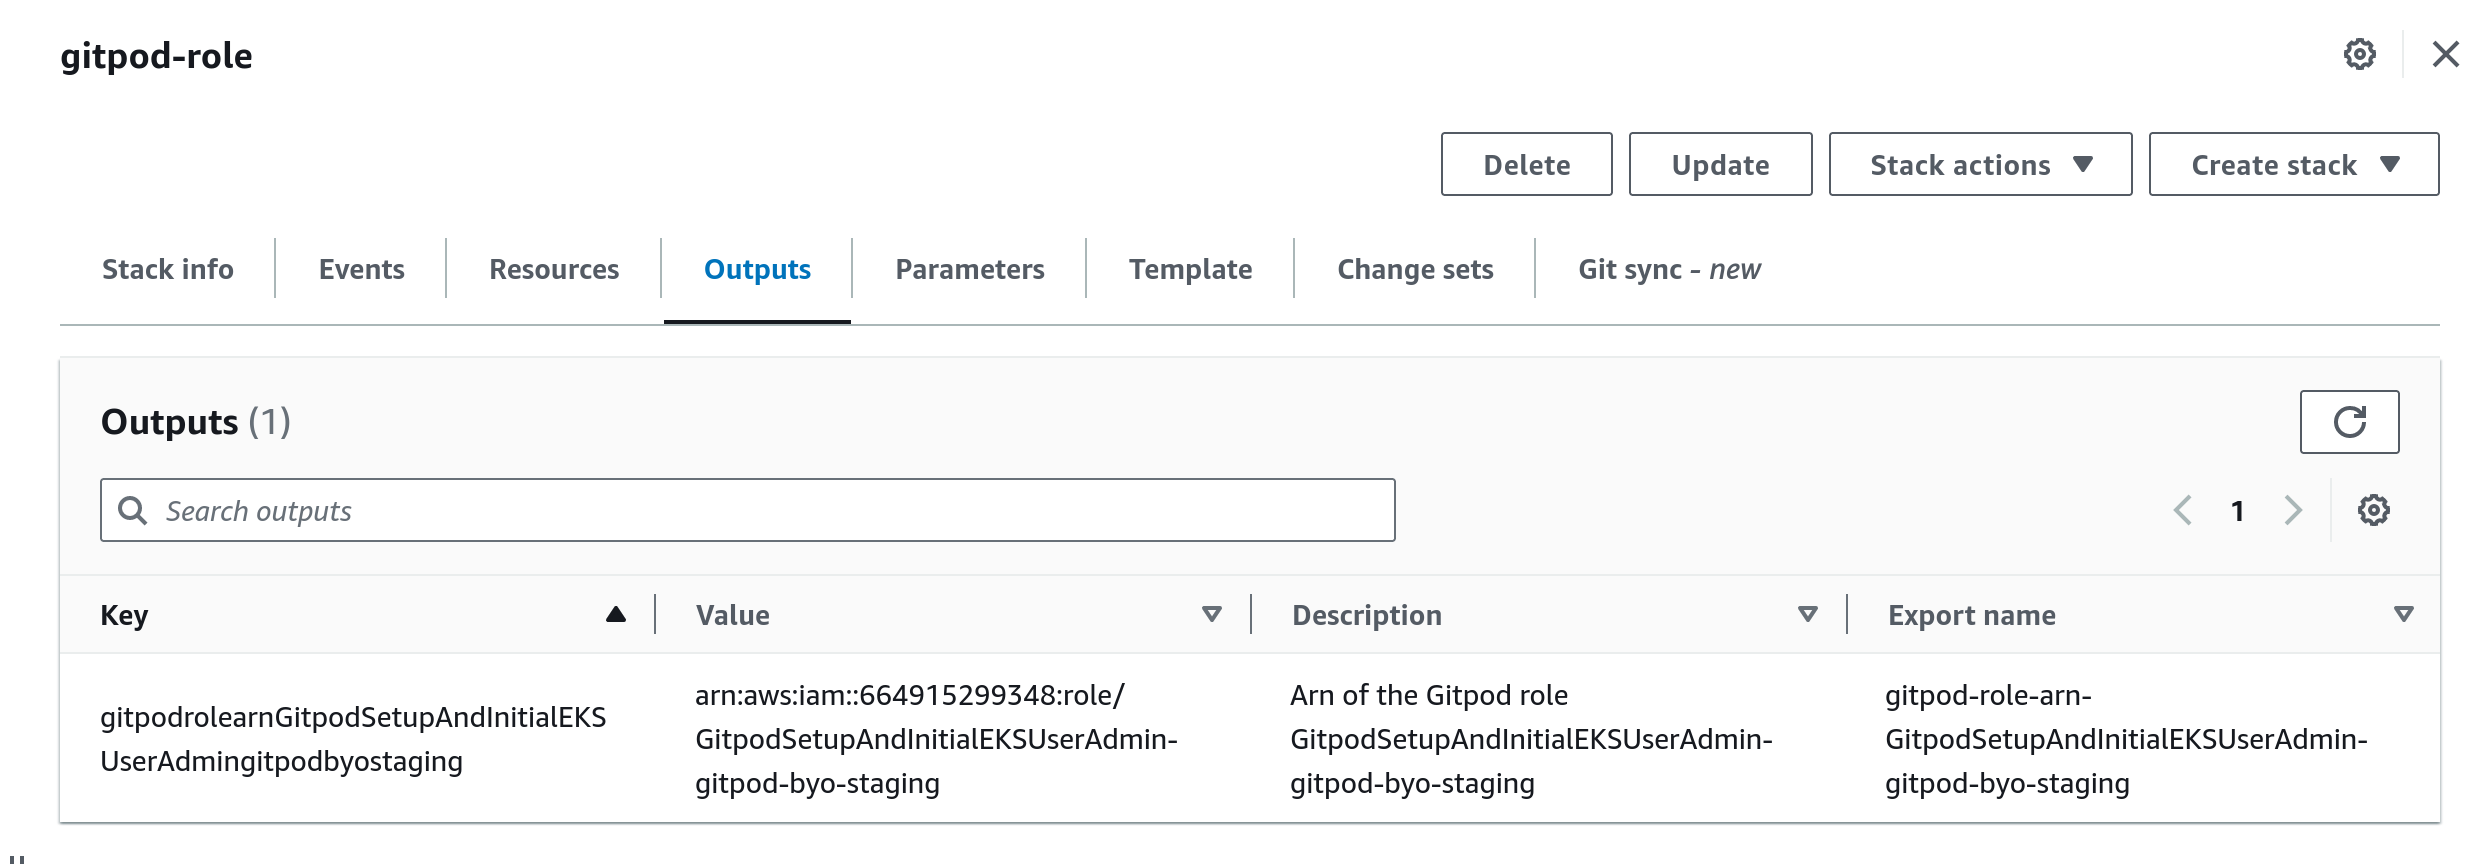
Role template output
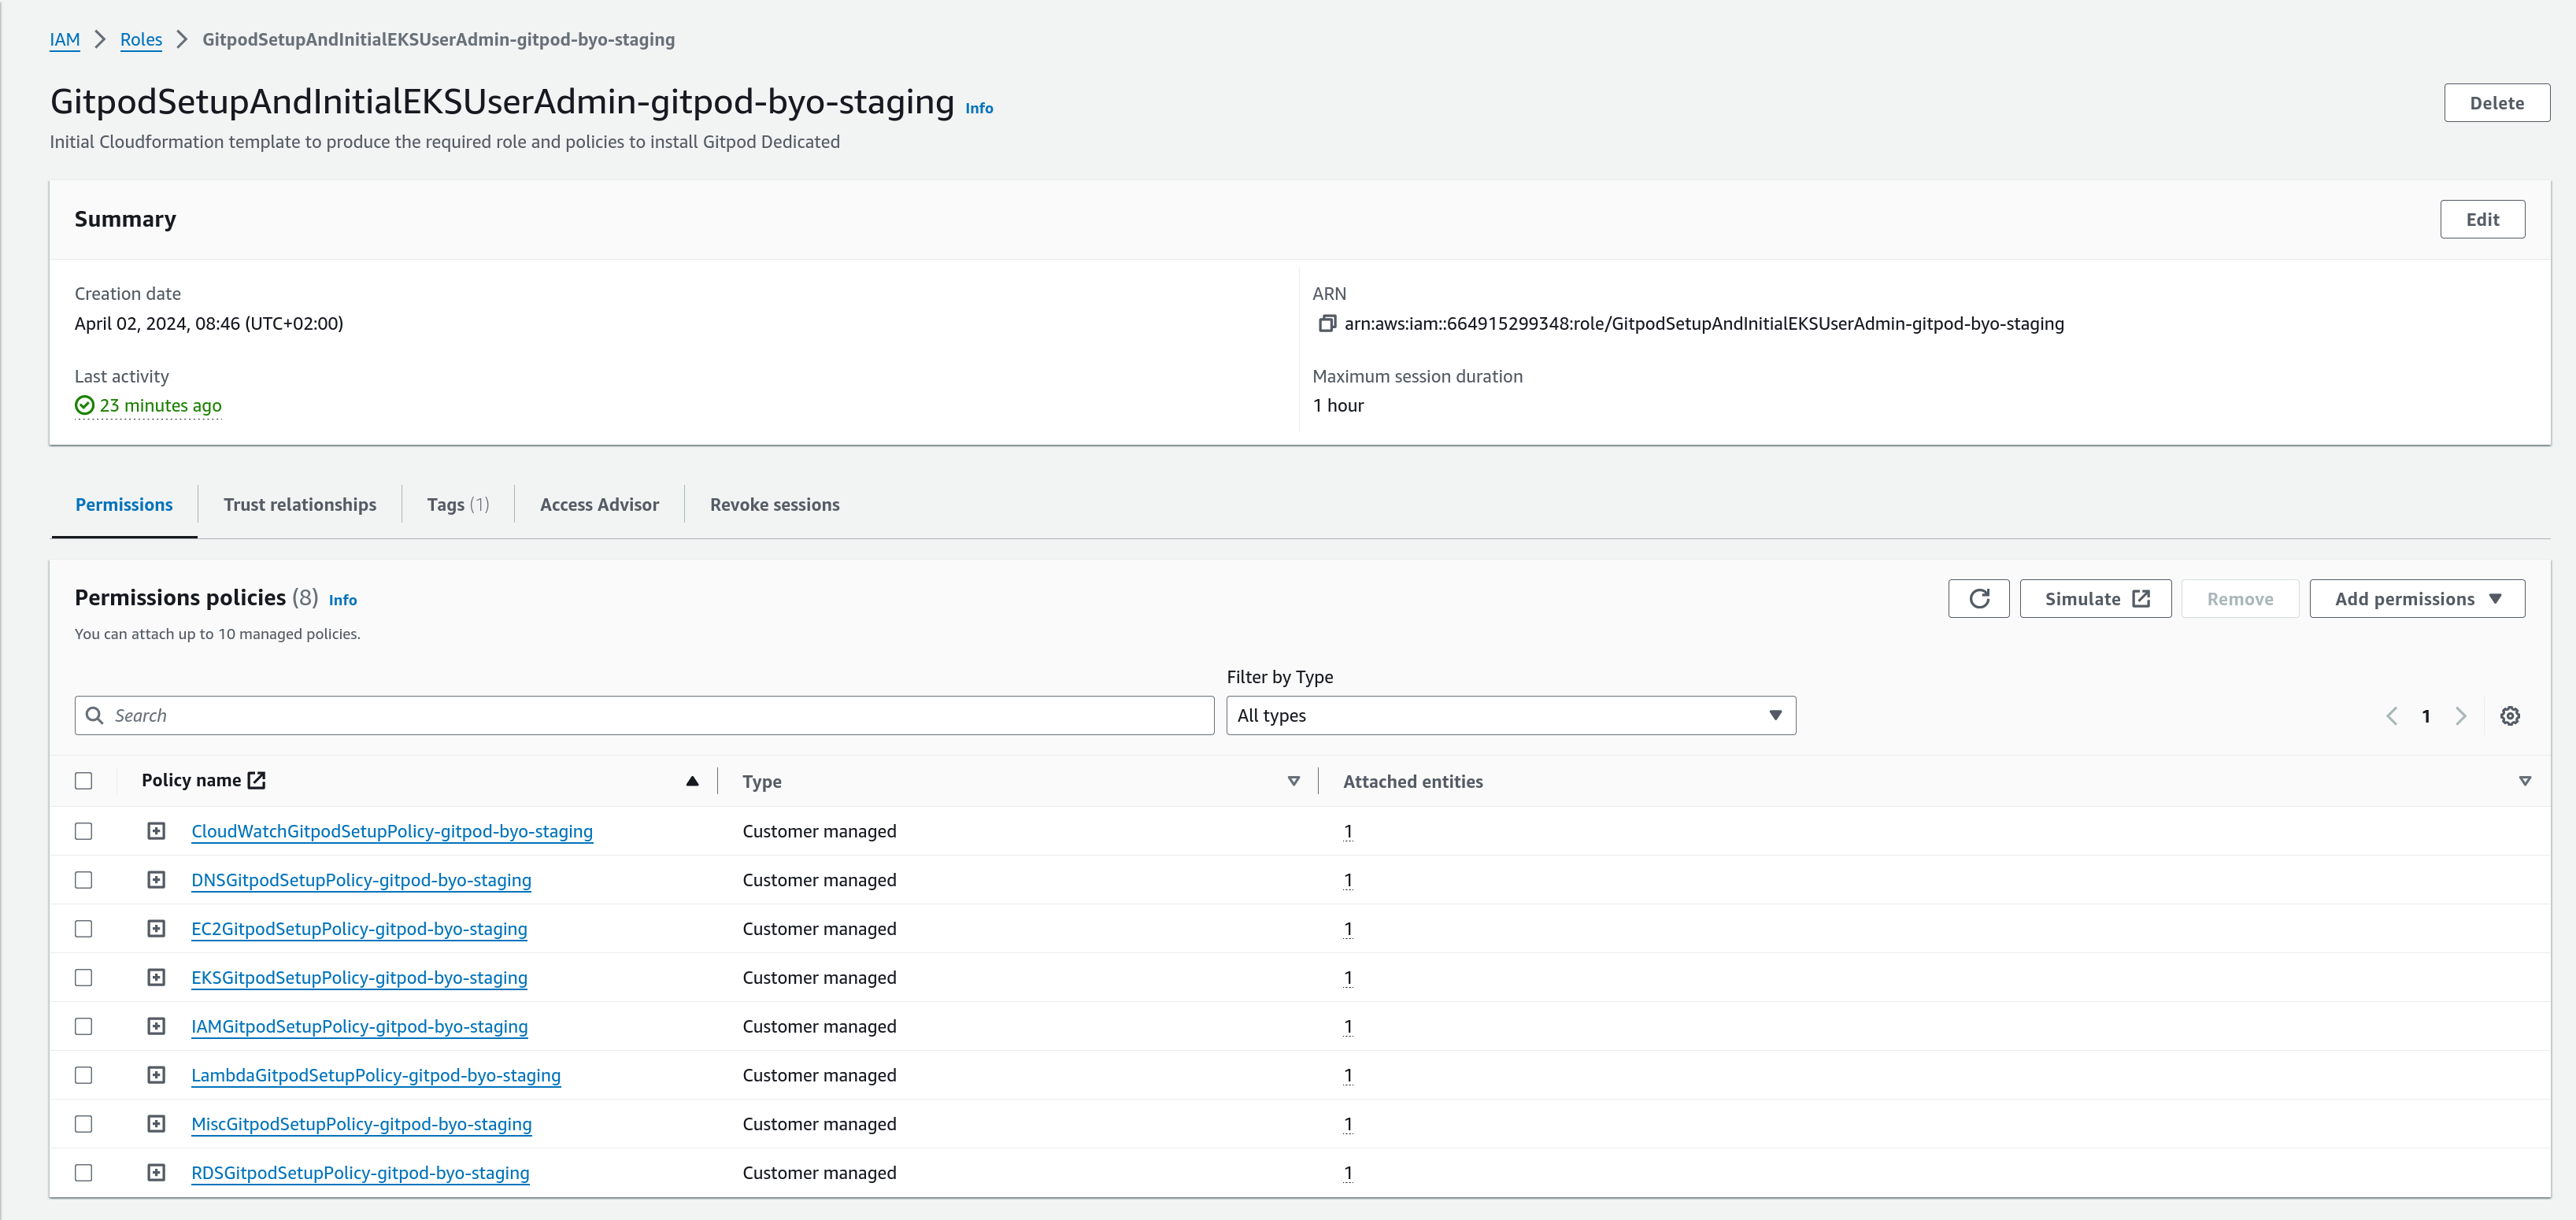
Role details in IAM Console
Step 2: Deploying the Gitpod Instance
With the necessary role in place, the next step involves applying the main Gitpod deployment template. This section will guide you through the process, highlighting how to select the role created in the previous step and configure additional parameters for your Gitpod setup. As you did with the role deep link URL, click and launch the gitpod instance creation template. You should land on a welcome screen that looks like this: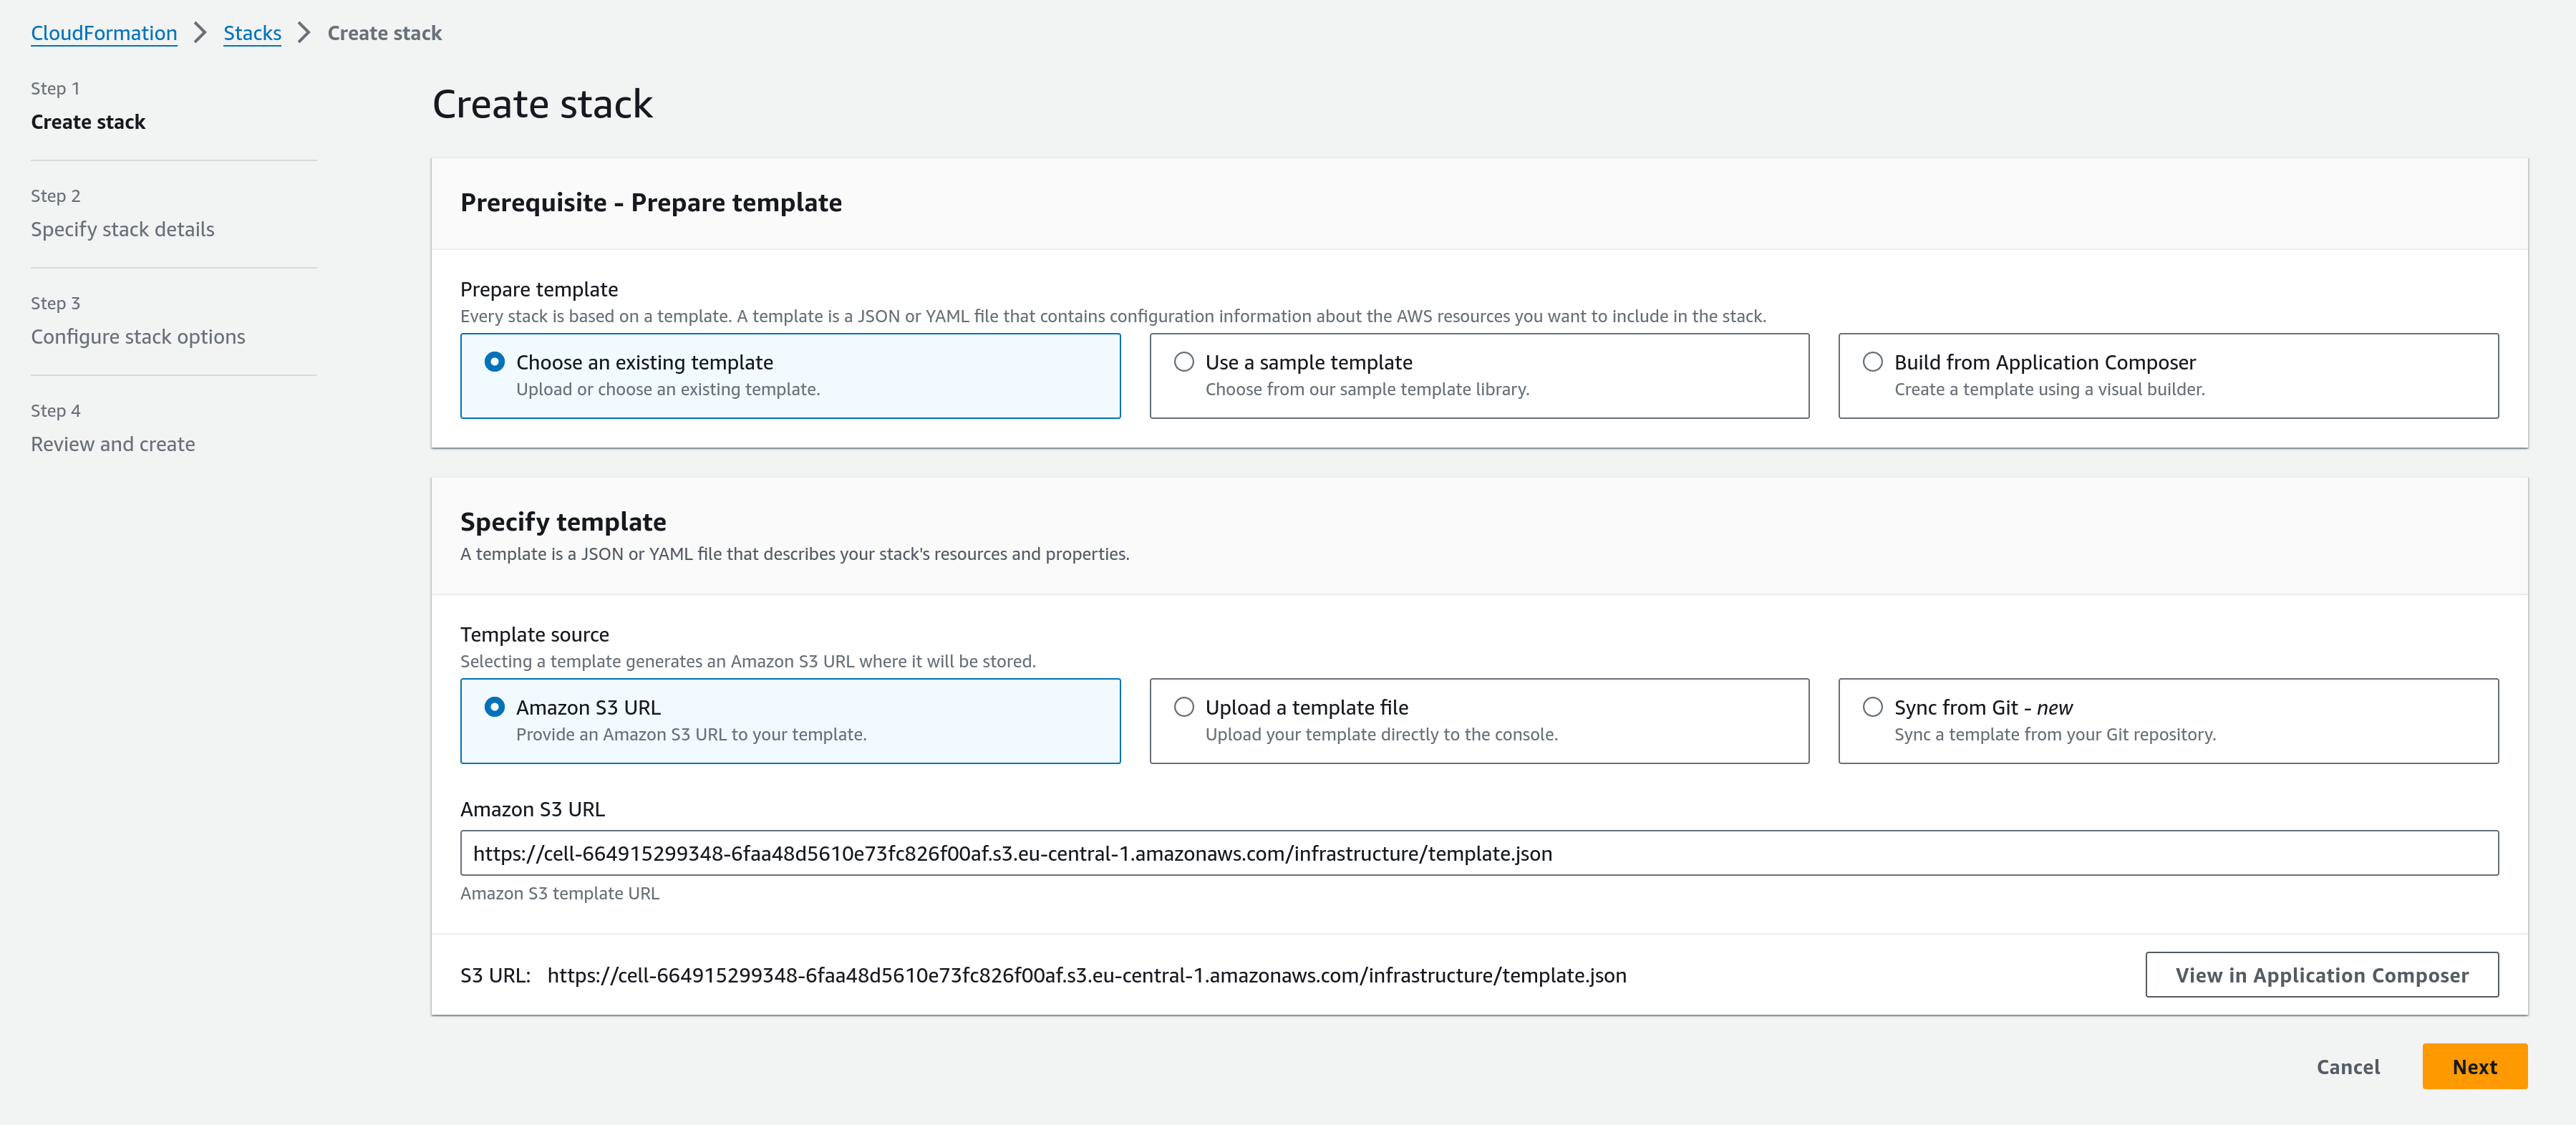
Instance template landing page
Parameters in the Instance Creation Template
The deployment template includes numerous parameters, providing significant control over the configuration. These parameters are divided into sections on the page, which we will address section by section.Networking Configurations
Please refer to the Network Setup to
understand the networking requirements and/or to create the network using our
standard CF templates
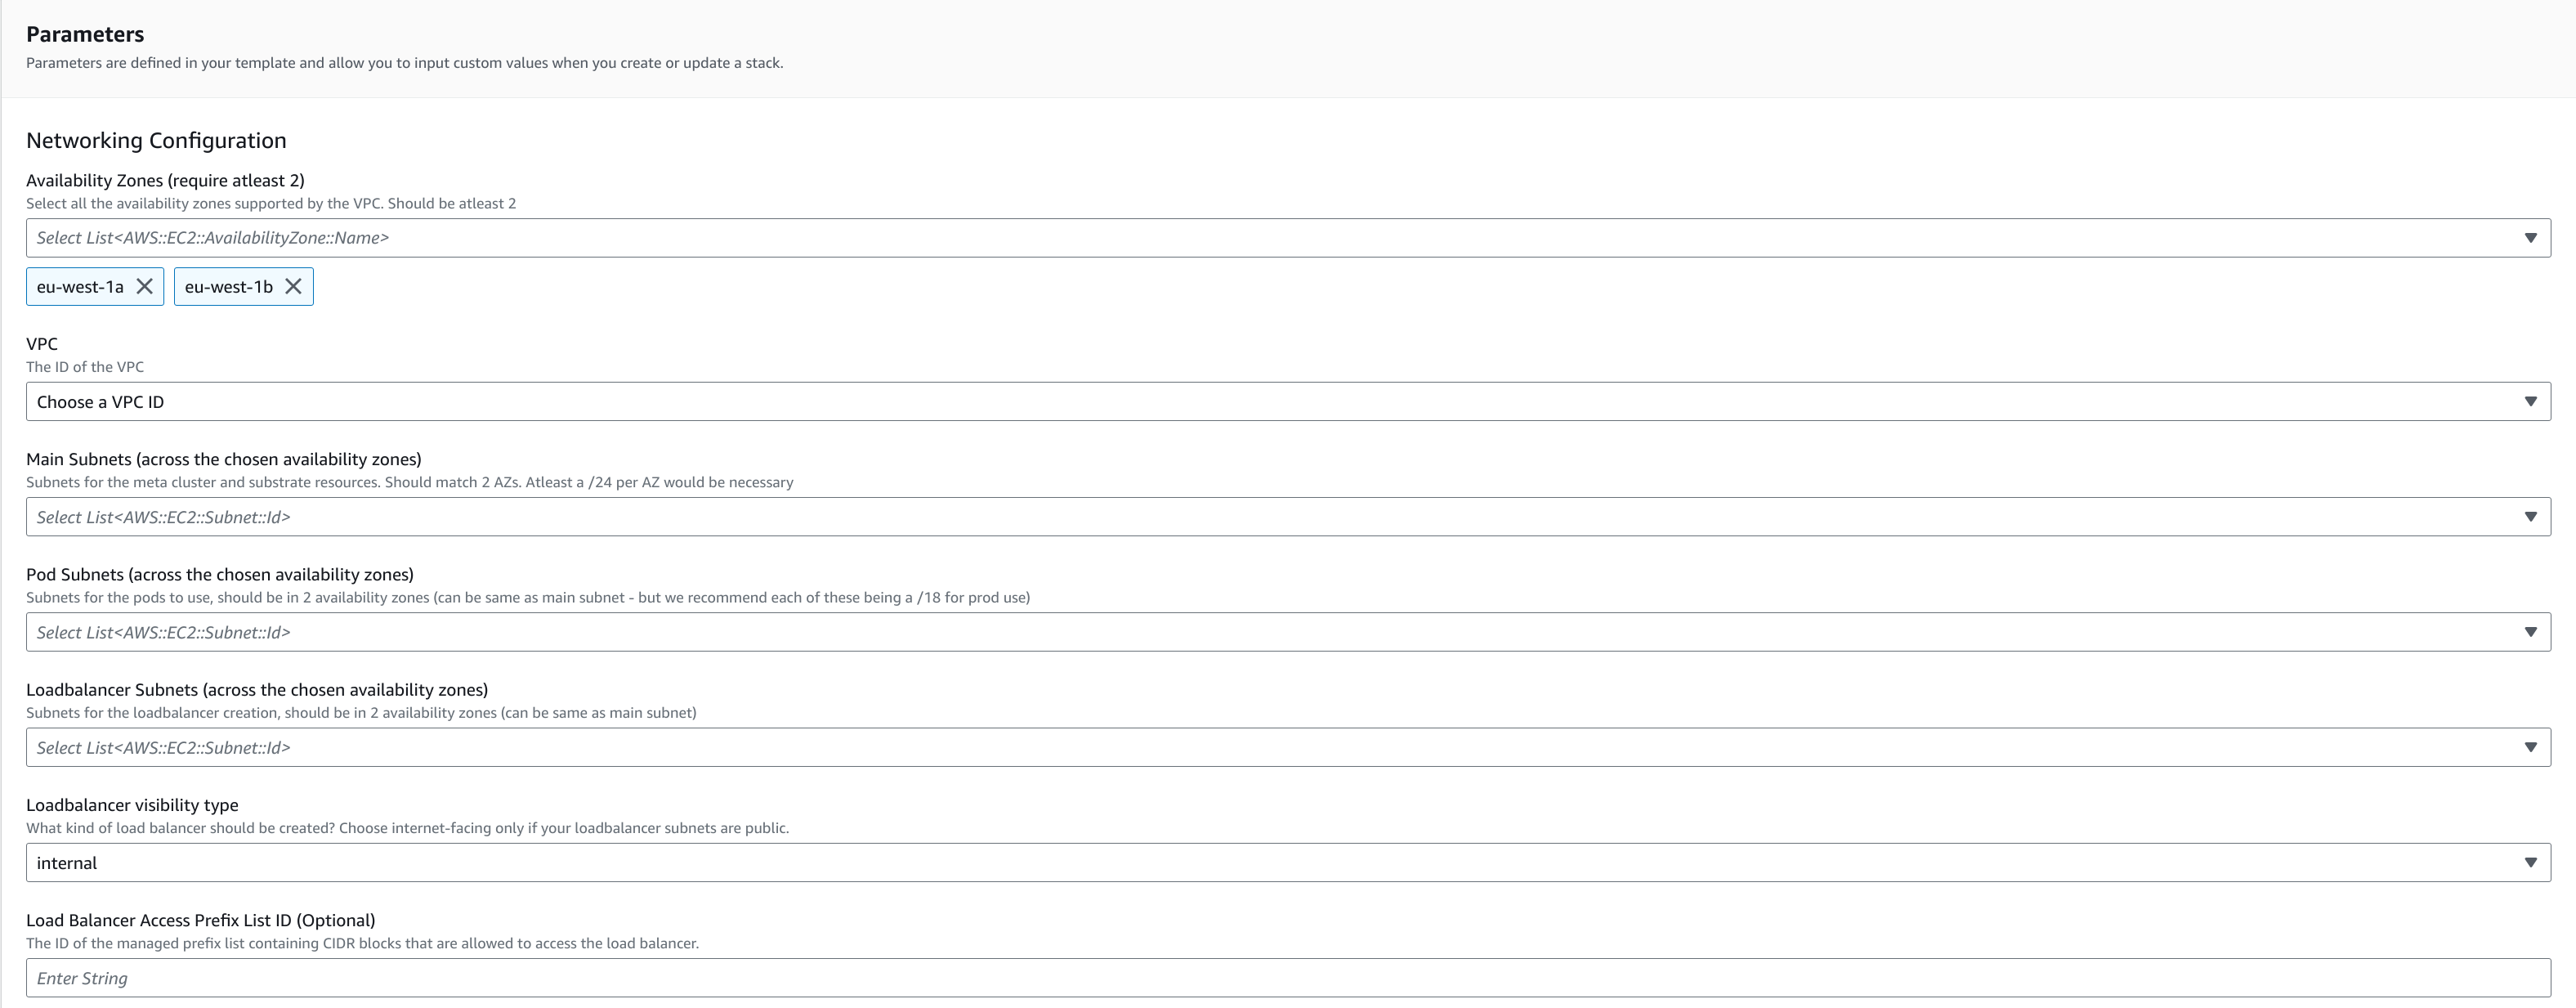
Instance template networking configurations
Creating a managed prefix list to control traffic to loadbalancer
Creating a managed prefix list to control traffic to loadbalancer
Creating a managed prefix list to control traffic to loadbalancer
- In the AWS Account in which you are deploying Gitpod Enterprise instance, go to the
Managed prefix listconsole under the VPC services:
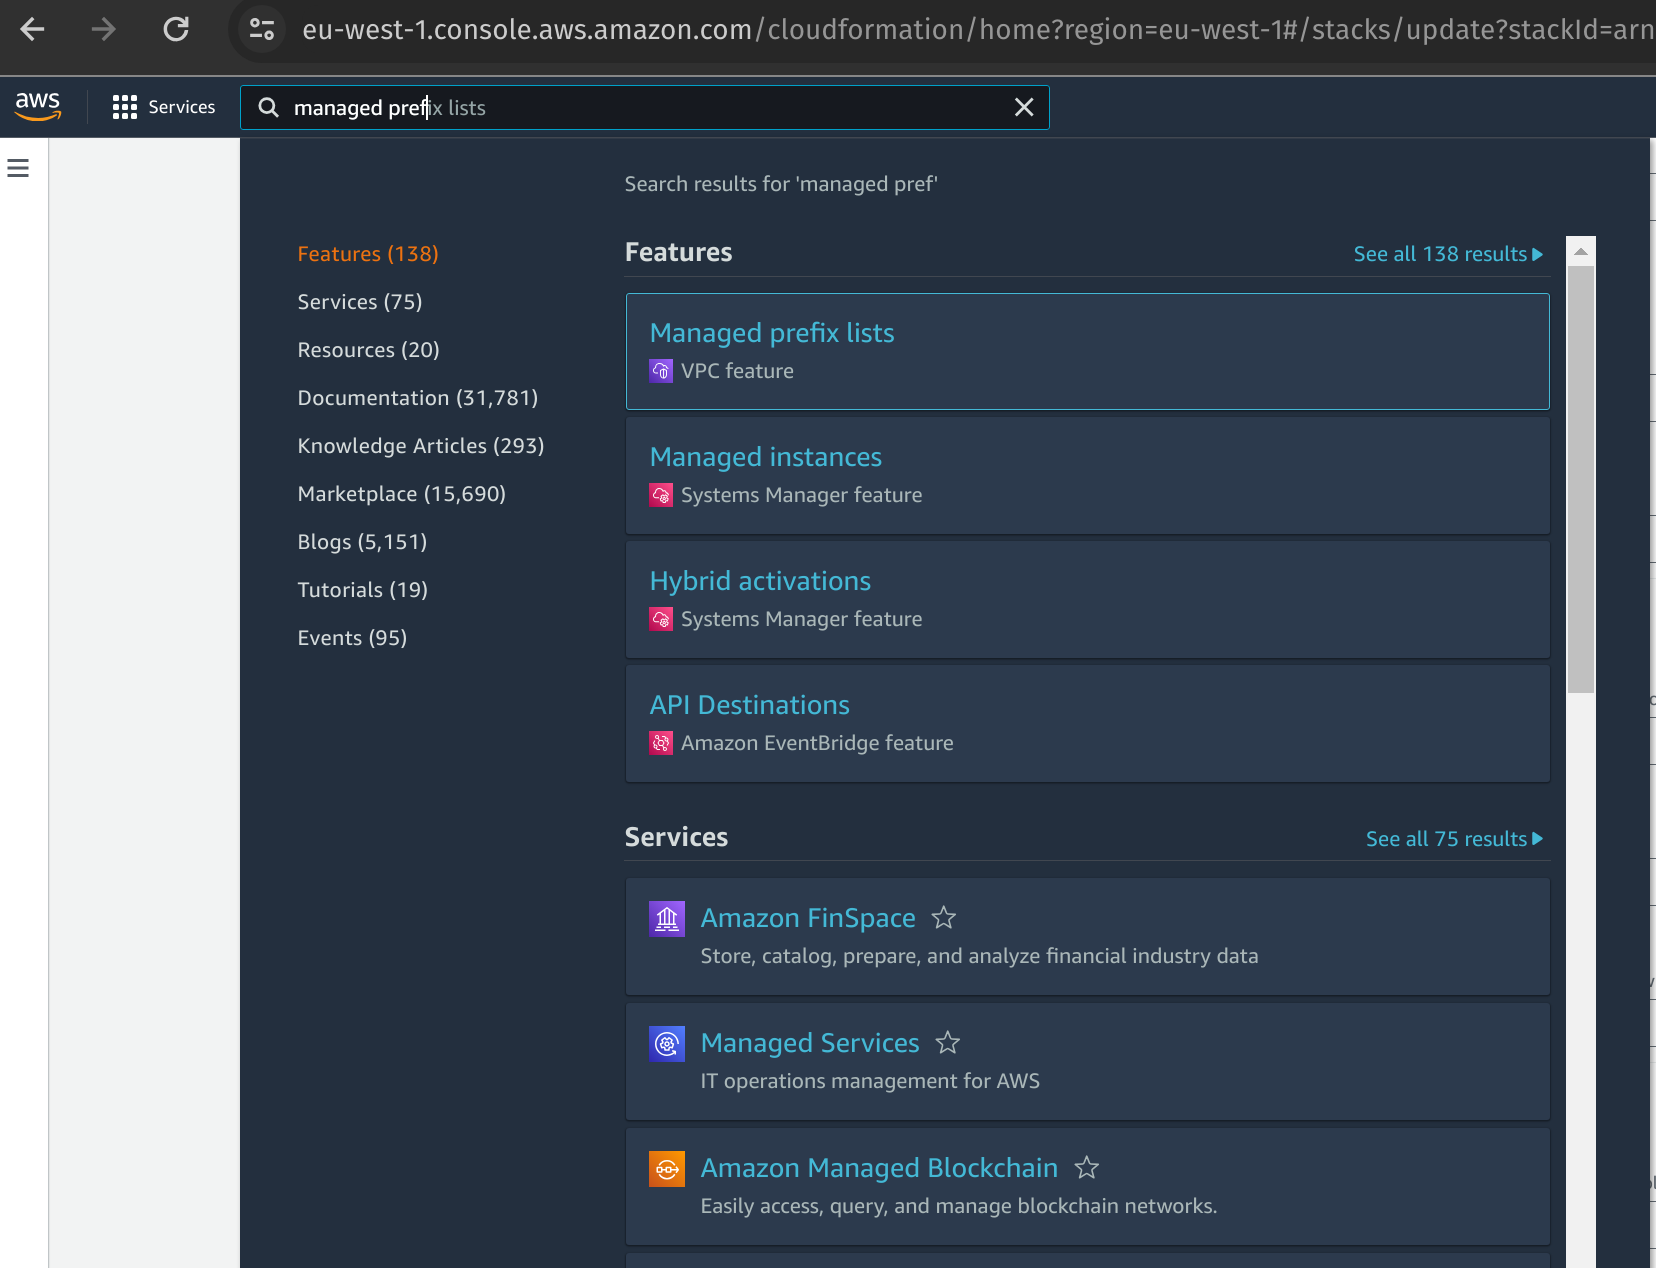
Managed prefix-list lookup
- Click on
Create Prefix Listat the top right corner of the page
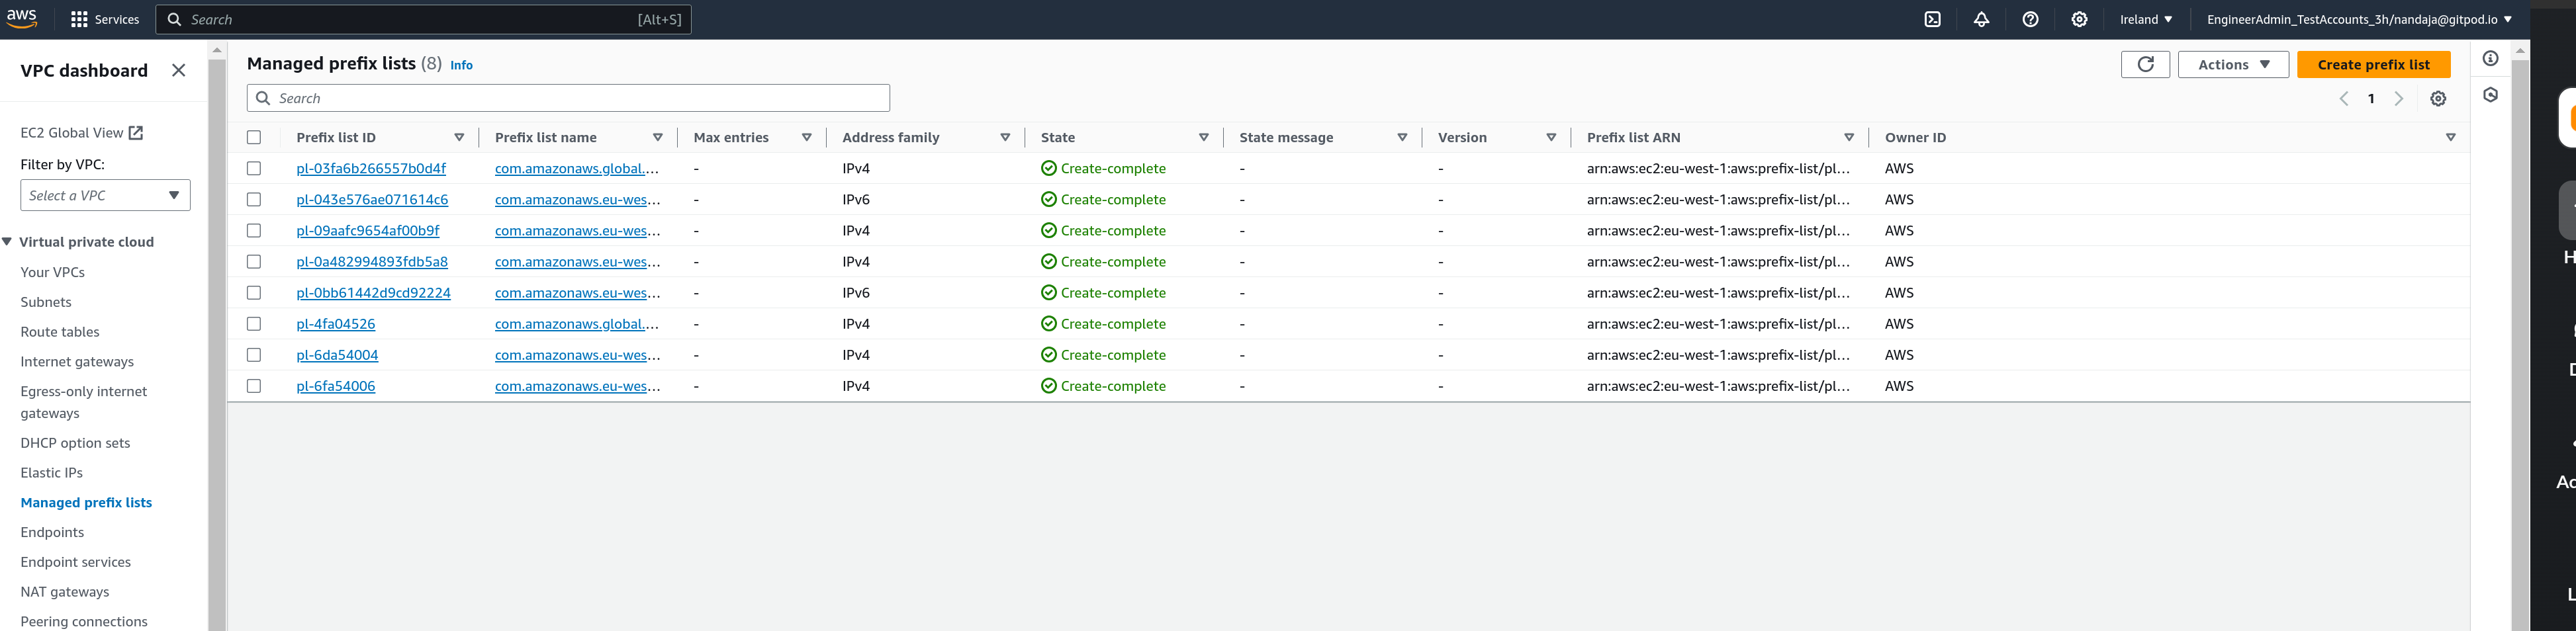
Managed prefix-list dashboard
- Give the Prefix list an appropriate name, choose the maximum number of CIDRs. The maximum number of CIDRs should be less that your account’s rule per security group limit, which is by default 60 but more than the number of CIDRs you want to specify. Add the CIDRs using the
Add new entryoption.
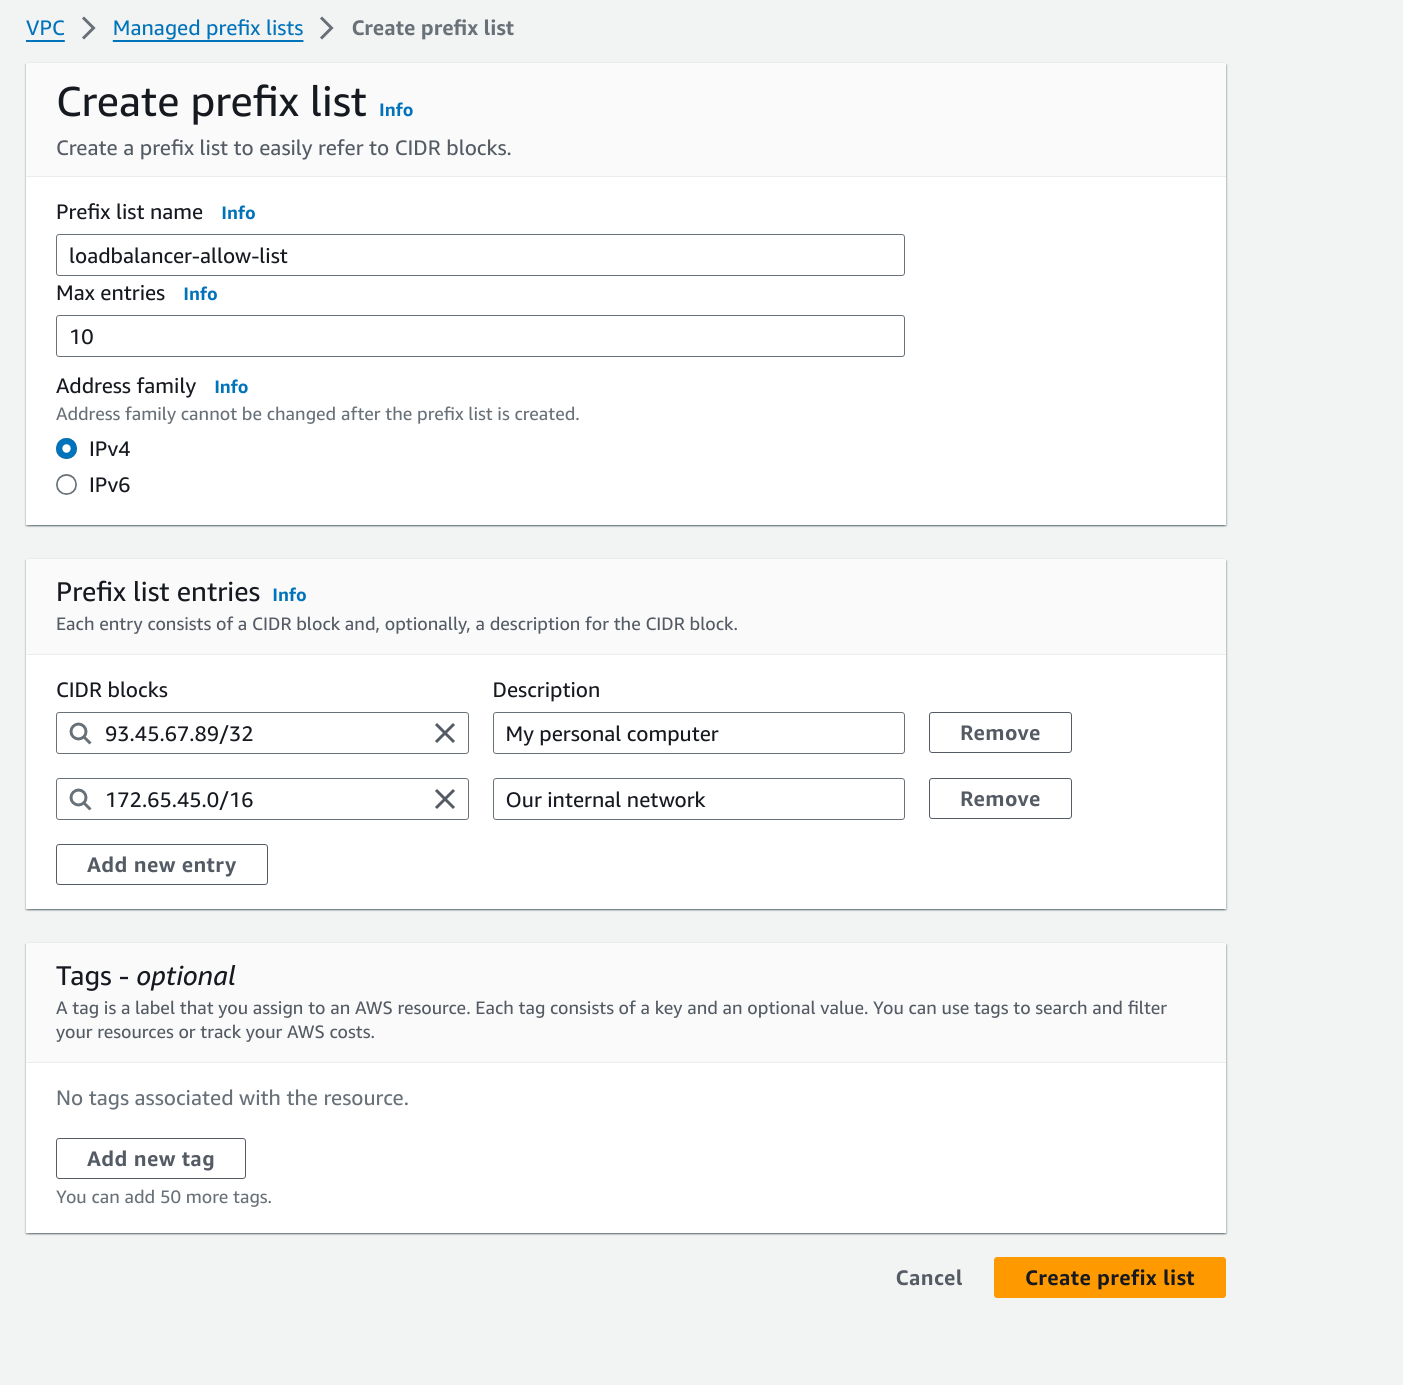
Managed prefix-list create
- Copy the ID of the Managed prefix list and use it directly as the value for cloudformation parameter
Loadbalancer Access Prefix List ID
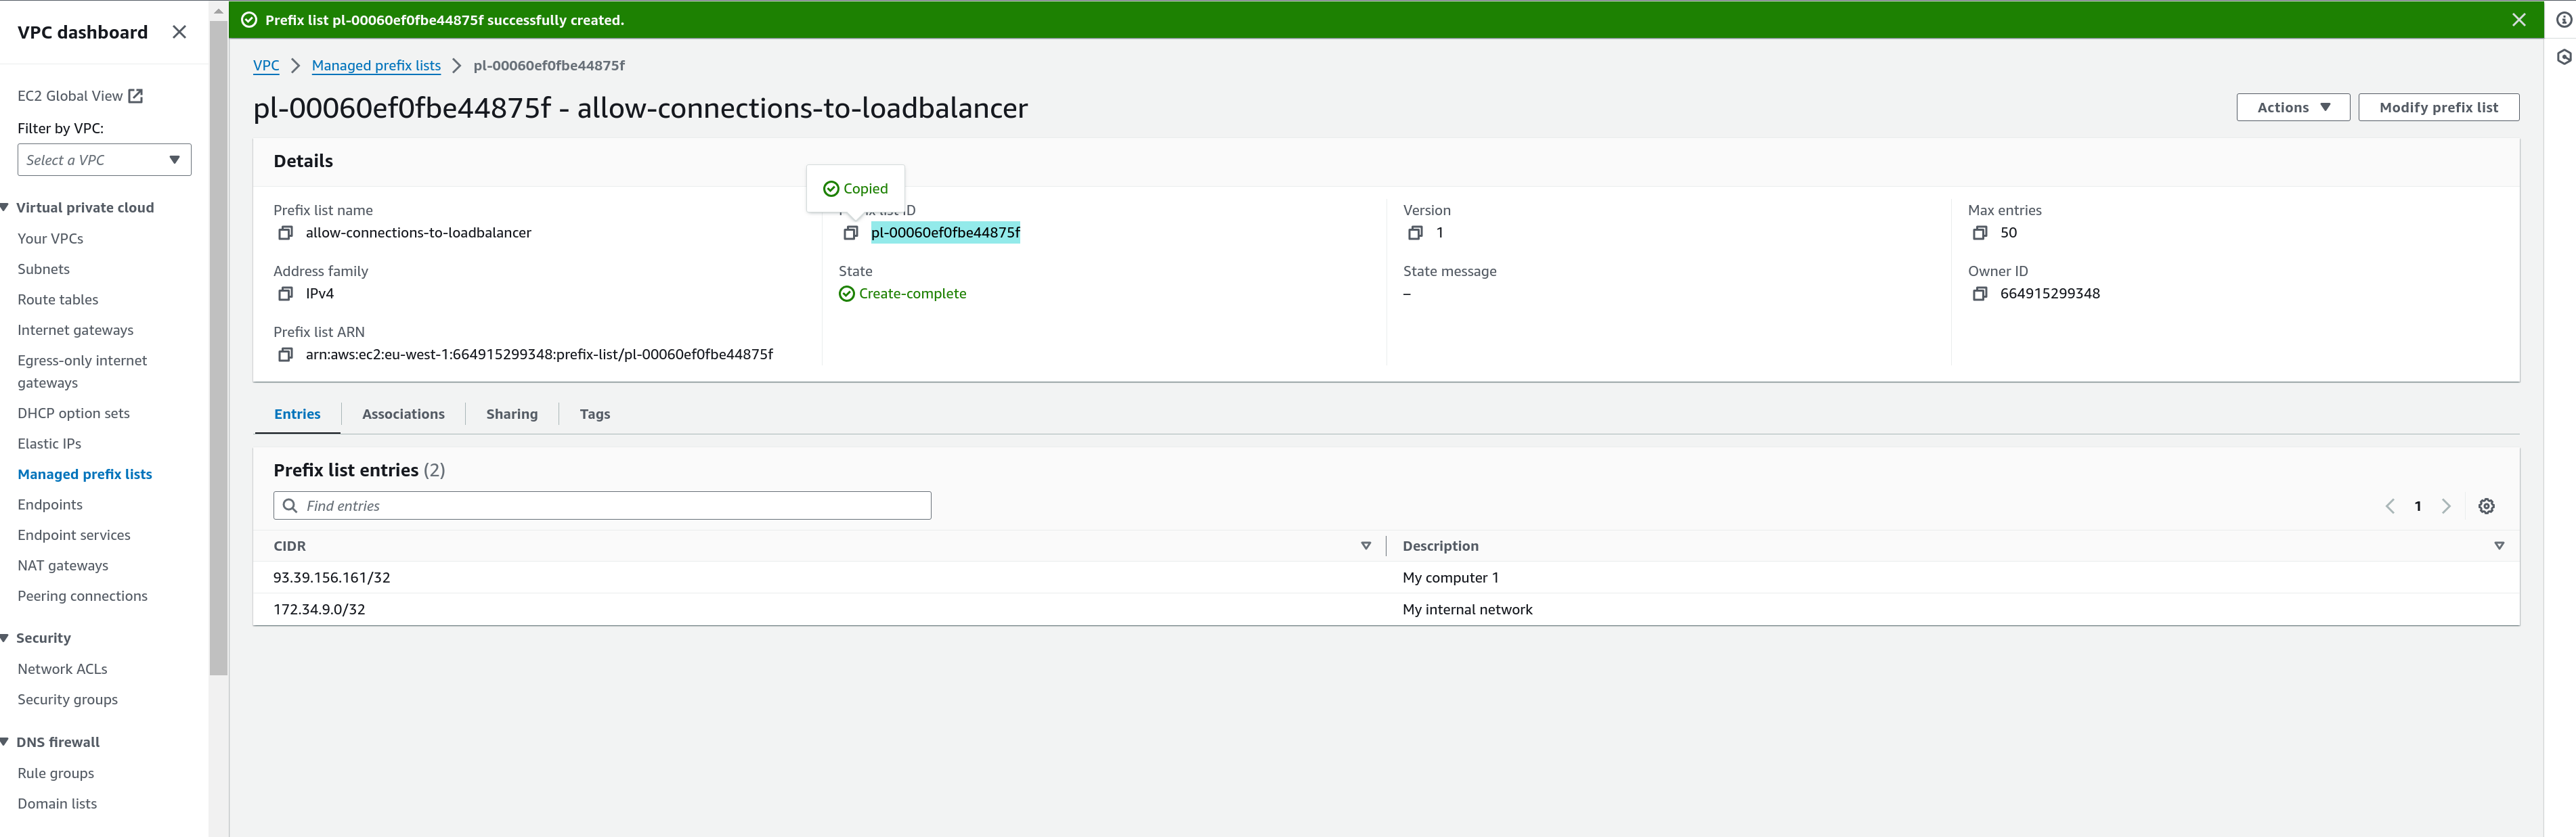
Managed prefix-list create
DNS Configuration
For a seamless experience, Gitpod can manage a DNS name and corresponding certificate within our*.gitpod.cloud domain. Alternatively, you may opt to configure your own domain and match it with an ACM-stored certificate.
If you decide to self-manage DNS, you’ll receive domain mapping information as CloudFormation Outputs, which should be added to Route 53 or your DNS management service. More about this will be covered in the Complete DNS Configuration section.
If you’re using the auto-generated domain by setting auto-generation to “Yes,”
ensure you’ve also selected “Yes” for the parameter
Add Route 53 management permissions to the role? in the role creation template. If this wasn’t set
initially, please update the role template to align with your DNS configuration
choice.
DNS Configuration
Application Settings (Optional)
This optional section allows for specifying custom CA certificates for your Gitpod workspaces. While these settings offer additional customization for specific scenarios, they are not required for all installations.- Additional Custom CA: If Gitpod needs to interact with resources that use a Custom CA (e.g., Source Control Management systems), you can specify the ARN of the secret where the certificate is stored. For guidance on using custom or private CAs with Gitpod, refer back to our documentation in the preparation section.

Application Configuration
Remember, these settings are optional and should only be configured if your workspace environments require them.
Advanced Configuration (Optional)
This section contains settings for specific scenarios that might not be essential for every Gitpod instance but are critical for certain use cases, particularly if your deployment has unique requirements.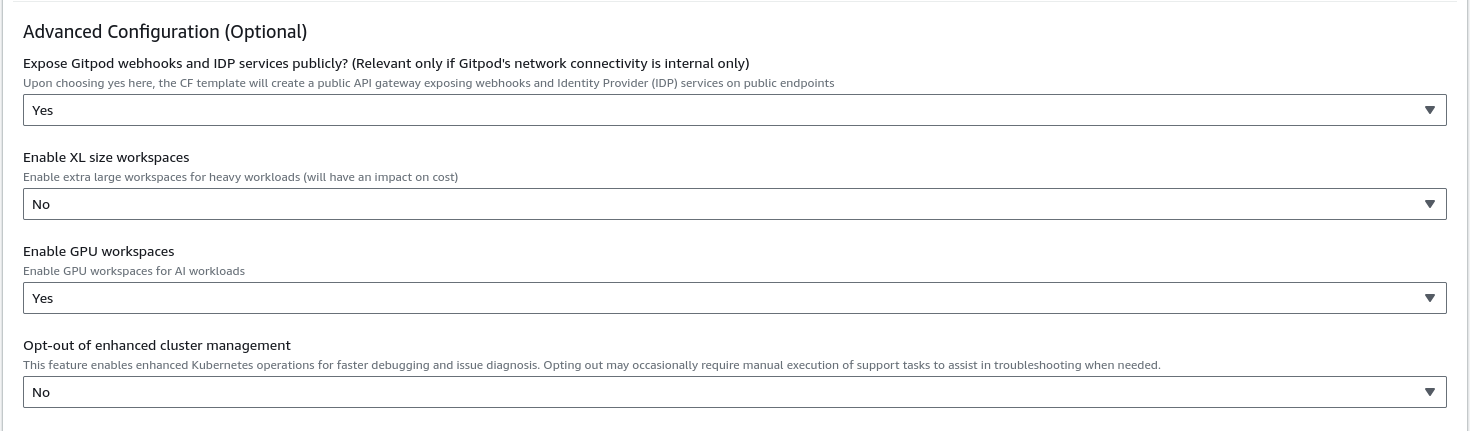
Advanced Configuration
Important: This setting is particularly relevant if your VPC is private or
restricts public internet access. It ensures that even with stringent
network controls, essential Gitpod services remain accessible as needed.
When you enable this, a public API gateway will be established, allowing webhooks and IDP services to be accessed publicly, despite the VPC being private or internet-restricted. It is essential to configure this correctly for your Gitpod services to function as intended in a restricted network setup. It is required that you have selected Enable Public API Gateway Permissions in the role creation template otherwise the role we use to apply the cloud formation template will not have the required permissions.
Important: Enabling this option, will make these two new workspace classes
available in Gitpod
The setting for enabling large workspaces does not apply until the next application release. This is due to the need for a full application update to activate the feature. Releases happen daily at 2:00AM UTC. To verify your cell has been updated correctly, see the Available Workspace Classes section in your Gitpod instance organization settings.
Important: Enabling this option, will make these a new workspace class available in
Gitpod
The setting for enabling GPU workspaces does not apply until the next application release. This is due to the need for a full application update to activate the feature. Releases happen daily at 2:00AM UTC. To verify your cell has been updated correctly, see the Available Workspace Classes section in your Gitpod instance organization settings.
This feature significantly reduces your Kubernetes management overhead by allowing the Gitpod Engineering team to perform essential maintenance operations when needed. For full transparency, you can audit all allowed permissions in the CloudFormation template and monitor any executed actions. All cluster outputs are sanitized at source, ensuring your sensitive information remains protected. This capability is vital for maintaining optimal cluster performance and enabling swift incident resolution, ultimately minimizing your team’s operational burden while ensuring cluster reliability. For more details, see our Enhanced Cluster Management documentation.
Choosing the right role for the stack execution
After choosing the right parameters based on your requirements, before proceeding to apply the CF template, we should choose the role that was created by the previous CF template to execute the current one. To do so, hit theNext button once you have chosen all the required parameters and you will end up in a page that looks like below:
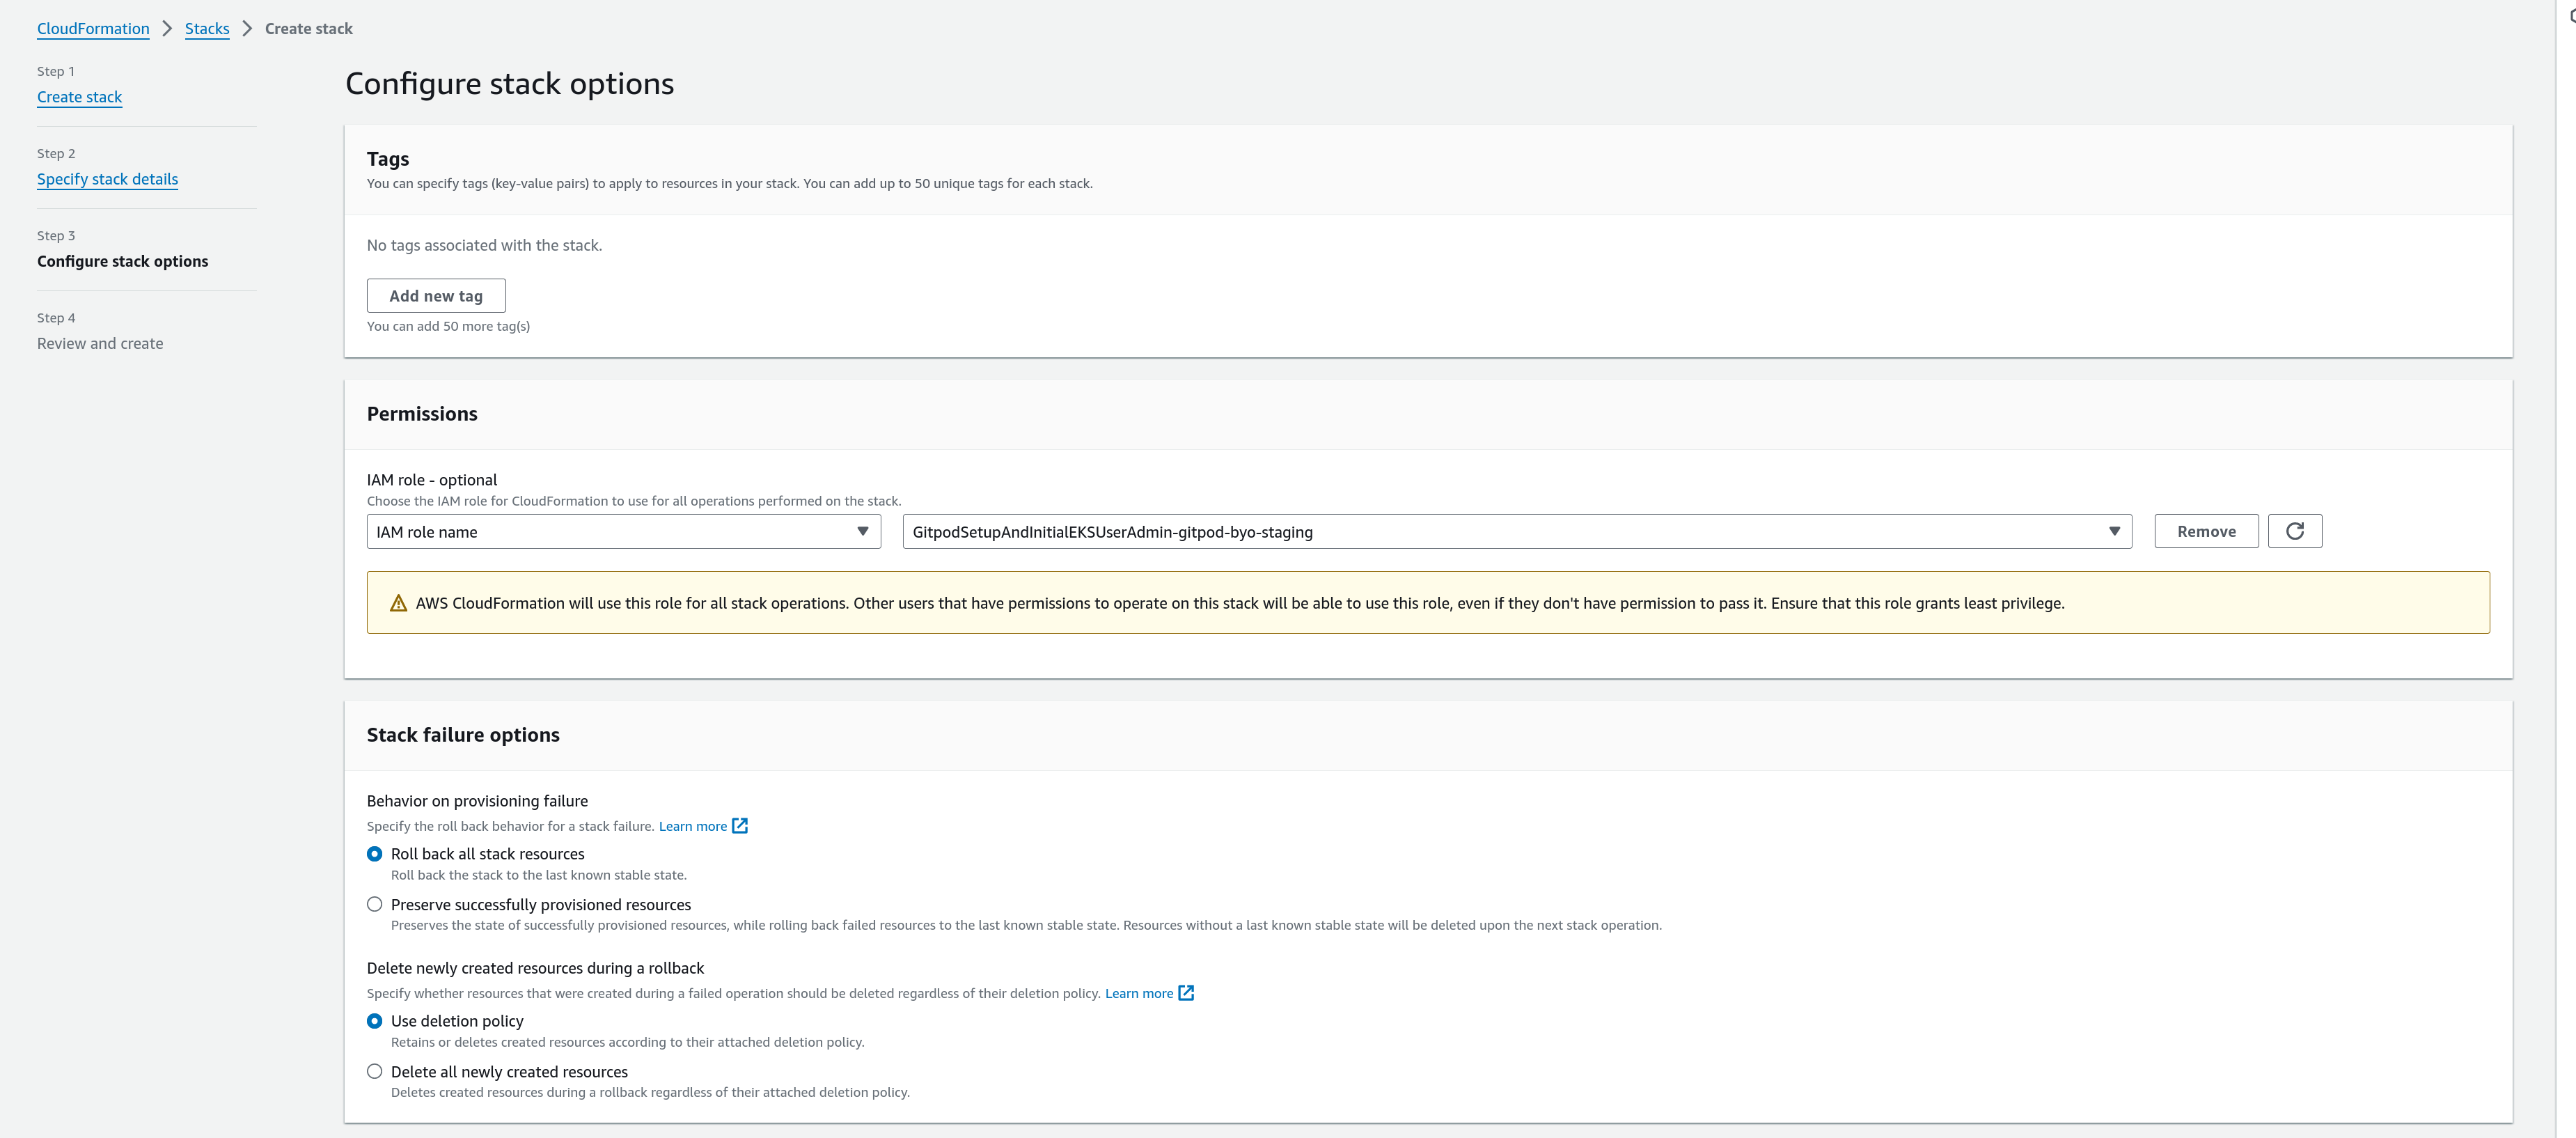
Role Configuration
Submit.
Next Steps
The CF stack apply should take around 30 minutes to complete
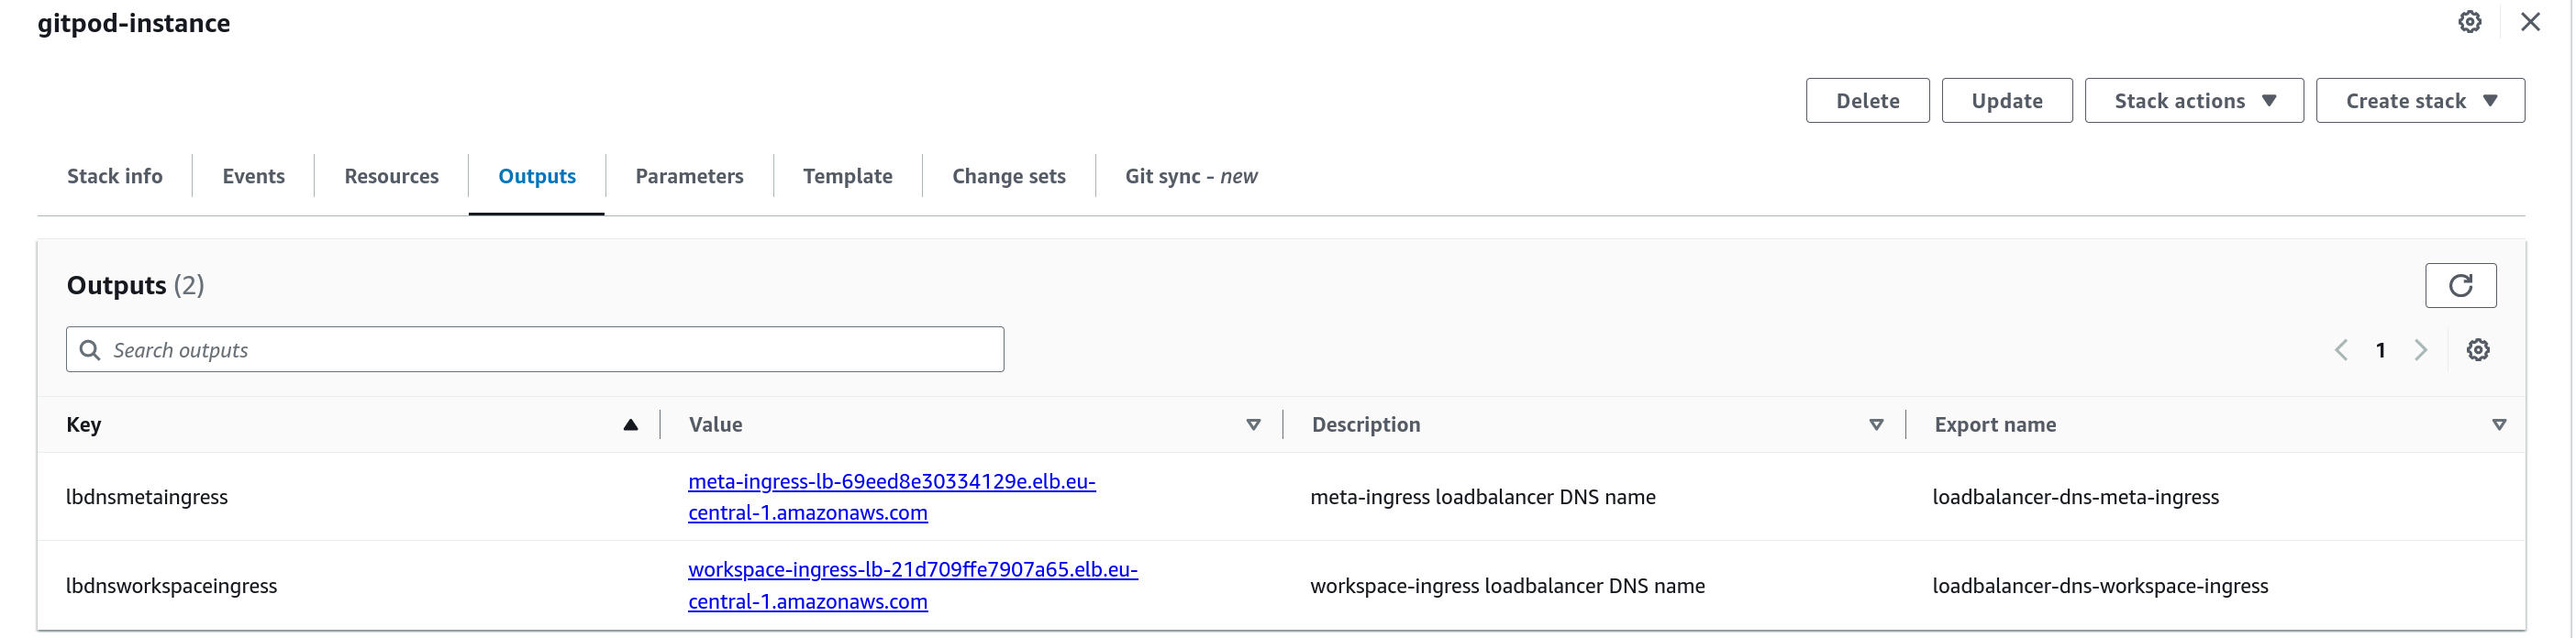
Instance Configuration
If you have chosen auto-configured DNS name and have no more routing
requirements, you can get in touch with your Gitpod account manager who
should generate an admin URL for your setup and you should be able to
proceed to Configuring your instance.