

Prerequisites
- Project user, editor, or admin role on the project
- An existing project with at least one environment class
- AWS or GCP Enterprise runner, or Ona Cloud
Enable prebuilds
1. Navigate to project settings
- Go to your organization dashboard at https://app.ona.com
- Select your project from the projects list
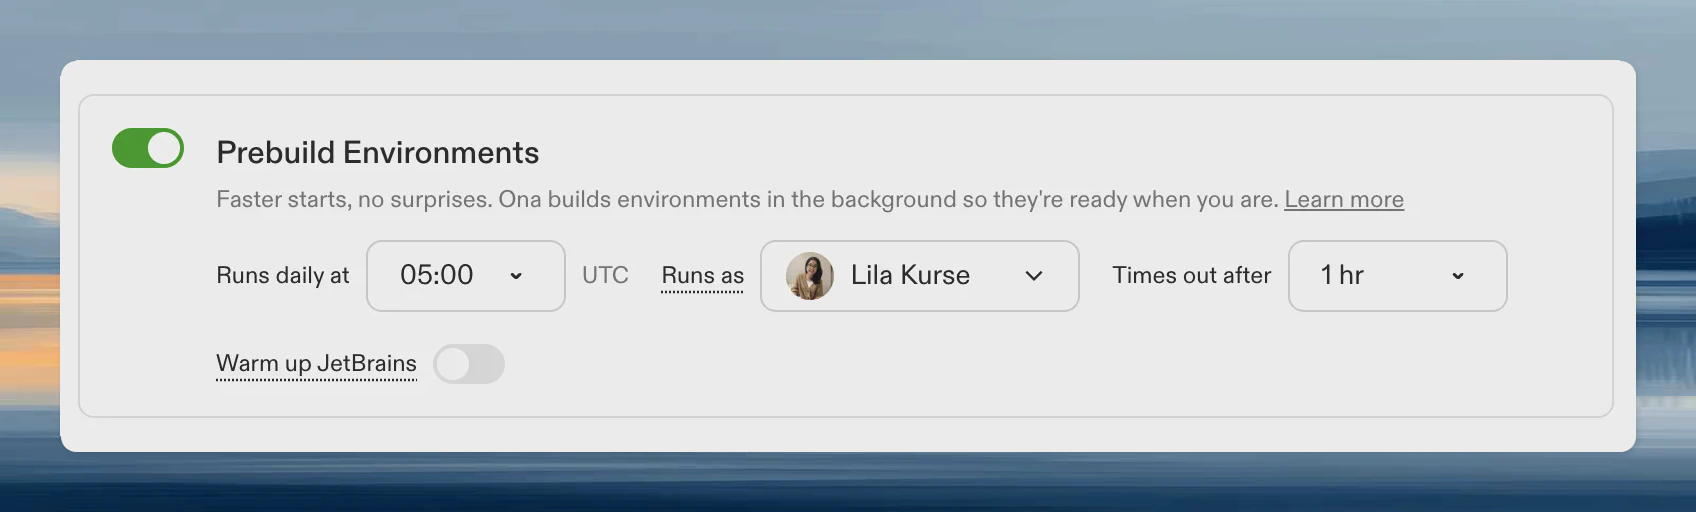
2. Configure prebuild settings
In the project settings, the prebuild configuration section lets you:- Enable prebuilds for the project
- Select environment classes to prebuild
- Configure the schedule for automatic prebuild creation
- Configure the executor to run prebuilds as yourself or a service account
- Set timeout for prebuild execution
- Stops the daily schedule
- Prevents new environments from using existing snapshots
- Leaves existing snapshots until they expire (7 days)
3. Select environment classes
Check the boxes next to the environment classes you want to prebuild. Prebuilds run for each selected class on the configured schedule. Tip: If your team primarily uses one or two classes (e.g., “Regular”), enable prebuilds only for those to keep costs low.4. Configure the executor
Choose which identity runs your prebuilds:- User (default): Prebuilds run as the user who enabled them
- Service account: Prebuilds run as a service account, using the service account’s SCM credentials
- Prebuilds keep working regardless of individual user availability
- Permissions stay consistent independent of user role changes
- Prebuild activity is attributed to a dedicated account
- Git authentication configured on all runners where prebuilds run
- The service account’s Personal Access Token must have access to the project’s repository
5. Configure the schedule
Set when prebuilds run:- Daily schedule: Choose the hour (UTC) when prebuilds trigger
- Recommended timing: Schedule during off-hours so fresh prebuilds are ready when your team starts work
6. Set timeout
Configure how long prebuilds can run before timing out. You can set the timeout in project settings under Prebuild Environments → Times out after, or via the CLI:7. Configure JetBrains warmup (optional)
If your team uses JetBrains editors, enable warmup to pre-install the backend and build project indexes during prebuilds:- In the prebuild configuration section, enable JetBrains warmup
- Configure recommended editors to specify which JetBrains editors to warm up
Configure your Dev Container for prebuilds
Structure your Dev Container configuration so prebuilds handle the slow parts.Commands that run during prebuilds
Place time-consuming setup in these lifecycle hooks:Commands that run after prebuilds
Place user-specific or session-specific commands here:Configure tasks and services for prebuilds
Add theprebuild trigger to automation tasks that should run during prebuilds:
prebuild trigger execute during prebuild creation alongside Dev Container lifecycle commands.
Organization and project secrets are available to automation tasks during prebuilds, but user secrets are not. Configure any credentials needed for prebuild tasks at the organization or project level.
Choosing between prebuild and postDevcontainerStart
During a prebuild, only tasks with the prebuild trigger run. Other triggers like postDevcontainerStart do not fire during prebuilds. Prebuilds run without user context (no user secrets), so running a task during a prebuild is opt-in.
When a user creates an environment from a prebuild, postDevcontainerStart fires as usual.
Example: Install dependencies during prebuilds so the snapshot includes
node_modules, and also when a user rebuilds their Dev Container (which creates a fresh container without the snapshot):
Manually trigger a prebuild
Via web UI
- Open your project from the dashboard
- Click the Run Prebuild button in the project header
Via CLI
Run prebuilds for specific environment classes:Verify your setup
After enabling prebuilds:- Run a manual prebuild and verify it completes
- Check the prebuild logs for errors
- Create a new environment and confirm it starts from the prebuild
- Verify the schedule matches your timezone
Best practices
Speed and cost
Install only what development needs. Schedule prebuilds during off-hours so fresh snapshots are ready when your team starts. Start with one or two commonly used environment classes, then expand based on usage.Structuring commands
Place stable, time-consuming operations in prebuild commands: dependency installation, database seeding, asset downloads. ReservepostCreateCommand for dynamic operations like starting dev servers or user-specific setup. Keep all commands idempotent.
Managing secrets
Use organization secrets for shared build credentials and project secrets for project-specific credentials. User secrets are not available during prebuilds.Next steps
- View and manage your prebuilds
- Enable warm pools for faster startup times (Enterprise, AWS only)
- Understand prebuild concepts
- Optimize your Dev Container configuration
- Learn about Tasks and Services
Troubleshooting
Cannot run prebuild
Cannot run prebuild
Verify prebuilds are enabled in project settings.
Prebuild fails to complete
Prebuild fails to complete
Check logs for errors, verify secrets are configured, and confirm commands do not require user interaction. If builds time out, increase the timeout in project settings or via CLI.
Environment does not use prebuild
Environment does not use prebuild
Confirm a successful prebuild exists for the environment class and is less than 7 days old.
Prebuild succeeds but environment has issues
Prebuild succeeds but environment has issues
Move user-specific or session-specific commands to
postCreateCommand. Verify file permissions are correct after the snapshot.