

Configuring Azure DevOps Access
If Azure DevOps is already set up on your runner, skip to Authorizing Azure DevOps Access.Self-Hosted Runners
For self-hosted runners (like AWS), Azure DevOps integration is configured during runner creation or in the runner settings. There are two ways to integrate with Azure DevOps. Both can be used simultaneously:- OAuth App (Recommended): Using a Microsoft Entra ID OAuth app allows users to sign in more quickly. You’ll need to set up an OAuth app within Microsoft Entra ID.
- Personal Access Token (PAT): Each user will need to create a Personal Access Token. They will be provided with a deep link to do so on their first environment creation.
For Azure DevOps, allow outbound HTTPS connections from your runner to
app.vssps.visualstudio.com in your firewall, proxy, or egress filtering rules. Ona uses this Azure DevOps identity endpoint to validate the user’s OAuth or PAT credentials and resolve the Azure DevOps profile before the runner can access repositories on that user’s behalf.This request is made by the runner, not by a user’s browser, and it is separate from Git or REST traffic to dev.azure.com. If the endpoint is blocked, Azure DevOps authorization can fail even when repository URLs are otherwise reachable.Using OAuth
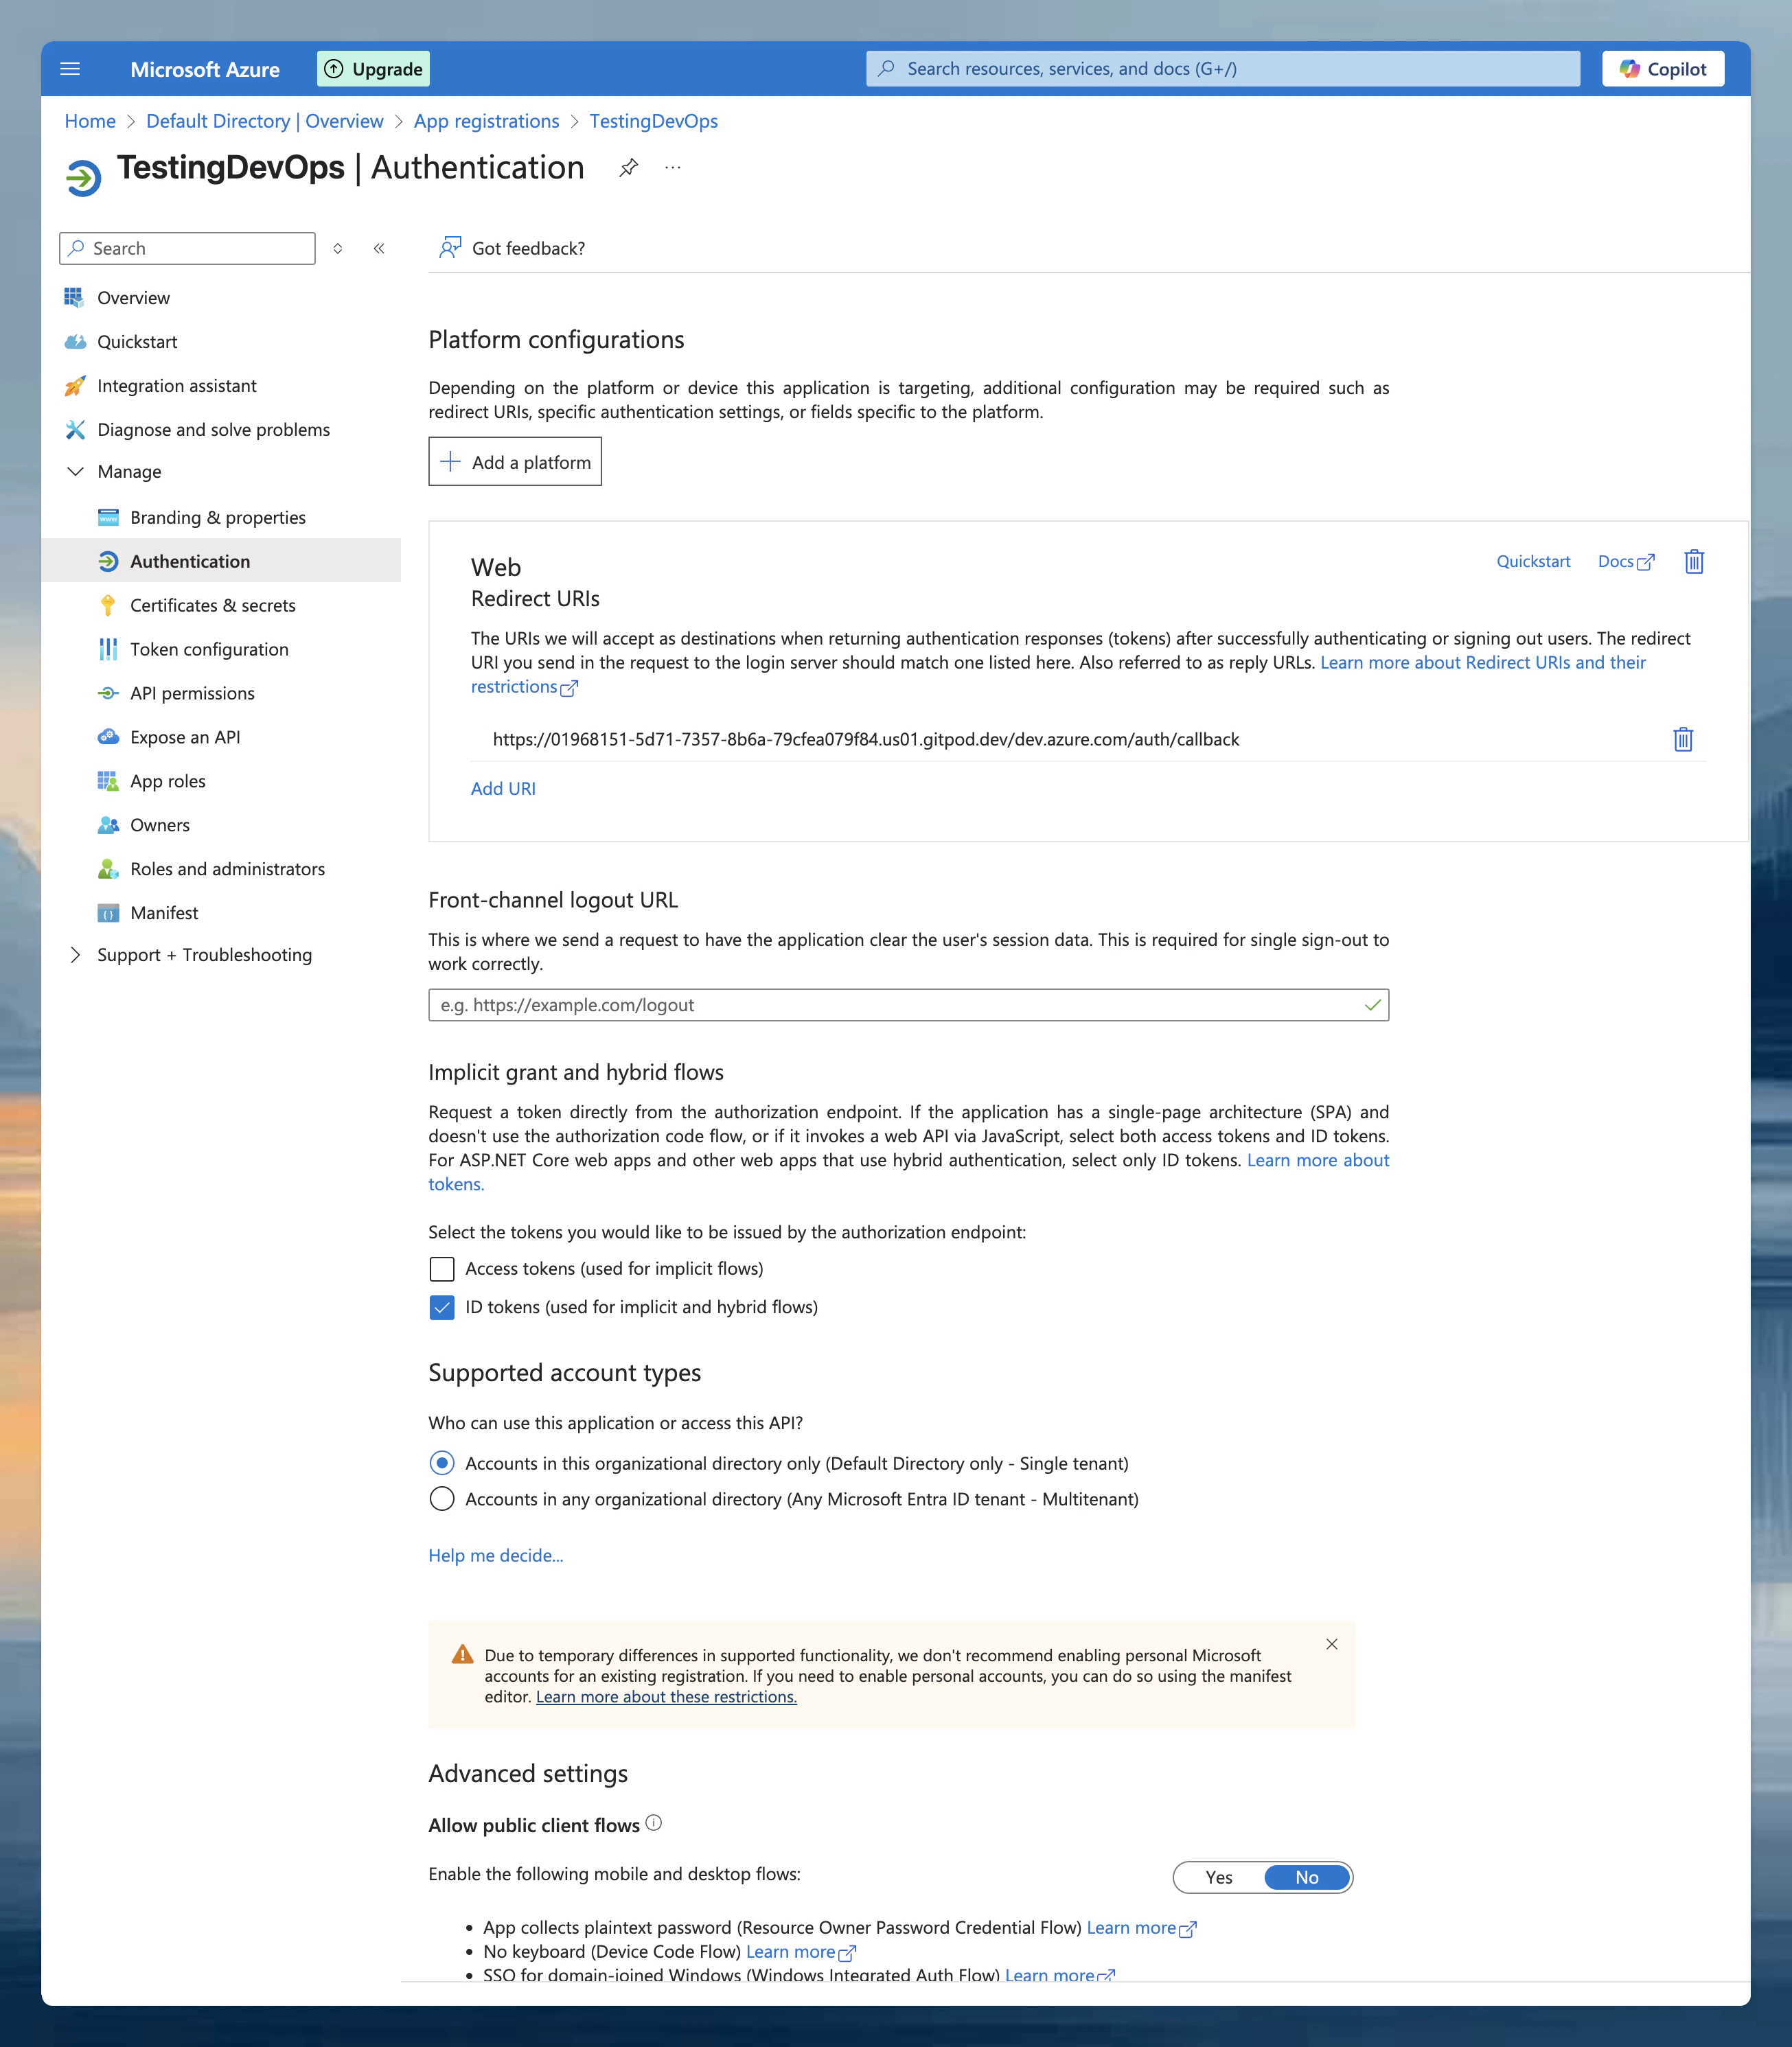
OAuth requires a Microsoft Entra ID app registration. You will set up the app in Azure, then enter its credentials in Ona. Step 1: Create the Entra ID app registration- Go to the Azure Portal and navigate to Microsoft Entra ID > App registrations.
- Click New registration and provide a name (e.g., “Ona Azure DevOps Integration”).
- Note the Client ID from the Overview page.
- Note the Issuer URL from Overview > Endpoints. Use the v2.0 URL, e.g.
https://login.microsoftonline.com/00000000-0000-0000-0000-000000000000/oauth2/v2.0.
- In your app registration, go to Manage > Authentication.
- Ensure Web platform is selected and paste the callback URL from the Ona configuration dialog.
- Enable ID tokens under Implicit grant and hybrid flows.
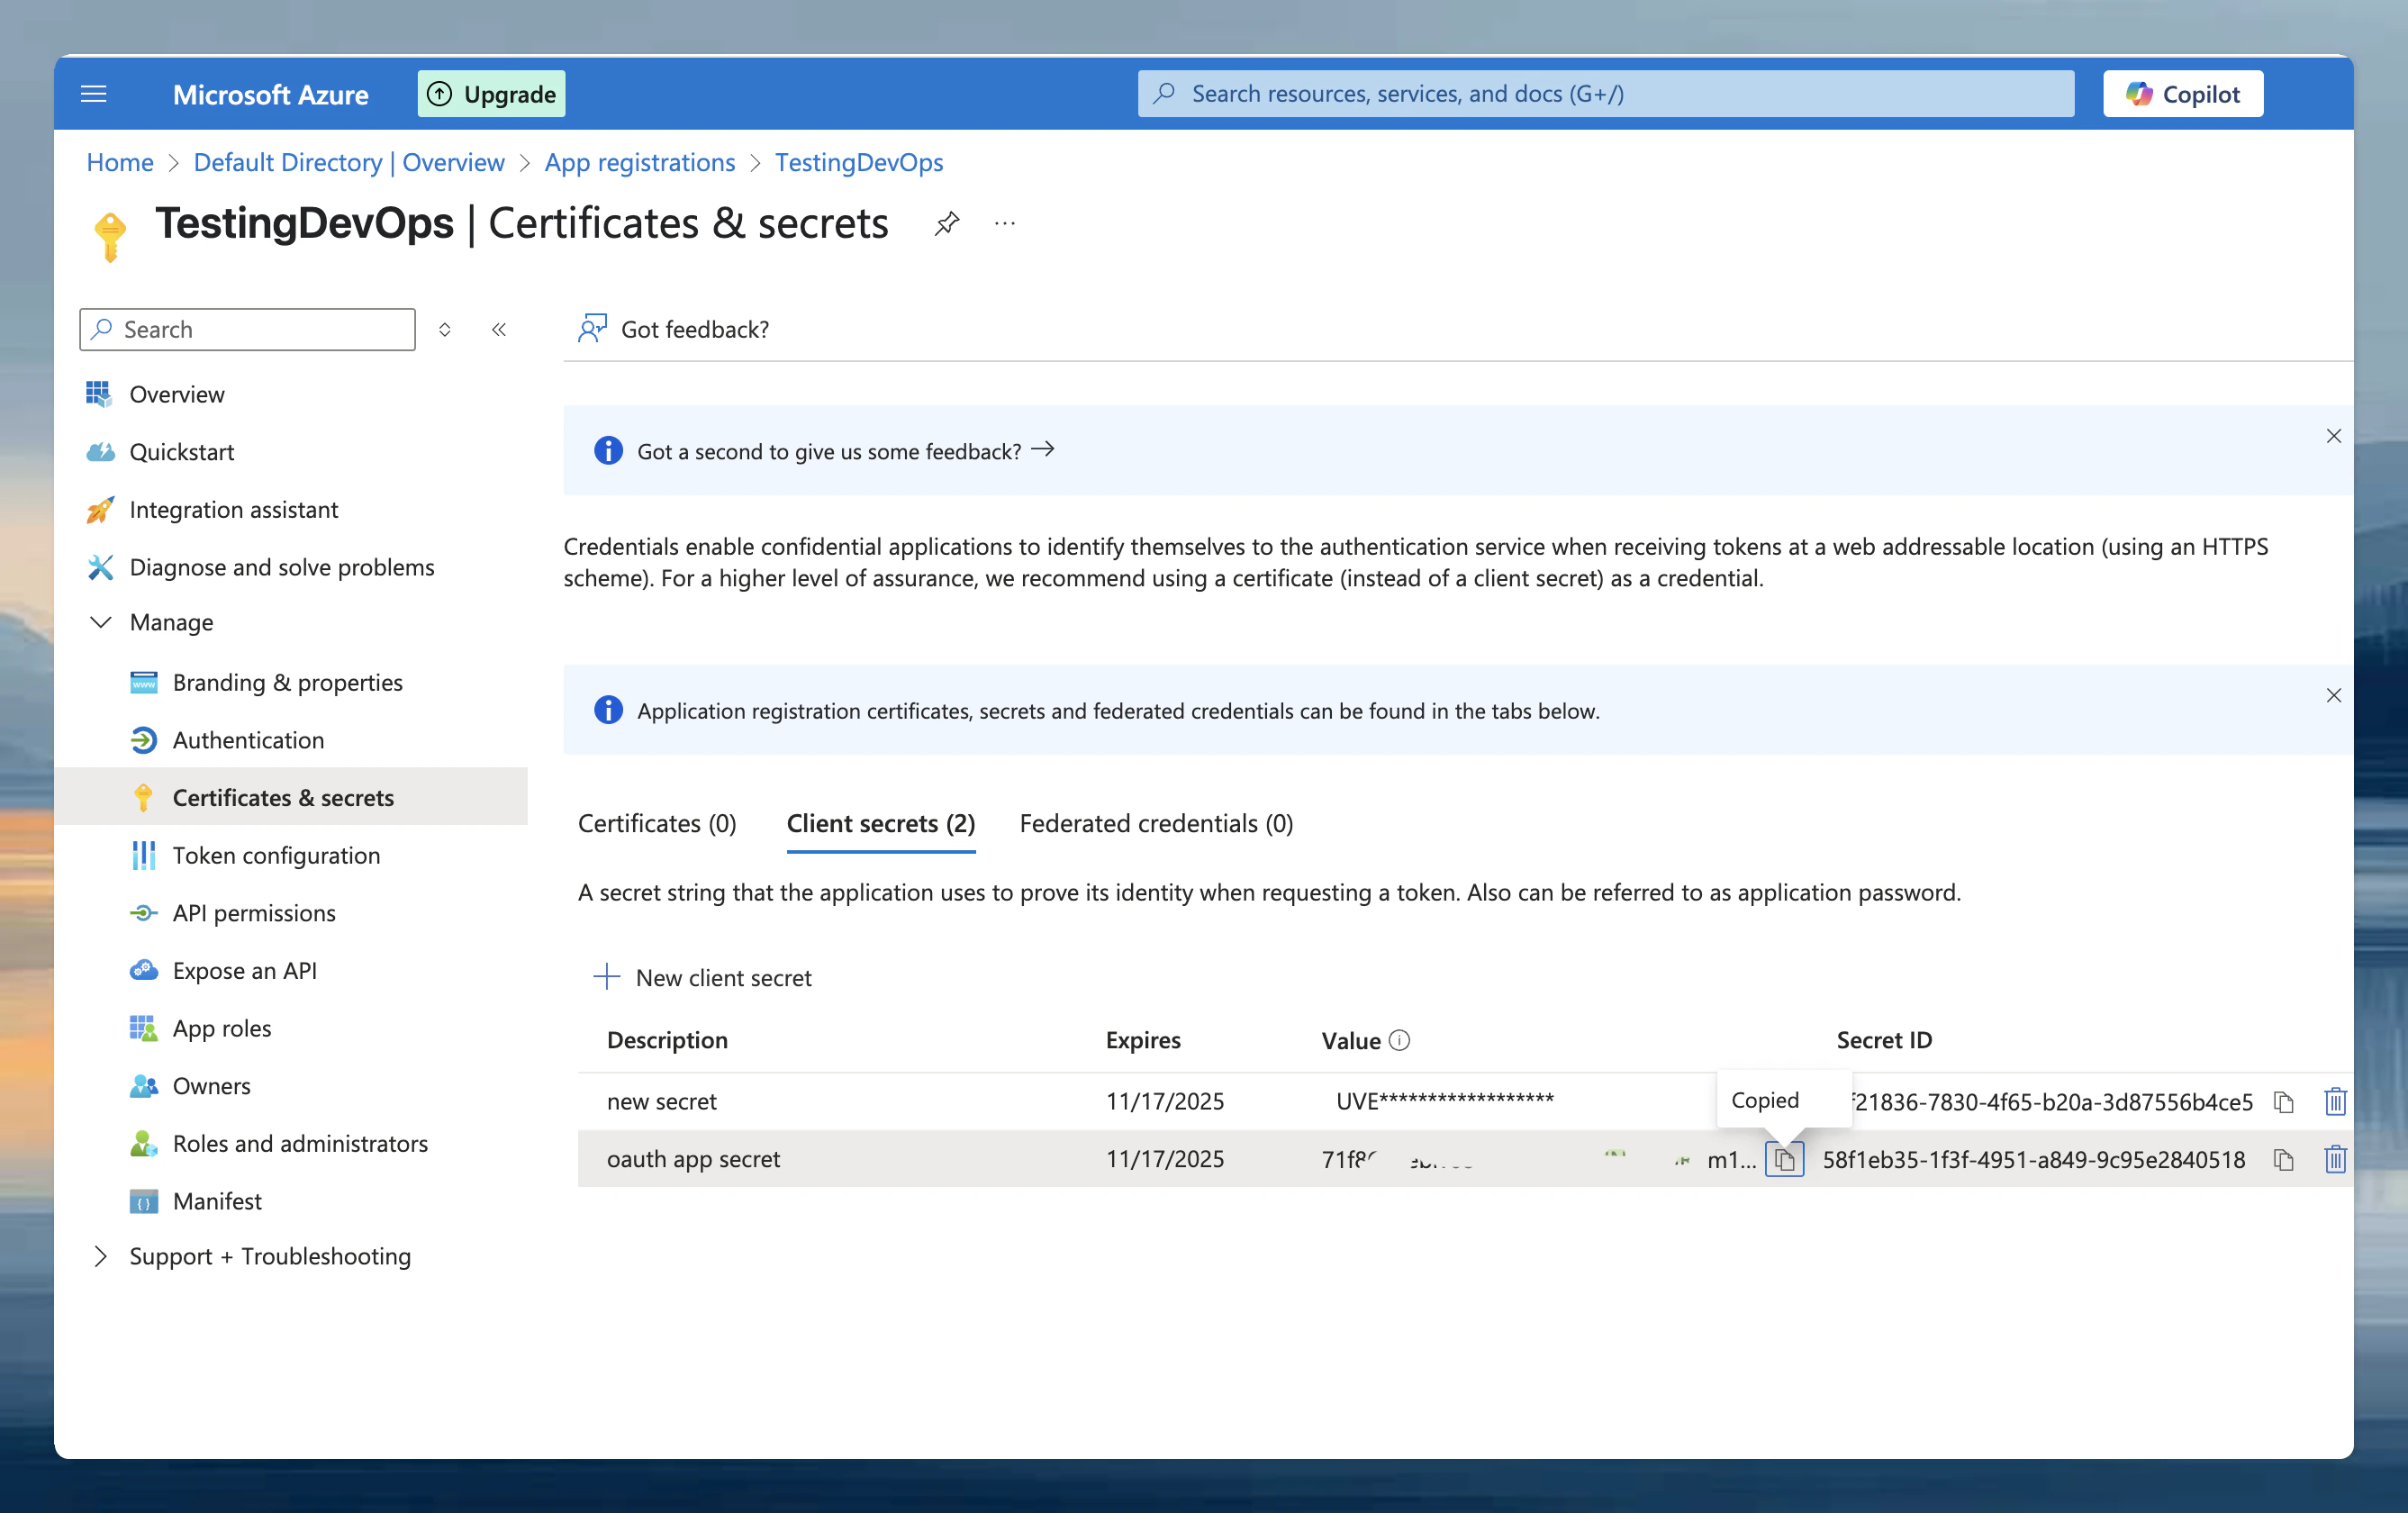
- Navigate to Manage > Certificates & secrets.
- Click New client secret, add a description, and set expiration as needed.
- Copy the secret Value immediately (it is only shown once).
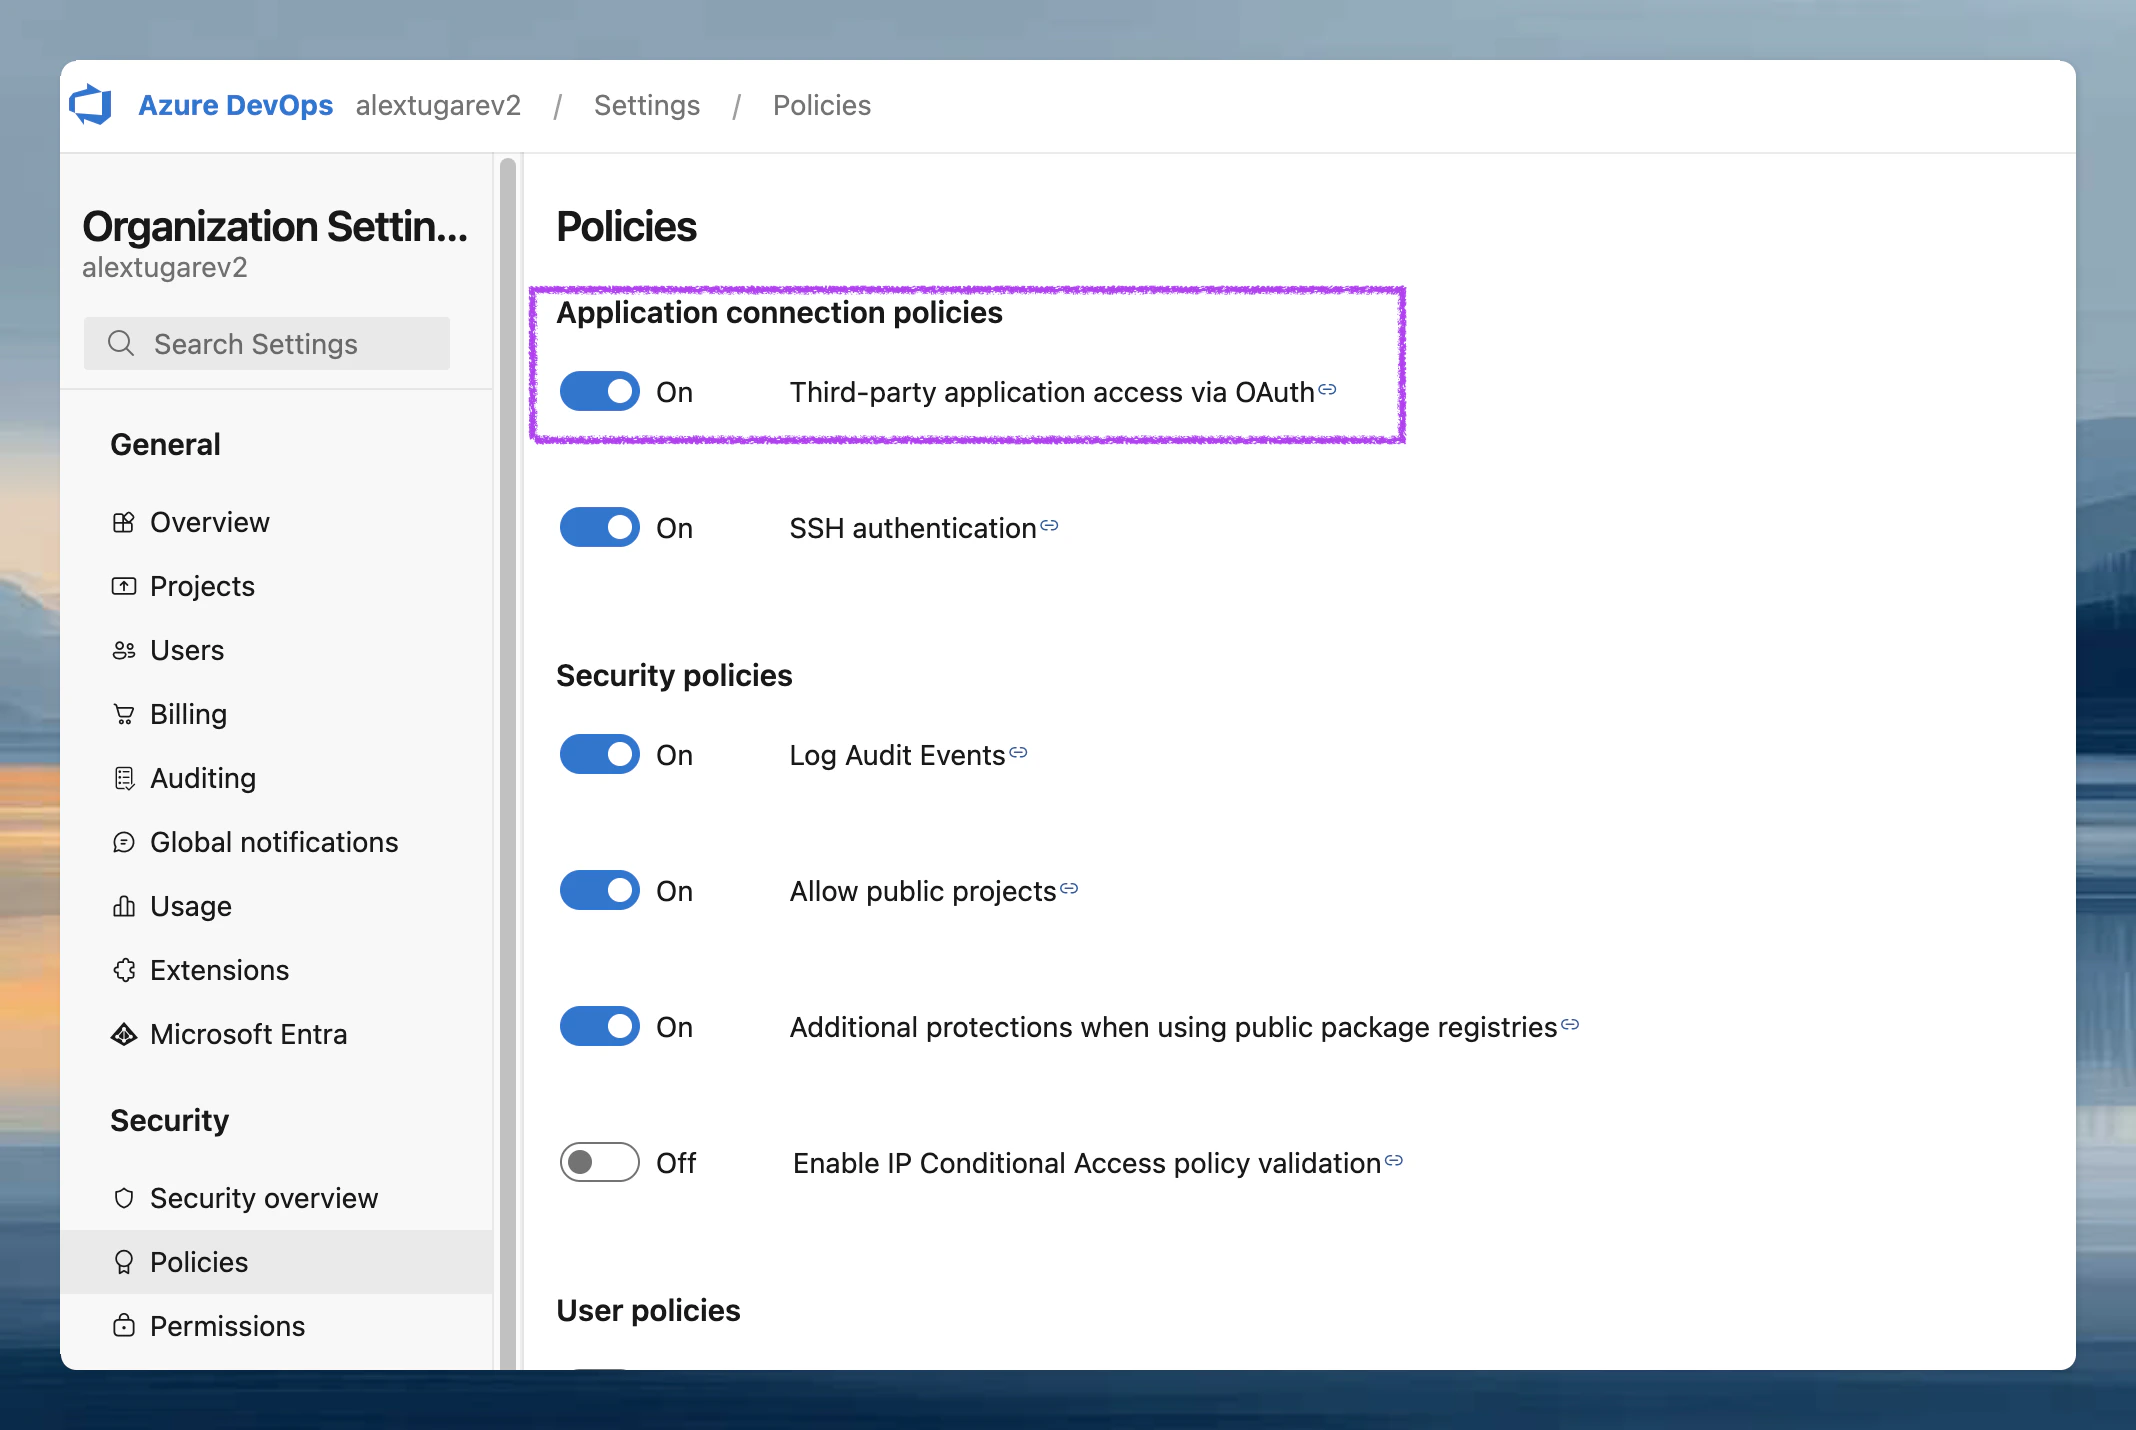
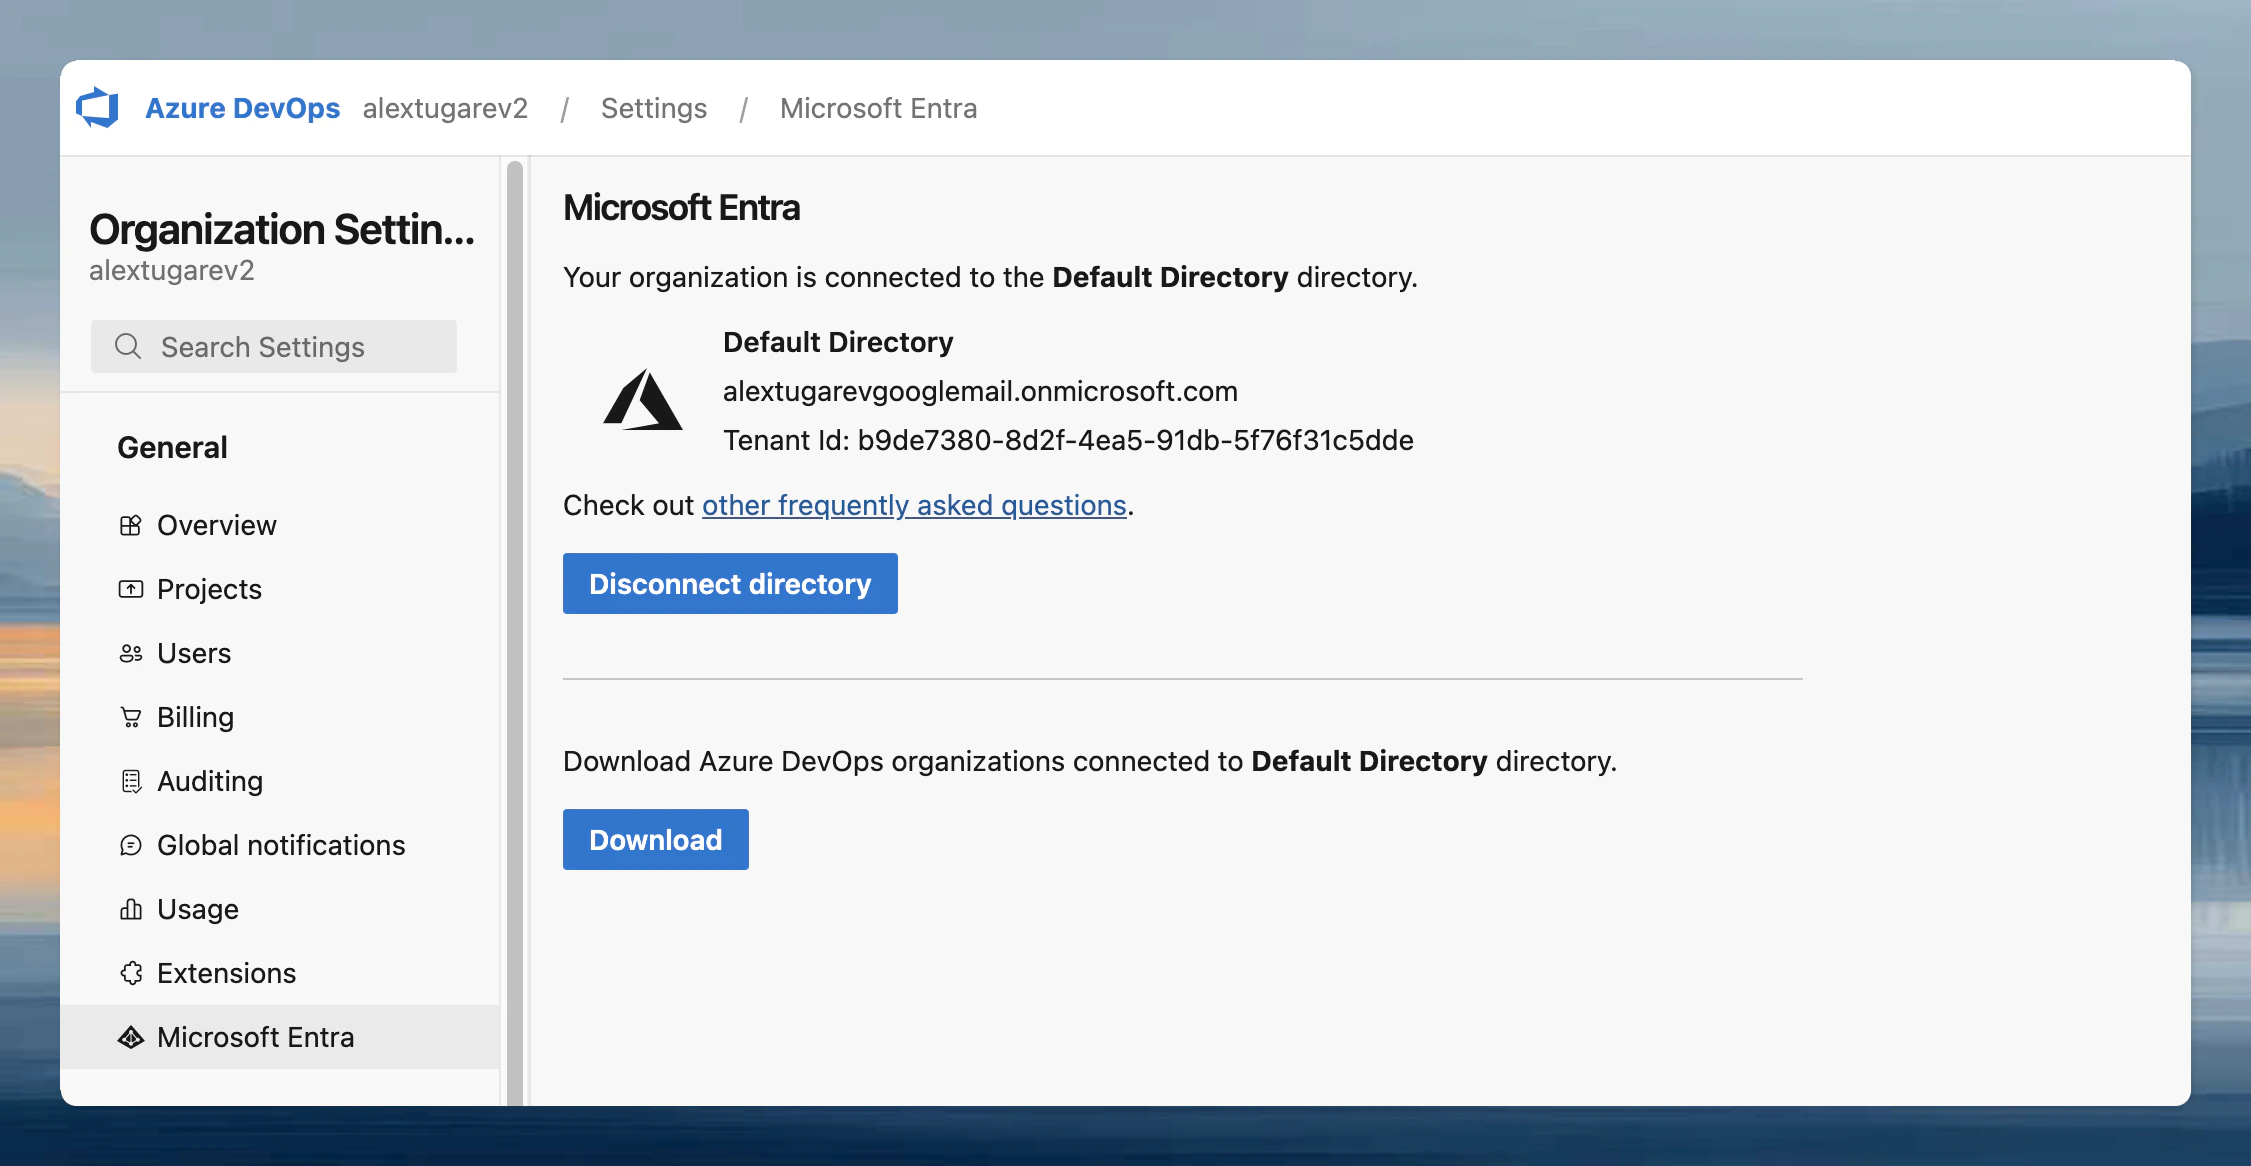
- In Azure DevOps, go to Organization Settings > Security > Policies and enable Third-party application access via OAuth.
- Go to Organization Settings > General and connect your Microsoft Entra ID tenant.
- Go to Settings → Runners and select the runner you want to configure.
- In the Configure repository access section, click Select next to Azure DevOps (Entra ID). If other providers are already configured, click Add a new provider first.
- Toggle Enable OAuth.
- Enter the Issuer URL, Client ID, and Client Secret from the steps above. The client secret is encrypted with the runner’s public key, so only the runner can read it.
- Click Save & Test. This also verifies the connection to Entra ID.
Using Personal Access Tokens (PATs)
- Go to Settings → Runners and select the runner you want to configure.
- In the Configure repository access section, click Select next to Azure DevOps. If other providers are already configured, click Add a new provider first.
- Toggle Enable Personal Access Token.
- Click Save.
Authorizing Azure DevOps Access
Using OAuth (Microsoft Entra ID)
- When creating your first environment, you will be prompted to authorize. Click Connect. A new window opens directing you to Microsoft Entra ID to authorize the OAuth app with the scopes configured above.
- After authorizing, close the window. You should see a confirmation that Azure DevOps (Entra ID) is connected.
Using Personal Access Tokens (PATs)
-
When creating your first environment, you will be asked to authorize the new application. Select Provide a Personal Access Token.
- Follow the instructions of the Azure documentation to create a PAT
- The name of the token and all required scopes are pre-set.
- By default, the token is valid for 30 days, but you can change the duration if needed.
- After creating the token, return to the dialog and paste the token.
- The environment will now be created using the provided token.