

Prerequisites
- An Ona account on any plan
- At least one runner in your organization. Ona Cloud includes a runner by default. If you’re self-hosting, deploy a runner on AWS or GCP first.
- A repository URL (GitHub or GitLab)
Create the project
- From the Ona dashboard, click Projects in the sidebar.
- Click New Project.
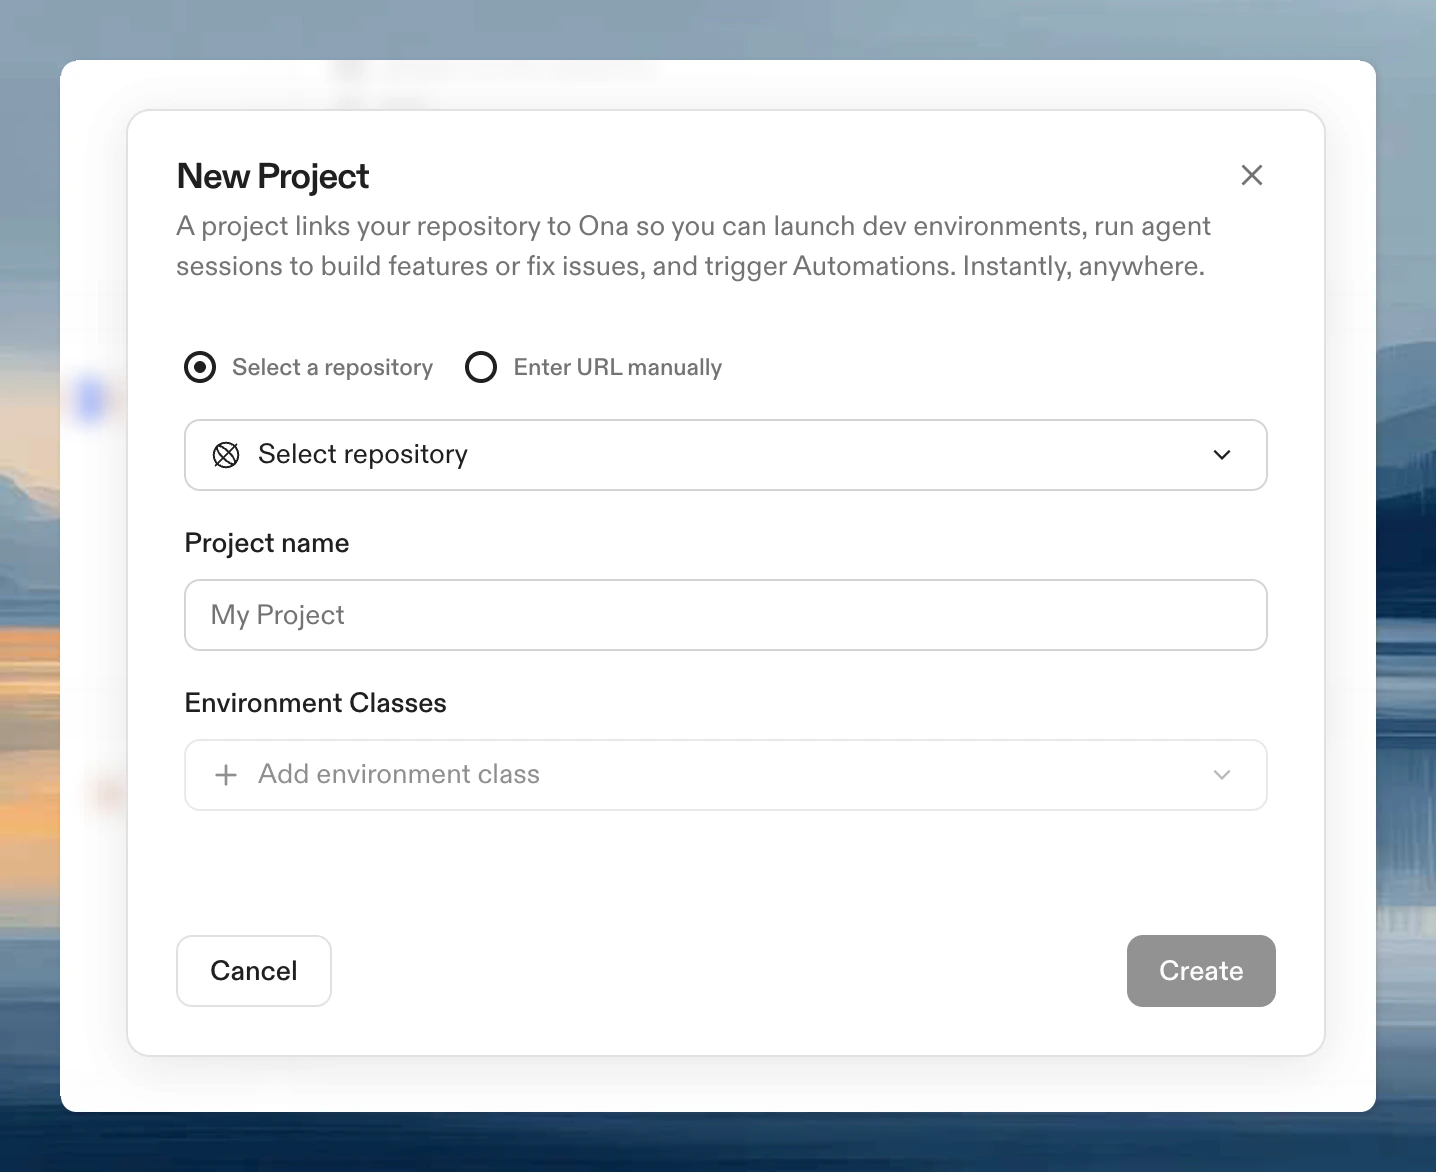
- Search for or browse to your repository.
- Enter a project name.
- Select at least one environment class. You can add up to 30 classes per project.
- Click Create.
Configure your environment
Every project reads two configuration files from your repository root. If adevcontainer.json doesn’t exist yet, Ona generates a default one. Adding your own makes the environment match your project’s needs.
devcontainer.json: defines the base image, language runtimes, tools, and VS Code extensions. This is the Dev Container standard, so the same file works in VS Code, GitHub Codespaces, and Ona. See configure your Dev Container for a walkthrough.automations.yaml: defines startup tasks (install dependencies, seed databases) and long-running services (dev servers, databases). These run automatically when an environment starts. See tasks and services for examples.
automations.yaml at the repository root. To use a different path (e.g. .ona/automations.yaml), set the Automations file path in your project settings.
Every environment and every Automation launched from this project uses the same configuration.
Verify it works
- Open the project from your dashboard.
- Click Create Environment.
- Wait for the environment to build and start.
- Confirm your tools, dependencies, and services are available.
What’s next
- Create your first Automation to run workflows against this project
- Set up your first environment to configure
devcontainer.json - Share the project with your team
- Projects reference for environment classes, recommended editors, and advanced configuration