Prerequisites
As prerequisites you will need the following:- Access to your Okta instance
- Permission to create an app integration
Create an OIDC application
- On the Okta Admin dashboard, navigate to Applications
- Select
Create App Integration

-
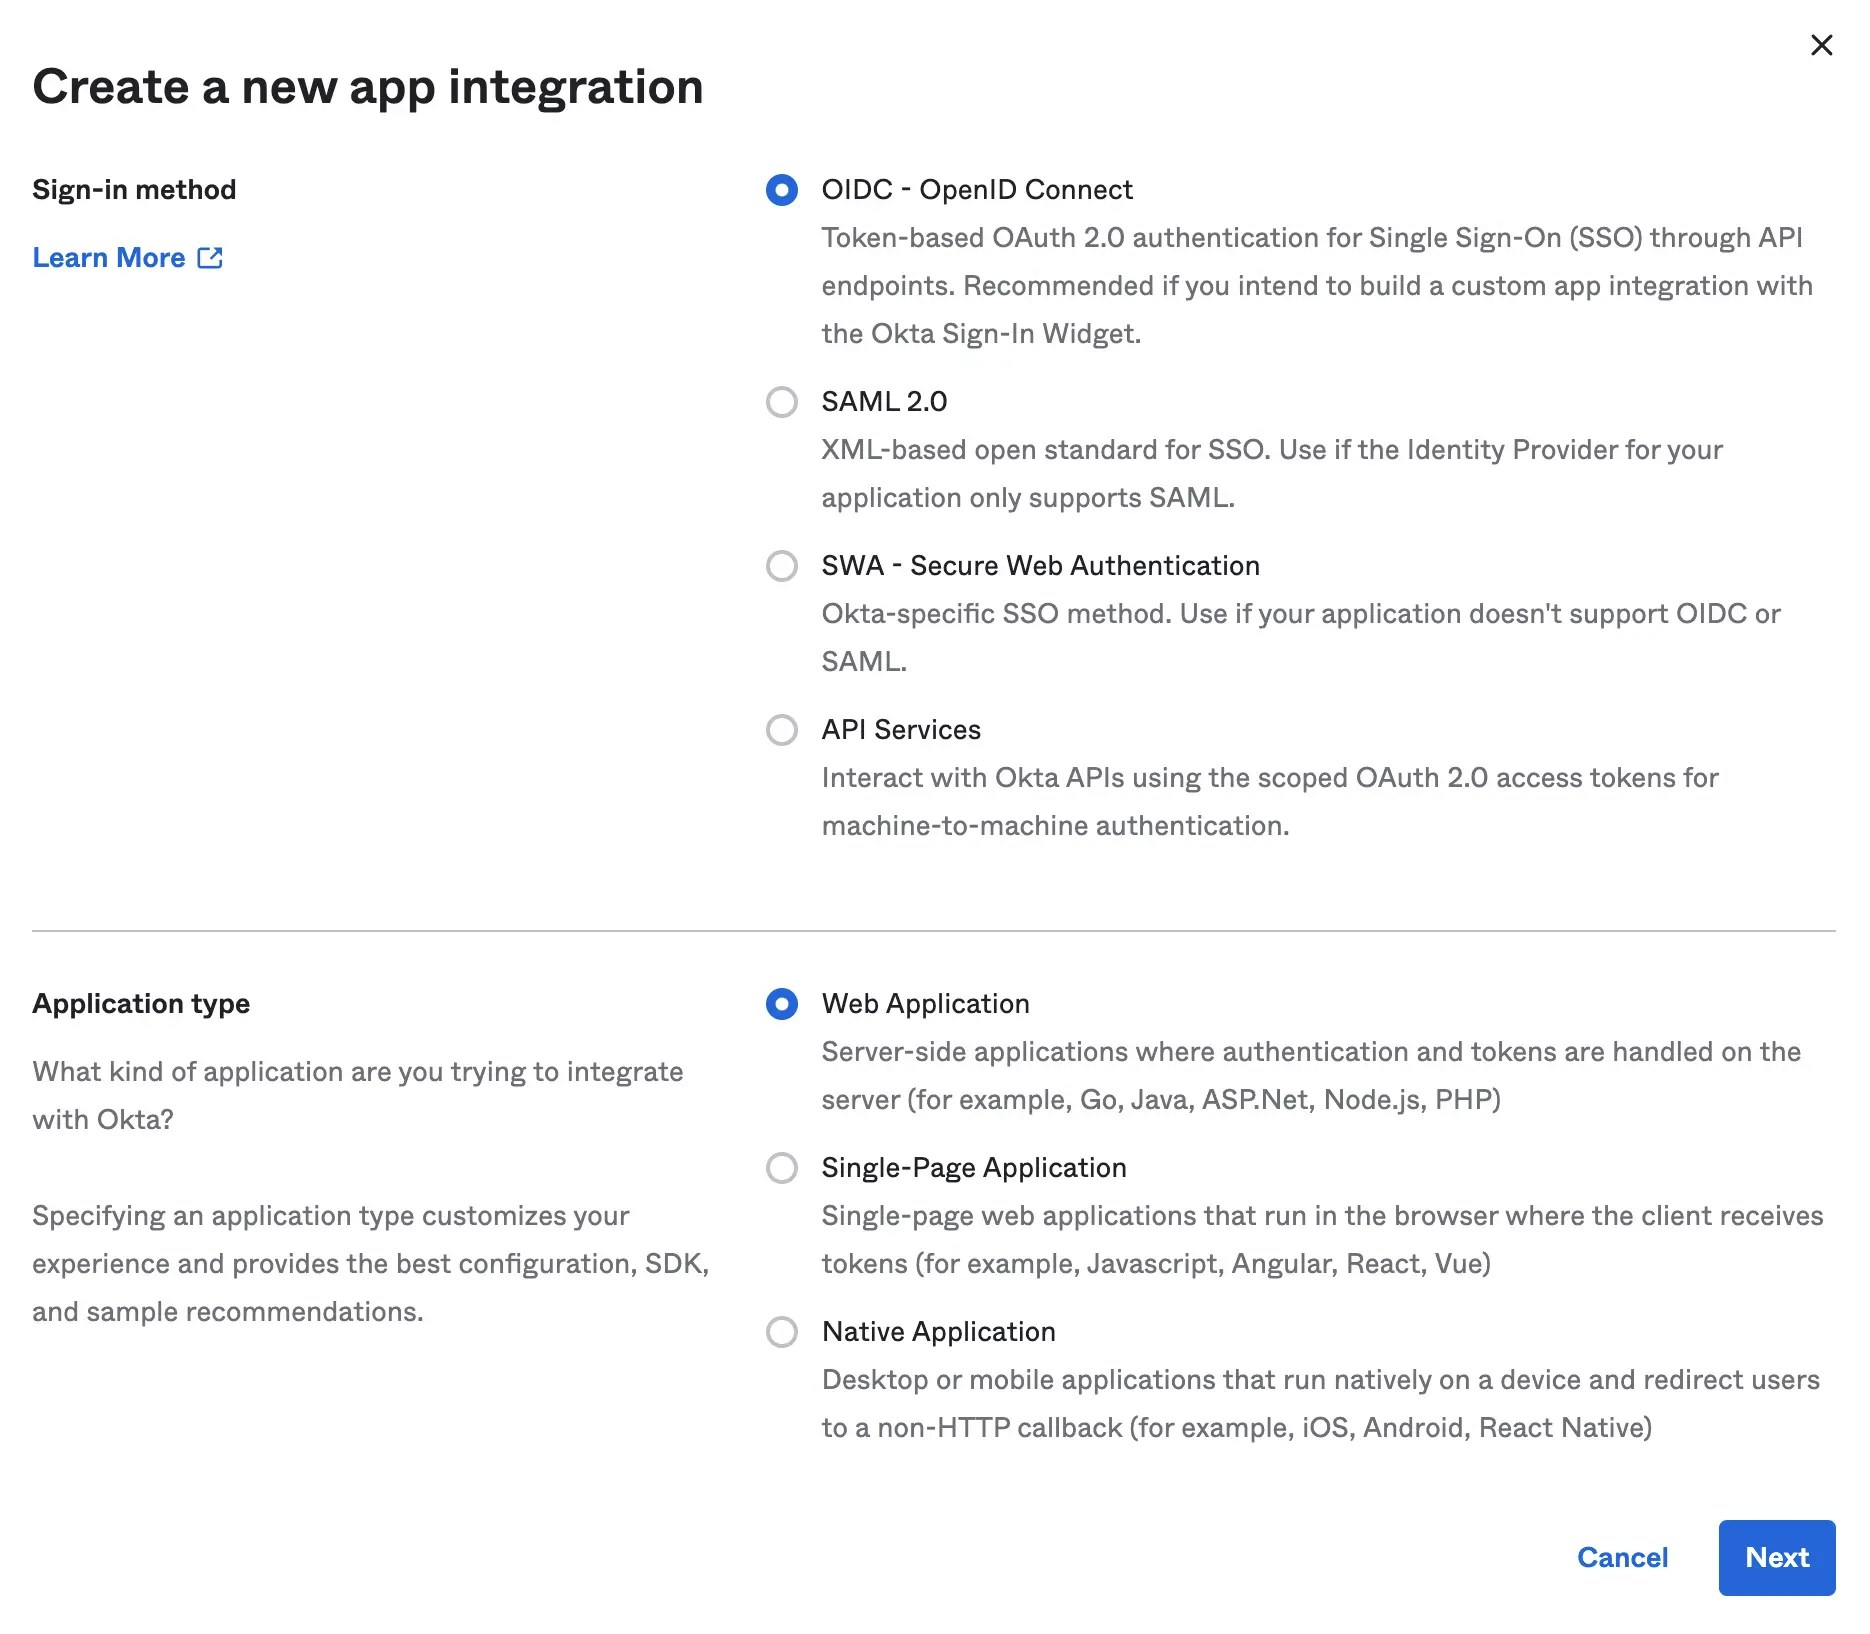
Select the following options and click Next
- Sign-in method:
OIDC - Open ID Connect - Application type:
Web Application
- Sign-in method:

-
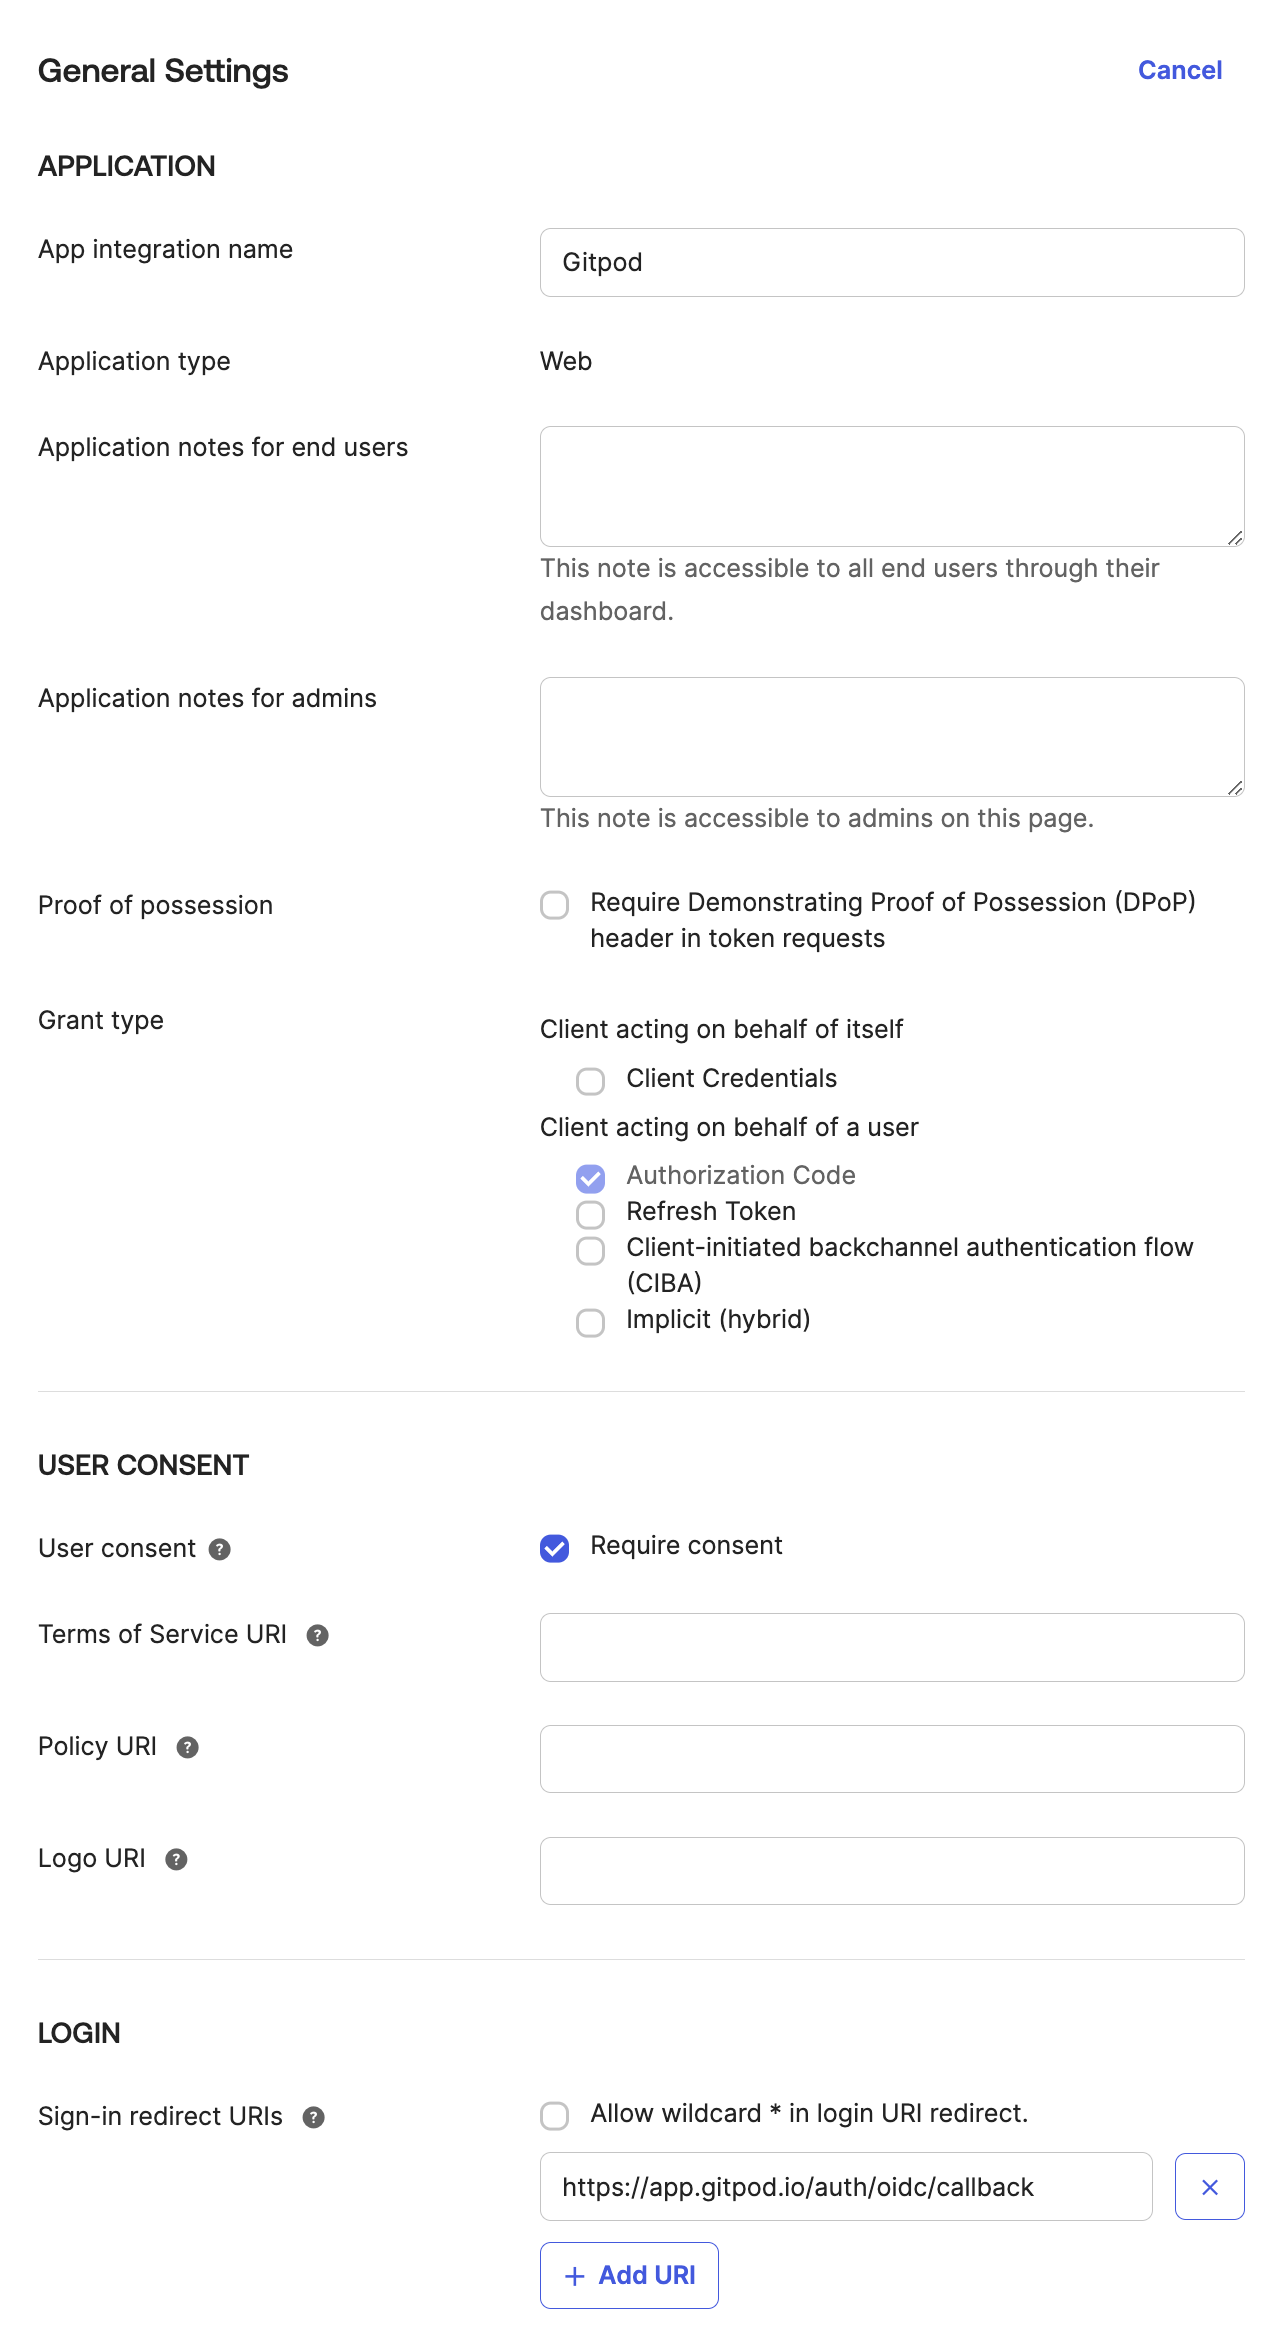
Specify General Settings
- App integration name, e.g.
Ona - Sign-in redirect URIs:
https://app.gitpod.io/auth/oidc/callback - Sign-out redirect URIs:
none
- App integration name, e.g.

-
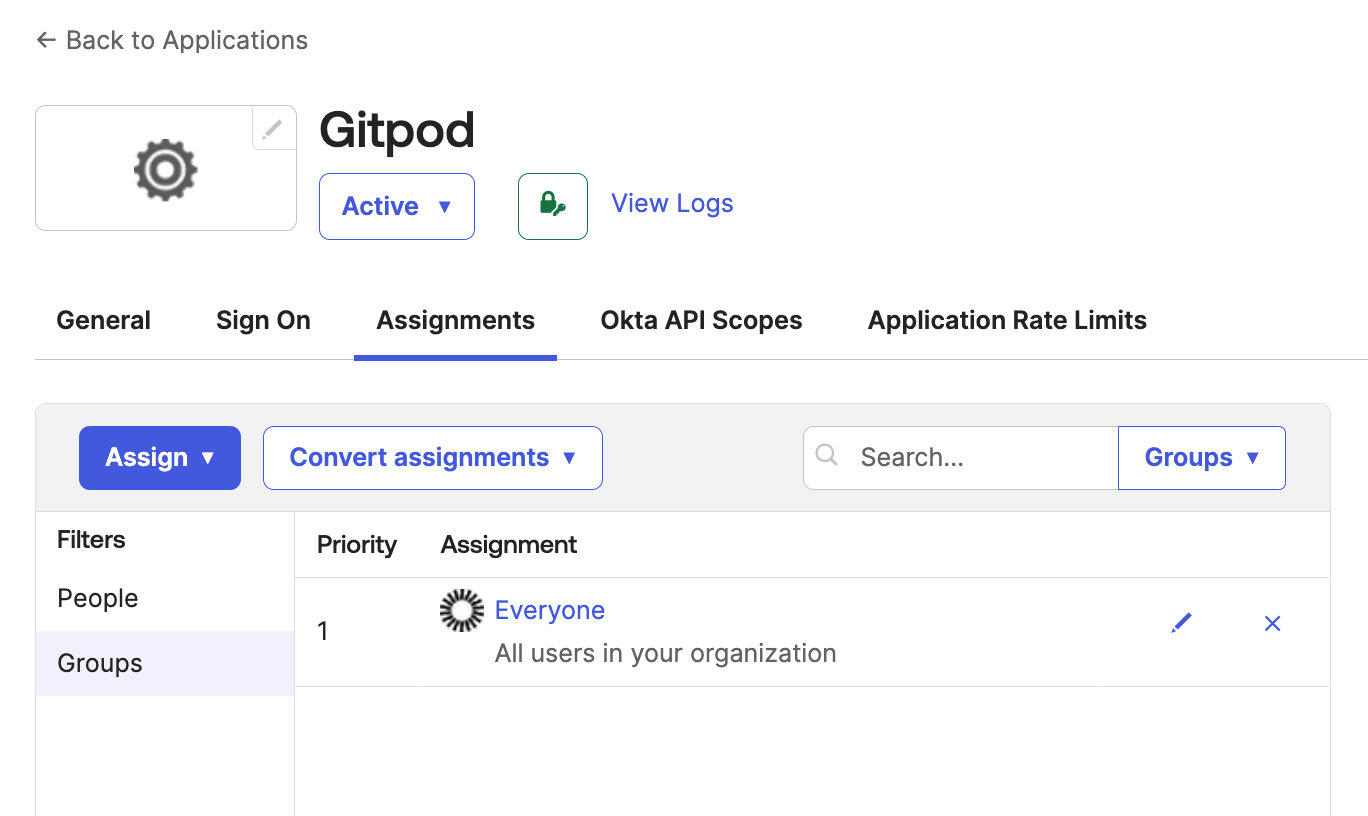
Assignments
- You have to select Okta users or groups which would be allowed to use the integration with Ona.
- Okta lets you import and synchronize directories, which then can be assigned to use the integration.

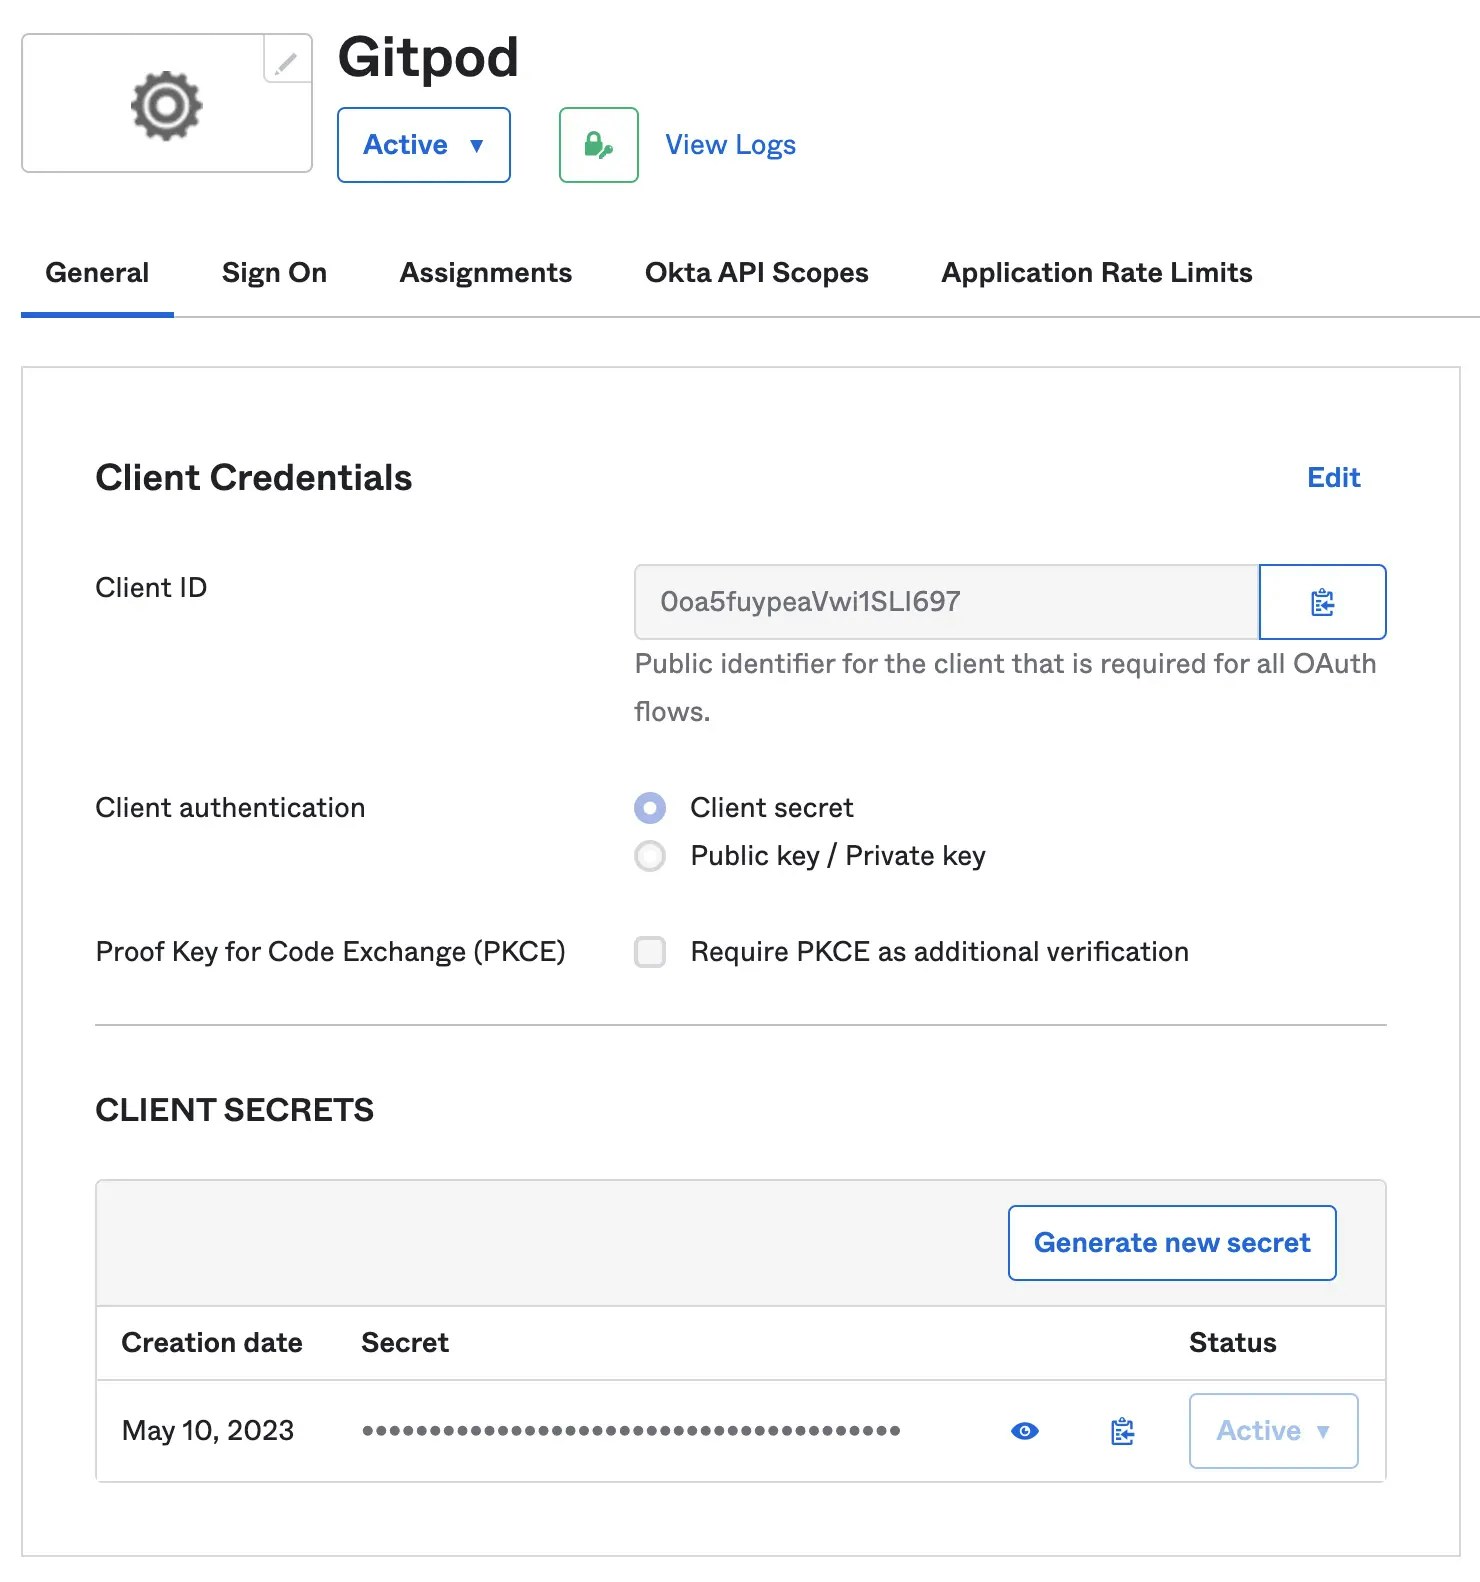
- Obtain Client ID, Client Secret from General tab

- Obtain Issuer URL

- Continue with the SSO configuration in Ona: Clicking Save & Test